Lexmark Z645 User's Guide for Windows - Page 45
Aligning the print cartridges, Specifying cartridge settings in the printer software
 |
UPC - 734646009133
View all Lexmark Z645 manuals
Add to My Manuals
Save this manual to your list of manuals |
Page 45 highlights
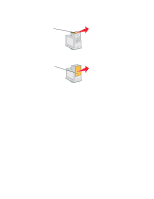
Specifying cartridge settings in the printer software Before you specify the print cartridge settings in the printer software, install the cartridges. For help, see "Installing the cartridges" on page 43. 1 Open the LSC. For help, see "Lexmark Solution Center" on page 8. 2 From the Maintenance tab, click Install a new print cartridge. 3 Select the type of cartridge you installed. Note: Specify whether the cartridge is a new cartridge or an old cartridge (one that has been used before). If an old cartridge is incorrectly identified as New Cartridge in the Lexmark Solution Center, ink levels may be incorrect. 4 Click OK or Next. 5 If you installed a new cartridge, continue with "Aligning the print cartridges." Aligning the print cartridges Typically, you only align print cartridges after installing or replacing a cartridge. However, you may also need to align cartridges when: • Characters are not properly formed or are not aligned at the left margin. • Vertical, straight lines are wavy. To align the cartridges: 1 Load plain paper. 2 Open the Lexmark Solution Center. For help, see page 8. 3 From the Maintenance tab, click Align to fix the blurry edges. 4 Click Print. The Alignment page prints. 5 Find the number under the darkest arrow for each alignment group. 6 Use the up and down arrows in the Align Cartridges dialog box to select the number that matches the darkest arrow on the printed page for each alignment group. 7 Click OK. If the alignment page does not print, make sure you have completely removed the sticker and transparent tape from both cartridges. For help, see "Installing the cartridges" on page 43. Aligning the print cartridges 45
-
 1
1 -
2
-
3
-
4
-
5
-
6
-
7
-
8
-
9
-
10
-
11
-
12
-
13
-
14
-
15
-
16
-
17
-
18
-
19
-
20
-
21
-
22
-
23
-
24
-
25
-
26
-
27
-
28
-
29
-
30
-
31
-
32
-
33
-
34
-
35
-
36
-
37
-
38
-
39
-
 40
40 -
 41
41 -
 42
42 -
 43
43 -
 44
44 -
 45
45 -
 46
46 -
 47
47 -
 48
48 -
 49
49 -
 50
50 -
51
-
52
-
53
-
54
-
55
-
56
-
57
-
58
-
59
-
60
-
61
-
62
-
63
-
64
-
65
-
66
-
67
-
68
-
69
 |
 |
