LiftMaster WGB315 User Guide - Page 2
Press - chamberlain
 |
View all LiftMaster WGB315 manuals
Add to My Manuals
Save this manual to your list of manuals |
Page 2 highlights
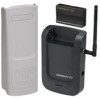
INSTALLATION • MOUNT RECEIVER WALL MOUNTING 1 2 Wall 3 Wall 4 Mounting Holes LEARN 2 1/8" (5.4 cm) LEARN Drywall Anchors Screw 5 6 Screw antenna into receiver. Determine location for indoor receiver. Mark and drill pilot holes using 1/4" drill bit. Insert drywall anchors. OPERATIONAL TEST LEARN NOTE: Two people will be needed to properly test the gate doorbell. 1 2 LEARN P RR IETNOSGS Install mounting screws, allowing 1/8" (3.2 mm) to protrude above surface. LEARN 3 Push "Press to Ring" on the keypad cover. The gatebell will ring. Press remote control button to open the gate. Position receiver on screw heads. PROGRAMMING KEYPAD TO INDOOR RECEIVER STOP The included keypad is learned to the receiver at the factory. Follow the next steps to learn replacement or additional keypads only. Insert remote control into receiver. 1 Learn Button LEARN Press and release the learn button on the back of the indoor receiver. Plug power adapter into receiver. Plug into outlet. 2 P RR IETNOSGS Push "Press to Ring" on the keypad cover within 30 seconds. Repeat operational test to verify. THE KEYPAD BATTERY CAUTION: Pressing the learn button for more than 6 seconds will clear all the learned keypads. The keypad can also be programmed to the gate operator using a 4-digit PIN entry code. Refer to your gate operator manual. Top Cover Bottom Mounting Hole 9V Battery 114A3447C Battery Cover To prevent possible SERIOUS INJURY or DEATH: • NEVER allow small children near batteries. • If battery is swallowed, immediately notify doctor. The battery should produce power for at least one year. Replace when the keypad illumination becomes dim or it doesn't stay on after a keystroke. Dispose of old battery properly. FOR SERVICE DIAL OUR TOLL FREE NUMBER: 1-866-826-4943 © 2008, The Chamberlain Group, Inc. All Rights Reserved
-
 1
1 -
 2
2
 |
 |
