Linksys BEFN2PS4 User Guide - Page 9
Configuring Your Network, with the Cable/DSL & Voice, Router - configuration
 |
UPC - 745883549931
View all Linksys BEFN2PS4 manuals
Add to My Manuals
Save this manual to your list of manuals |
Page 9 highlights
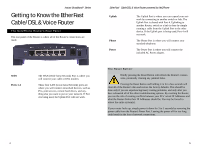
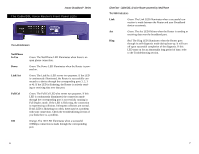
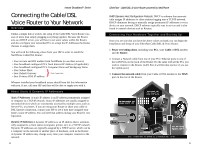
Instant BroadbandTM Series 4. Click the Properties button, then choose the IP Address tab. Select Obtain an IP address automatically. Click on the Gateway tab and make sure that all fields there are empty. EtherFast® Cable/DSL & Voice Router powered by Net2Phone Configuring Your Network with the Cable/DSL & Voice Router Configuring the Cable/DSL & Voice Router Now that your Cable/DSL & Voice Router is wired into your network, you can begin configuring your system. 1. Open your web browser and type http://192.168.1.1 in the browser's Address box. This number is the default IP address of your router. Press Enter. 5. Click OK. All client settings are complete. Windows may ask for original Windows installation files. Supply them as needed (i.e.: D:\win98, D:\win95, D:\ win9x, c:\windows\options\cabs.) 6. Windows will ask you to restart the PC. Click Yes. Repeat steps 1-6 for each PC on your network. When all of your PCs are configured, continue on to set up the router using the router's Webbased Utility. 12 Note: If you have previously enabled an Internet Sharing Proxy Service on any of your PCs, you must disable it now. • If you are running Netscape Navigator: Click Edit >> Preference >> Advanced >> Proxies> and click Direct Connection to the Internet. • If you are running Internet Explorer v5 or better, click Start>> Settings>> Control Panel>> Internet Options>> Connections>> LAN Settings. Remove the checks from all three boxes. Click OK to continue. 13
-
 1
1 -
2
-
3
-
 4
4 -
 5
5 -
 6
6 -
 7
7 -
 8
8 -
 9
9 -
 10
10 -
 11
11 -
 12
12 -
 13
13 -
 14
14 -
15
-
16
-
17
-
18
-
19
-
20
-
21
-
22
-
23
-
24
-
25
-
26
-
27
-
28
-
29
-
30
-
31
 |
 |
