Linksys EZXS88W User Guide - Page 5
Connecting the Switch, Instructions, Connecting the Switch - power supply
 |
UPC - 745883550791
View all Linksys EZXS88W manuals
Add to My Manuals
Save this manual to your list of manuals |
Page 5 highlights
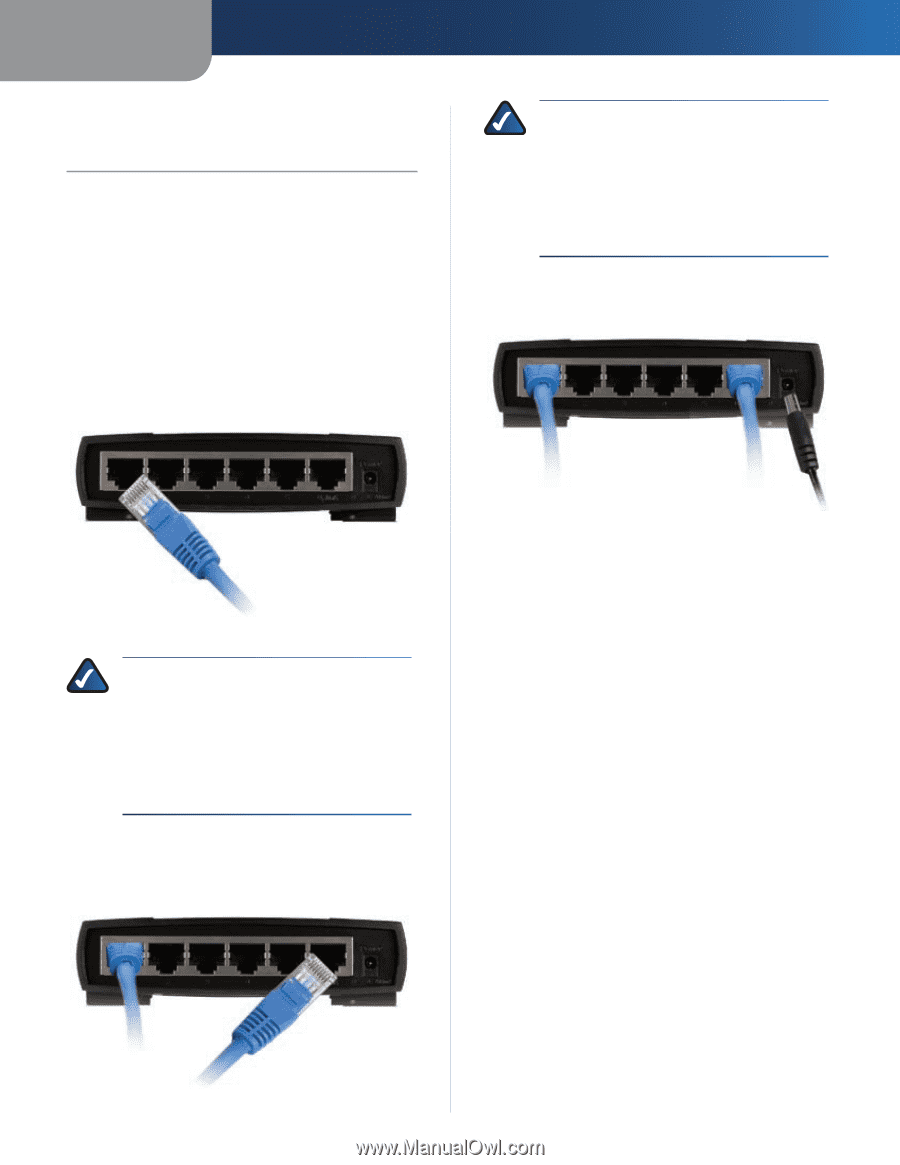
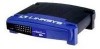
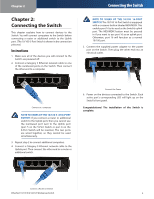
Chapter 2 Chapter 2: Connecting the Switch This chapter explains how to connect devices to the Switch. You will connect computers to the Switch before connecting a router or additional switch to the Uplink port. (The 10/100 5-Port Switch is shown in the connection pictures.) Instructions 1. Make sure all of the devices you will connect to the Switch are powered off. 2. Connect a Category 5 Ethernet network cable to one of the numbered ports on the Switch. Then connect the other end to a computer. Connecting the Switch NOTE TO USERS OF THE 10/100 16-PORT SWITCH: The 10/100 16-Port Switch is equipped with a crossover button labeled MDI/MDIX. This enables port 16 to be used as the Switch's uplink port. The MDI/MDIX button must be pressed in if you want to use port 16 as an uplink port. Otherwise, port 16 will function as a normal 10/100 port. 5. Connect the supplied power adapter to the power port on the Switch. Then plug the other end into an electrical outlet. Connect to a computer NOTE TO USERS OF THE 10/100 5- OR 8-PORT SWITCH: If you connect a router or additional switch to the Uplink port, then you cannot use the numbered port next to the Uplink port (port 5 on the 5-Port Switch or port 8 on the 8-Port Switch will be inactive). The two ports are wired together, so they cannot be used simultaneously. 3. Repeat step 2 to connect additional computers. 4. Connect a Category 5 Ethernet network cable to the Uplink port. Then connect the other end to a router or additional switch. Connect the Power 6. Power on the devices connected to the Switch. Each active port's corresponding LED will light up on the Switch's front panel. Congratulations! The installation of the Switch is complete. Connect a Router or Switch EtherFast 10/100 5/8/16-Port Workgroup Switch 2
-
 1
1 -
 2
2 -
 3
3 -
 4
4 -
 5
5 -
 6
6 -
 7
7 -
 8
8 -
 9
9 -
 10
10 -
 11
11 -
12
-
13
-
14
-
15
-
16
-
17
-
18
-
19
-
20
-
21
-
22
-
23
-
24
-
25
-
26
-
27
-
28
 |
 |