Linksys WPC54GS User Guide - Page 17
Hardware Installation - 2 1 driver
 |
UPC - 745883583263
View all Linksys WPC54GS manuals
Add to My Manuals
Save this manual to your list of manuals |
Page 17 highlights
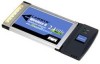
Wireless-G Notebook Adapter with SpeedBooster Chapter 5: Hardware Installation NOTE: You must run the Setup Wizard to install the software before installing the hardware. Connecting the Adapter 1. Turn off your notebook PC. 2. Locate an available CardBus slot on your notebook PC. 3. With the connector pin end facing the CardBus slot and the label facing up, as shown in Figure 5-1, slide the Adapter into the CardBus slot until it locks in place. 4. Restart your notebook PC. The Power LED should light up when the Adapter is installed correctly. 5. Windows will begin copying the driver files to your computer. If Windows asks you for the original Windows CD-ROM, insert the CD-ROM, and direct Windows to its correct location (e.g., D:\). Figure 5-1: How the Adapter installs into your notebook The installation of the Wireless-G Notebook Adapter is complete. If you want to check the link information, search for available wireless networks, or make additional configuration changes, go to "Chapter 6: Using the Wireless Network Monitor." Chapter 5: Hardware Installation 12 Connecting the Adapter
-
 1
1 -
2
-
3
-
4
-
5
-
6
-
7
-
8
-
9
-
10
-
11
-
 12
12 -
 13
13 -
 14
14 -
 15
15 -
 16
16 -
 17
17 -
 18
18 -
 19
19 -
 20
20 -
 21
21 -
 22
22 -
23
-
24
-
25
-
26
-
27
-
28
-
29
-
30
-
31
-
32
-
33
-
34
-
35
-
36
-
37
-
38
-
39
-
40
-
41
-
42
-
43
-
44
-
45
-
46
-
47
-
48
-
49
-
50
-
51
-
52
-
53
-
54
 |
 |
