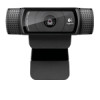
Logitech C920 Getting Started Guide - Page 3
Thank you for buying your c920, Setting up your webcam, Getting started with video calling - hd pro webcam
 |
View all Logitech C920 manuals
Add to My Manuals
Save this manual to your list of manuals |
Page 3 highlights
Getting started with Thank you for buying your c920! Setting up your webcam 1 Place your webcam Designed for the way you like to make a video call, place the Webcam c920 where you want it-on a computer monitor, desktop, or tripod. 1 2 3 Use this guide to set up and begin using your Logitech webcam. If you have questions before you start, or if you just want to learn more about your Logitech webcam, please visit logitech.com/support. For placement on a monitor Grasp the webcam as shown and open the flexible/ clip base with your other hand. Mount the webcam, making sure the foot on the flexible/clip base is flush with the back of your monitor. 2 Connect your webcam USB 3 Install the software If you're using your webcam with Windows® 8, the software required is downloaded automatically when you connect your webcam for the first time, and installed silently in the background. Important: Make sure you're connected to the Internet, so the software can be downloaded. If you're using your webcam with Windows® 7 or Windows Vista®, you must install the Logitech® Webcam Software, available from: logitech.com/downloads Logitech® HD Pro Webcam C920 Getting started with video calling Your Logitech HD Pro Webcam c920 provides full HD 1080p video calling. To take advantage of video calling both you and the person you call must install Skype™, or use a different video-calling application such as Yahoo!® Messenger, Windows Live® Messenger or Gmail. Learn more: skype.com As well as a webcam and video calling application, both callers need: • A computer with speakers (or a headset) and a microphone; your Logitech HD Pro Webcam c920 has two built-in microphones. • A broadband Internet connection (e.g., DSL, T1, or cable) 4 English English 5


