MSI AM1I User Guide - Page 5
APU & Heatsink Installation - motherboard
 |
View all MSI AM1I manuals
Add to My Manuals
Save this manual to your list of manuals |
Page 5 highlights
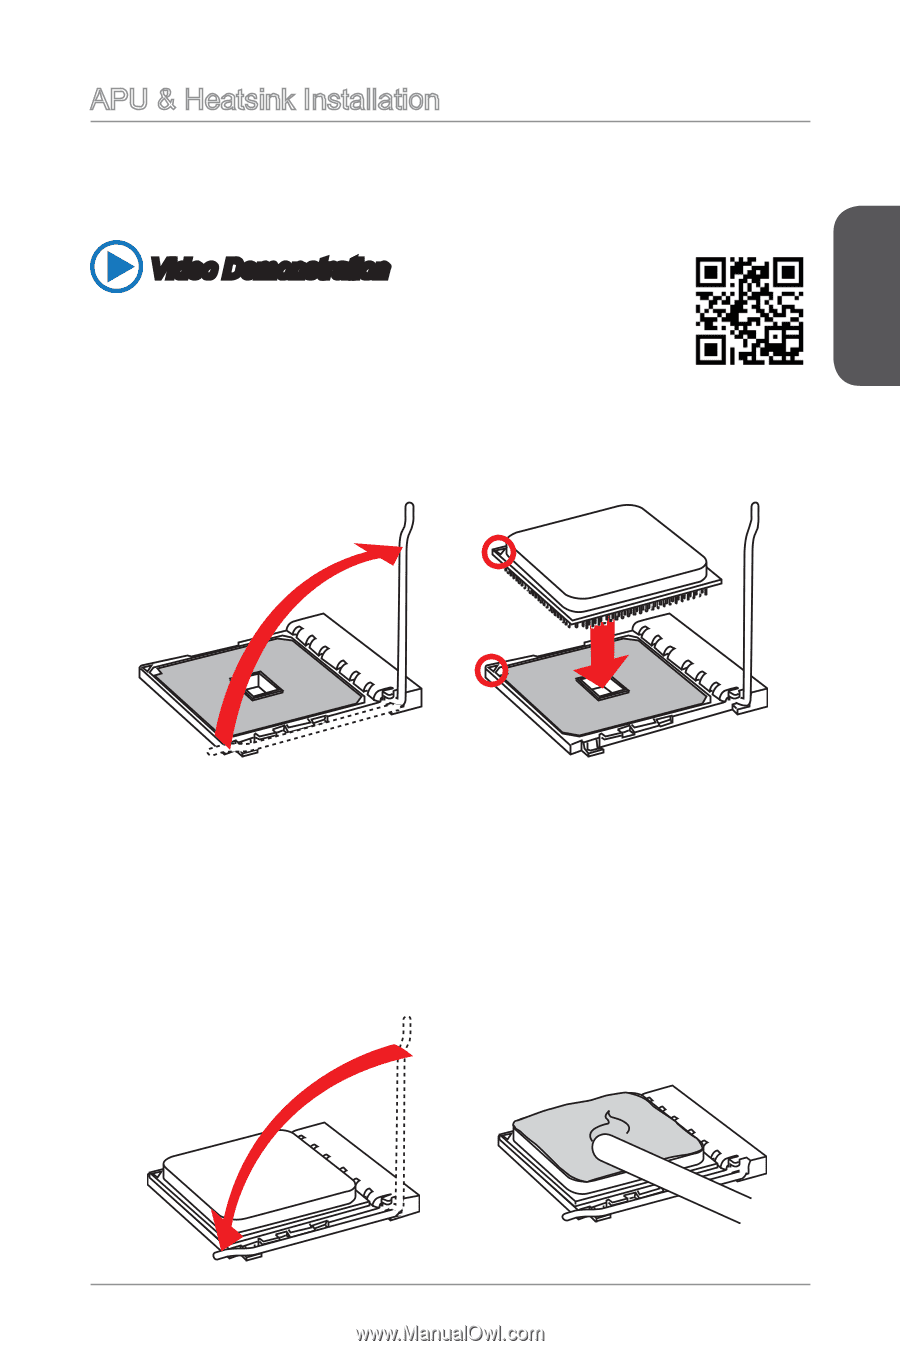
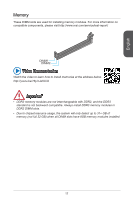
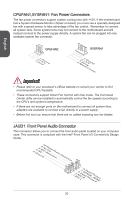
English APU & Heatsink Installation When installing an APU, always remember to install an APU heatsink. An APU heatsink is necessary to prevent overheating and maintain system stability. Follow the steps below to ensure correct APU and heatsink installation. Wrong installation can damage both the APU and the motherboard. Video Demonstration Watch the video to learn how to install APU & heatsink at the address below. http://youtu.be/s--YUBNkHc8 1. Pull the lever sideways away from the socket. Make sure to raise the lever up to a 90-degree angle. 2. Look for the gold arrow of the APU. The gold arrow should point as shown in the picture. The APU can only fit in the correct orientation. 3. If the APU is correctly installed, the pins should be completely embedded into the socket and can not be seen. Please note that any violation of the correct installation procedures may cause permanent damages to your motherboard. 4. Press the APU down firmly into the socket and close the lever. As the APU is likely to move while the lever is being closed, always close the lever with your fingers pressing tightly on top of the APU to make sure the APU is properly and completely embedded into the socket. 5. Evenly spread a thin layer of thermal paste (or thermal tape) on the top of the APU. This will help in heat dissipation and prevent APU overheating. 15
-
 1
1 -
 2
2 -
 3
3 -
 4
4 -
 5
5 -
 6
6 -
 7
7 -
 8
8 -
 9
9 -
 10
10 -
 11
11 -
12
-
13
-
14
-
15
-
16
-
17
-
18
 |
 |