MSI FX600MX User Manual - Page 79
Removing the Disk
 |
View all MSI FX600MX manuals
Add to My Manuals
Save this manual to your list of manuals |
Page 79 highlights
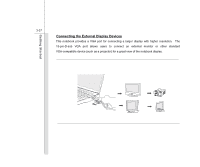
3-35 5. Push the tray back into the drive. Getting Started Removing the Disk Follow the instructions below to remove the disk that is placed in the optical storage device: 6. Press the eject button on the drive's panel and the disk tray will slide out partially. 7. Gently pull the tray out until fully extended. 8. Hold the disk by its edge with your fingers and lift it up from the tray. 9. Push the tray back into the drive. 6 7 8 9
-
 1
1 -
2
-
3
-
4
-
5
-
6
-
7
-
8
-
9
-
10
-
11
-
12
-
13
-
14
-
15
-
16
-
17
-
18
-
19
-
20
-
21
-
22
-
23
-
24
-
25
-
26
-
27
-
28
-
29
-
30
-
31
-
32
-
33
-
34
-
35
-
36
-
37
-
38
-
39
-
40
-
41
-
42
-
43
-
44
-
45
-
46
-
47
-
48
-
49
-
50
-
51
-
52
-
53
-
54
-
55
-
56
-
57
-
58
-
59
-
60
-
61
-
62
-
63
-
64
-
65
-
66
-
67
-
68
-
69
-
70
-
71
-
72
-
73
-
 74
74 -
 75
75 -
 76
76 -
 77
77 -
 78
78 -
 79
79 -
 80
80 -
 81
81 -
 82
82 -
 83
83 -
 84
84 -
85
-
86
-
87
-
88
-
89
-
90
-
91
-
92
-
93
-
94
-
95
-
96
-
97
-
98
-
99
-
100
 |
 |
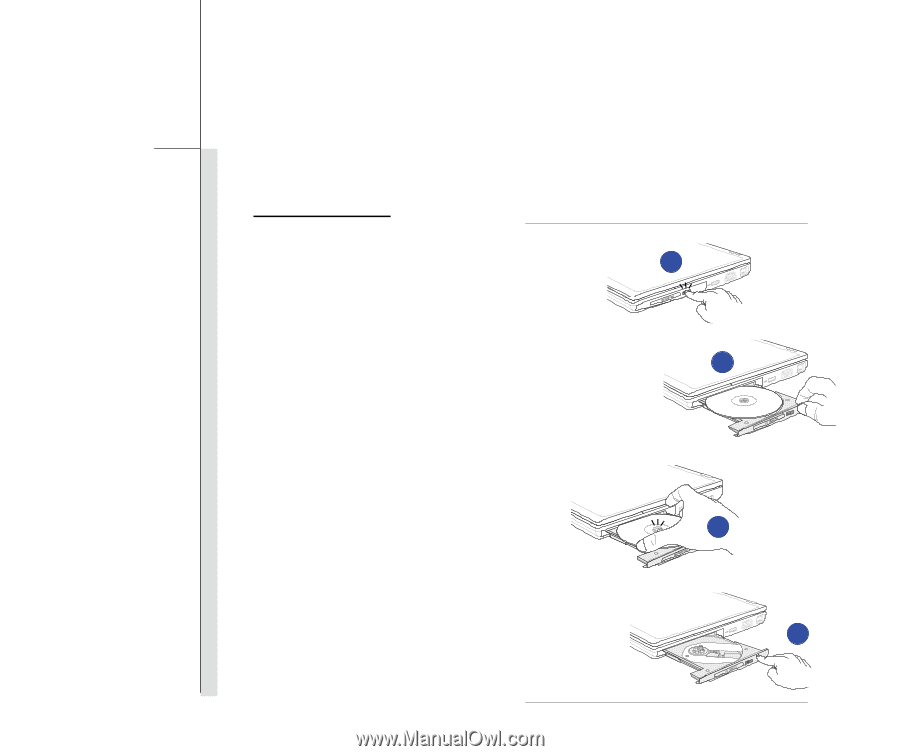
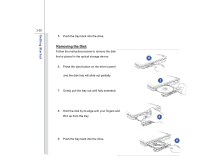
3-35
Getting Started
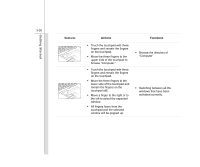
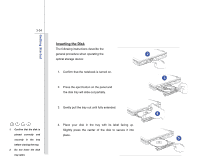
5.
Push the tray back into the drive.
Removing the Disk
Follow the instructions below to remove the disk
that is placed in the optical storage device:
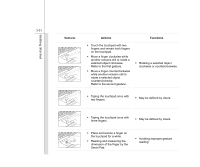
6.
Press the eject button on the drive’s panel
and the disk tray will slide out partially.
7.
Gently pull the tray out until fully extended.
8.
Hold the disk by its edge with your fingers and
lift it up from the tray.
9.
Push the tray back into the drive.
6
7
8
9