MSI VR610 User Manual - Page 63
Express Card Installation, Installing the Express Card
 |
View all MSI VR610 manuals
Add to My Manuals
Save this manual to your list of manuals |
Page 63 highlights
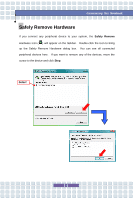
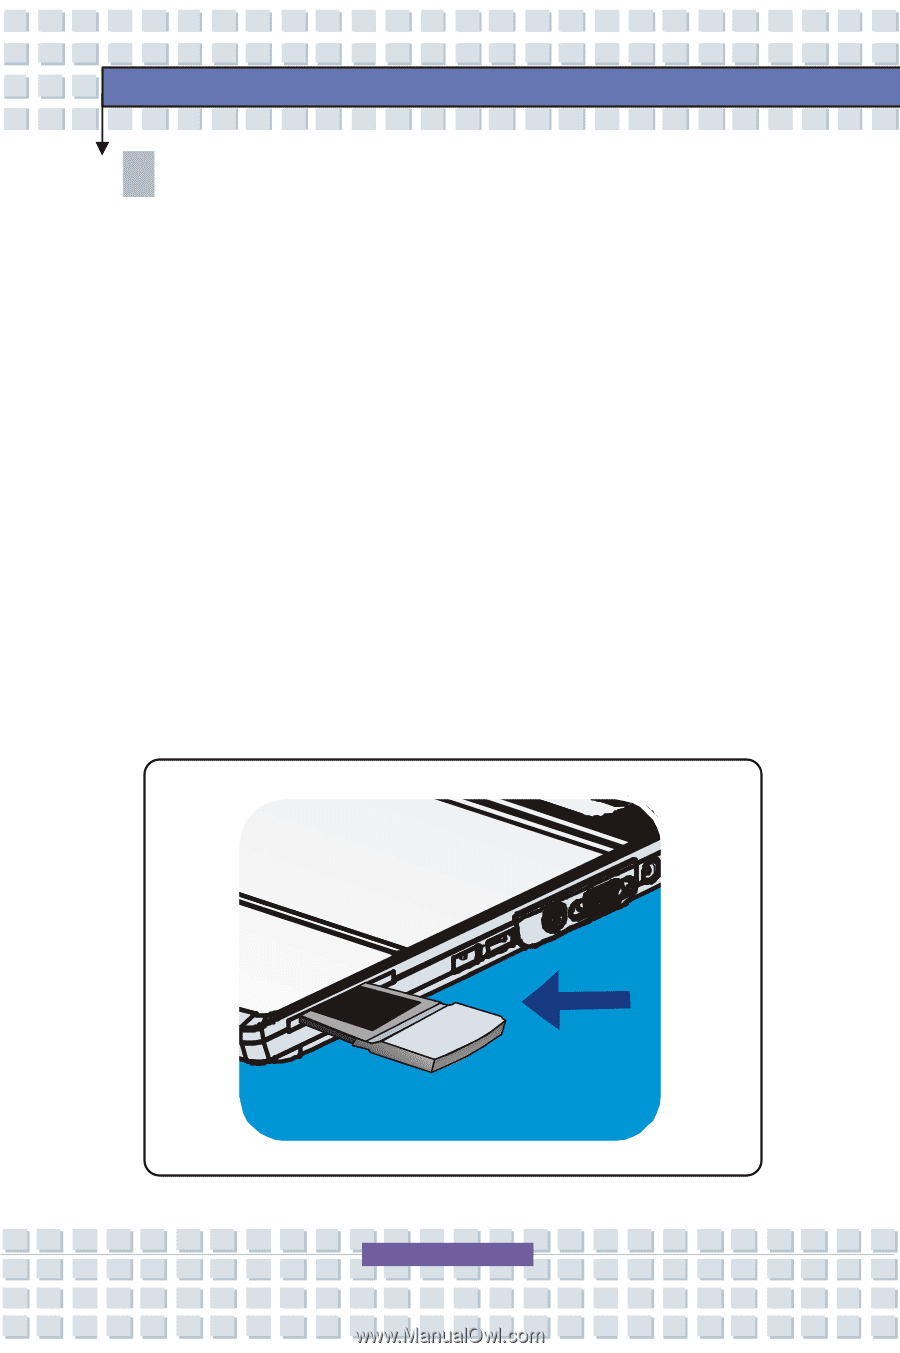
Customizing this Notebook Express Card Installation This computer provides an Express Card slot. The new Express Card interface is smaller and faster than PC Card interface. The Express Card technology takes advantage of the scalable, high-bandwidth serial PCI Express and USB 2.0 interfaces. The following instruction provides you with a basic installation for the Express Card, including how to install and remove it. For more information, please refer to the manual of your Express Card. Installing the Express Card 1. Locate the Express Card slot on your notebook. If there is the dummy card in the slot, remove it first. 2. Insert the Express Card into the slot (usually with its label facing up) and push it until it is firmly seated. 3-7
-
 1
1 -
2
-
3
-
4
-
5
-
6
-
7
-
8
-
9
-
10
-
11
-
12
-
13
-
14
-
15
-
16
-
17
-
18
-
19
-
20
-
21
-
22
-
23
-
24
-
25
-
26
-
27
-
28
-
29
-
30
-
31
-
32
-
33
-
34
-
35
-
36
-
37
-
38
-
39
-
40
-
41
-
42
-
43
-
44
-
45
-
46
-
47
-
48
-
49
-
50
-
51
-
52
-
53
-
54
-
55
-
56
-
57
-
 58
58 -
 59
59 -
 60
60 -
 61
61 -
 62
62 -
 63
63 -
 64
64 -
 65
65 -
 66
66 -
 67
67 -
 68
68 -
69
-
70
-
71
-
72
-
73
-
74
-
75
-
76
 |
 |
3-7
Customizing this Notebook
Express Card Installation
This computer provides an Express Card slot. The new Express Card interface
is smaller and faster than PC Card interface. The Express Card technology
takes advantage of the scalable, high-bandwidth serial PCI Express and USB 2.0
interfaces.
The following instruction provides you with a basic installation for the Express
Card, including how to install and remove it. For more information, please refer
to the manual of your Express Card.
Installing the Express Card
1.
Locate the Express Card slot on your notebook. If there is the dummy
card in the slot, remove it first.
2.
Insert the Express Card into the slot (usually with its label facing up) and
push it until it is firmly seated.