Mackie ProFX22v2 Owners Manual - Page 4
Getting Started, Introduction - mixer
 |
View all Mackie ProFX22v2 manuals
Add to My Manuals
Save this manual to your list of manuals |
Page 4 highlights
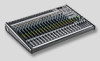
ProFX8v2 • ProFX12v2 • ProFX16v2 • ProFX22v2 • ProFX30v2 Introduction Getting Started Our ProFXv2 Series mixers provide a comprehensive live sound solution, with models from 4- to 30-channels, covering a huge range of applications. Delivering unmatched sound quality, ProFXv2 features all-new Vita™ preamps, which are virtually noiseless and designed specifically for the highlydynamic world of live sound. ProFXv2 also includes the immensely powerful new ReadyFX™ effect engine, harnessing floating-point DSP to deliver 16 rich effects that elevate any performance. The ProFXv2 no-compromise live sound toolkit includes a room-shaping GEQ, flexible I/O and a built-in USB interface for hassle-free recording/playback. With a rugged steel chassis and unmatched sonic performance, ProFXv2 is truly the life of your live mix. How to Use This Manual: After this introduction, a getting started guide will help you get things set up fast. The hookup diagrams show some typical setups, while the remaining sections provide details of the ProFXv2 Series mixers. This icon marks information that is critically important or unique to ProFXv2. For your own good, read and remember them. This icon leads you to in-depth explanations of features and practical tips. They usually have some valuable nuggets of information. This icon draws attention to certain features and functions relating to the usage of ProFXv2. Things to Remember: • Never listen to loud music for prolonged periods. Please see the Safety Instructions on page 2 for information on hearing protection. • Save the shipping box and packing materials! You may need them someday. Besides, the cats will love playing in them and jumping out at you unexpectedly. Remember to pretend like you are surprised! • Save your sales receipt in a safe place. The following steps will help you set up the ProFXv2 mixer quickly. 1. Turn down all knobs except the channel EQ and pan knobs, and set all the faders fully down. 2. Set all channel EQ knobs, pan knobs, and the graphic EQ sliders at their center detent. 3. Set all buttons to the "out" position. 4. Plug signal sources into the mixer, such as: • Microphones plugged into the mic inputs. Engage phantom power if your mics need it. Check the mic's user manual to be sure. • Line-level sources such as keyboards, drum machines, or CD players plugged into the line-level inputs. 5. Connect cords from the main outs to your powered speakers or amplifier. 6. Plug in the mixer's power cord to a live AC outlet and turn on the mixer. 7. If you have powered speakers, turn them on. Otherwise, hook up your passive speakers to your amp with speaker cables, and turn it on. Adjust your powered speaker or amplifier level controls to however the manufacturer recommends. 8. Plug something into an input. This could be an instrument, you singing or speaking, or a line level source such as a keyboard or CD player. 9. Engage the channel's PFL Solo switch [ProFX16v2, ProFX22v2, ProFX30v2] to view the input level via the main meters. 10. Be sure that the volume of the input is the same as it would be during normal use, or you may have to readjust the gain in the middle of a set. You can listen with headphones if you carefully turn up the channel fader and headphones level a little. 11. The mono channel gain affects the mic and the line inputs. The stereo channel gain adjusts the stereo line inputs. Adjust as desired, and make sure that the OL LED does not come on during the loudest passages. There are hybrid channels that have both mono mic and stereo line inputs. In these channels, the gain control affects only the mic gain. 12. To get sound out of the speakers and into a waiting world, engage a channel's L-R assign switch [ProFX16v2, ProFX22v2, ProFX30v2] turn up that channel's fader to the "U" (unity gain) position, and slowly bring up the main fader to a comfortable listening level. 13. Repeat steps 8 to 12 for the other channels. 4 ProFX8v2 • ProFX12v2 • ProFX16v2 • ProFX22v2 • ProFX30v2
-
 1
1 -
 2
2 -
 3
3 -
 4
4 -
 5
5 -
 6
6 -
 7
7 -
 8
8 -
 9
9 -
 10
10 -
11
-
12
-
13
-
14
-
15
-
16
-
17
-
18
-
19
-
20
-
21
-
22
-
23
-
24
-
25
-
26
-
27
-
28
-
29
-
30
-
31
-
32
-
33
-
34
-
35
-
36
-
37
-
38
-
39
-
40
 |
 |
