Magic Chef MCO160UBF User Manual - Page 2
Installation Hardware, Mounting Space - microwave
 |
View all Magic Chef MCO160UBF manuals
Add to My Manuals
Save this manual to your list of manuals |
Page 2 highlights
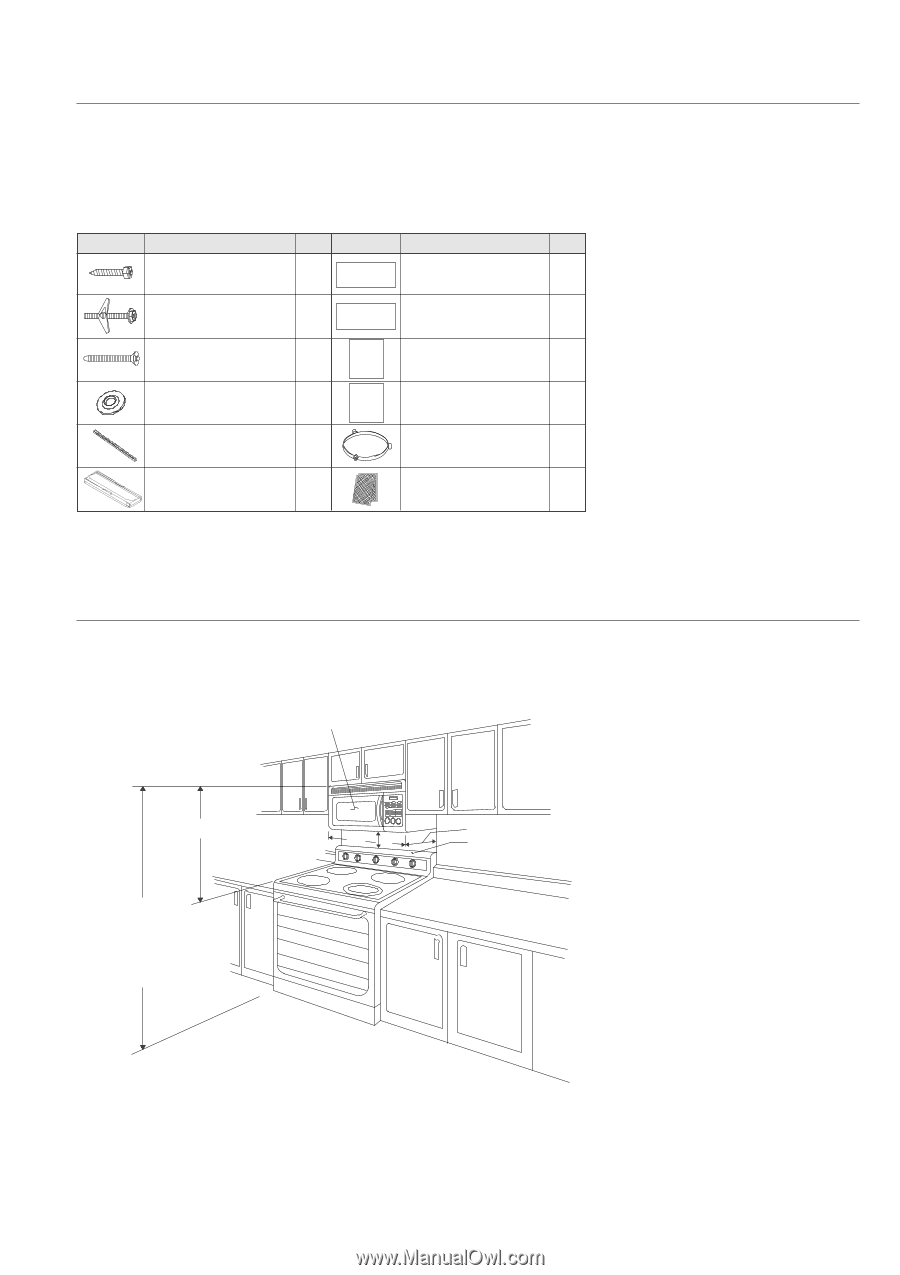
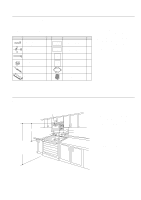
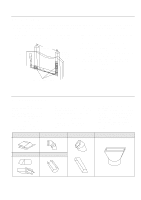
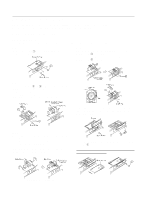
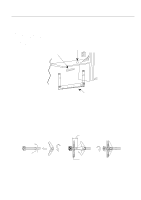
Installation Hardware The following is a list of parts you may need for installing your Over-the-Range microwave oven. You will find the installation hardware contained in a packet with the unit. Check to make sure you have all these parts. Use this time to become familiar with each piece. Image Part & Description Q'ty Lag screws (1/4" x 2") 3 Toggle Bolts and Nuts 3/16 x 3" 3 Cabinet Mounting Bolts 1/4" x 3-1/8 3 Washer (3/4") 3 Image Top Cabinet Template Wall Template Installation Manual Use and Care Manual Part & Description Q'ty Top Cabinet Template 1 Rear Wall Template 1 Installation Manul 1 Use and Care Manual 1 Nylon Grommet (for metal cabinets) 2 Damper 1 Roller Guide 1 Grease Filters 2 Tools The following tools may be needed for installation of your microwave oven. Phillips screwdrivers, Electric Drill Motor, 1/2" & 5/8" Wood Bits & 3/16" Drill Bit, Saw to cut exhaust opening, (if needed) or Jig Saw, Tin Snips (if needed), Pencil, Tape Measure, Paper Tape & Duct Tape. Mounting Space OTR 30" more than from cooking surface 66" or more from the floor to the top of the microwave oven 30" 2" max, 12" Back splash 2 Your Over-the-Range microwave oven requires mounting space on a wall as shown. 1. A minimum of 30" between wall hung side cabinets is required for installation. Make sure the bottom edge of the top cabinet is at least 66" from the floor and 30" from the cooking surface. And the depth of the cabinet is required less than 12 inch. (max.12inch) 2. For easier access to the hood lamp, the bottom of the microwave oven should be at least 2" above the range backsplash. 3. If you are going to vent your microwave oven to the outside, see exhaust duct preparation. 4. Designed to be installed in 30" wide cabinet opening.
-
 1
1 -
 2
2 -
 3
3 -
 4
4 -
 5
5 -
 6
6 -
 7
7 -
 8
8 -
9
-
10
-
11
-
12
-
13
-
14
-
15
-
16
 |
 |