Magic Chef MCO160UBF User Manual - Page 7
B. Vertical Ventilation System
 |
View all Magic Chef MCO160UBF manuals
Add to My Manuals
Save this manual to your list of manuals |
Page 7 highlights
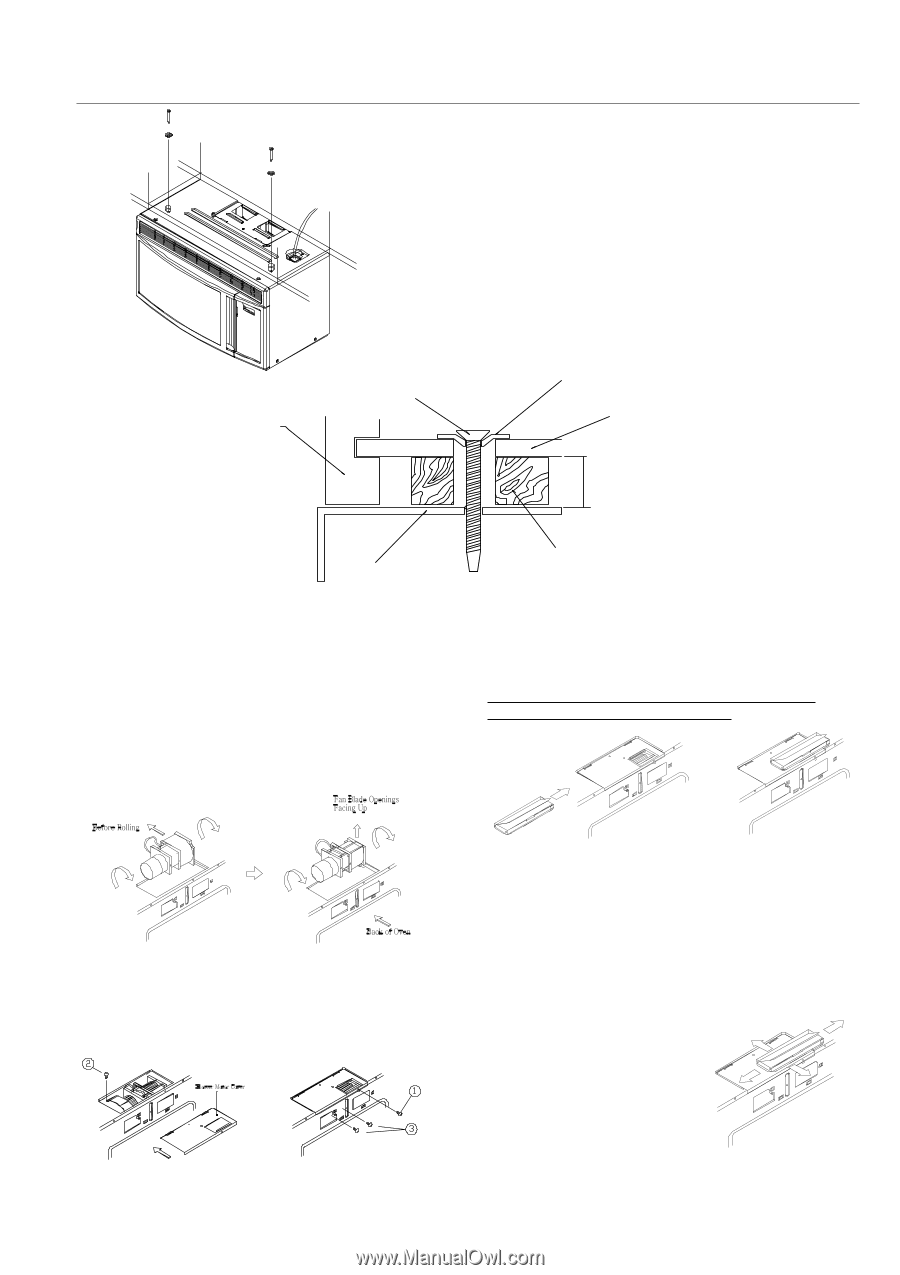
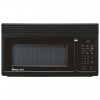
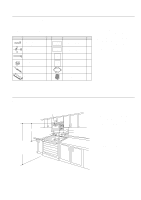
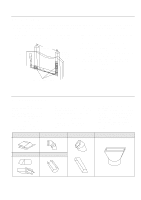
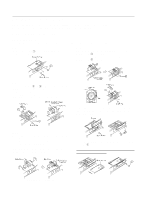
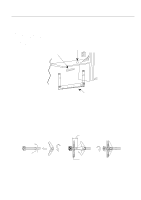
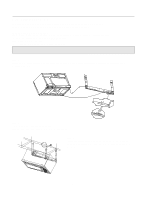
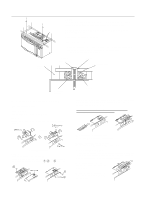
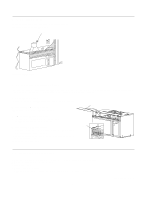
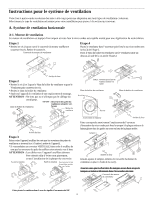
Cabinet front Step. 4 Insert 2 bolts through 2 flat washers into holes on top cabinet floor. Tighten screws to close the gap between top cabinet and the microwave oven. NOTE: MICROWAVE OVEN MUST BE SECURED WITH TWO MOUNTING BOLTS. Dress power cord nearly in top cabinet. Install the grease filters. * Using filler block for recessed bottom cabinet, insert a bolt with a 3/4" washer into one of the holes drilled previously in the top cabinet floor. (D & E on Top Cabinet Template.) Top cabinet mounting screw Washer Cabinet bottom shelf Microwave oven top B. Vertical Ventilation System B-1. Ventilation motor Step. 1 and 2 See the page 4, A-1 Ventilation motor. Step. 3 Roll the blower unit so that the fun blade openings are facing upward. After Rolling Roll the blower motor clockwise 90 Step. 4 Place the blower unit into the opening. Secure the Case Blow Fan Top, the blower motor and cover to the microwave oven with the screw(1, 2 and 3) from step 1 and 2. Filler block Carefully match the exhaust opening location of the microwave and attach the damper to blower motor cover by sliding it into the guides at the blower motor cover. Be sure that the damper hinge is on the front and the damper swings free into the wall outlet. B-2. Install the mounting plate See the page 5, A-2. Install the mounting plate. B-3. Mounting Microwave oven See the page 6, A-3. Mounting the Microwave oven. B-4. Adjust the Damper For the vertical exhaust open the top cabinet and adjust the damper to the microwave through the cabinet bottom. For front to back or side to side adjustment, slide the damper as needed. With the damper out, twist the damper to fit under the flaps of the blower plate. Replace the damper and make sure it will move easily by the force of the exhaust air. 7
-
 1
1 -
 2
2 -
 3
3 -
 4
4 -
 5
5 -
 6
6 -
 7
7 -
 8
8 -
 9
9 -
 10
10 -
 11
11 -
 12
12 -
13
-
14
-
15
-
16
 |
 |