Makita 2414DB Owners Manual - Page 8
Assembly
 |
View all Makita 2414DB manuals
Add to My Manuals
Save this manual to your list of manuals |
Page 8 highlights
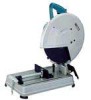
ASSEMBLY CAUTION: • Always be sure that the tool is switched off and unplugged before carrying out any work on the tool. 003761 Removing or installing cut-off wheel 2 1 To remove the wheel, raise the safety guard. Press the shaft 3 lock so that the wheel cannot revolve and use the socket wrench to loosen the hex bolt by turning it counterclockwise. Then remove the hex bolt, outer flange and wheel. (Note: Do not remove the inner flange, ring and O-ring. 1. Shaft lock 2. Safety guard 3. Socket wrench 1 2 3 4 1. O ring 2. Inner flange 3. Ring 4. Spindle 5. Cut-off wheel 6. Outer flange 7. Hex bolt 003762 To install the wheel, follow the removal procedures in 7 reverse. 6 5 CAUTION: • Be sure to tighten the hex bolt securely. Insufficient tightening of the hex bolt may result in severe injury. Use the socket wrench provided to help assure proper tightening. • Always use only the proper inner and outer flanges which are provided with this tool. • Always lower the safety guard after replacing the wheel. 1 1. Vise plate 2. Vise nut 3. Vise handle 8 003763 Securing workpiece 2 By turning the vise handle counterclockwise and then flipping the vise nut to the left, the vise is released from the shaft threads and can be moved rapidly in and out. To grip work- pieces, push the vise handle until the vise plate contacts the workpiece. Flip the vise nut to the right and then turn the vise 3 handle clockwise to securely retain the workpiece. CAUTION: • Always set the vise nut to the right fully when securing the workpiece. Failure to do so may result in insufficient securing of the workpiece. This could cause the workpiece to be ejected or cause a dangerous breakage of the wheel.
-
 1
1 -
2
-
 3
3 -
 4
4 -
 5
5 -
 6
6 -
 7
7 -
 8
8 -
 9
9 -
 10
10 -
 11
11 -
 12
12 -
 13
13 -
14
-
15
-
16
 |
 |
