Makita BO4556K Owners Manual - Page 4
Functional Description, Assembly - model
 |
View all Makita BO4556K manuals
Add to My Manuals
Save this manual to your list of manuals |
Page 4 highlights
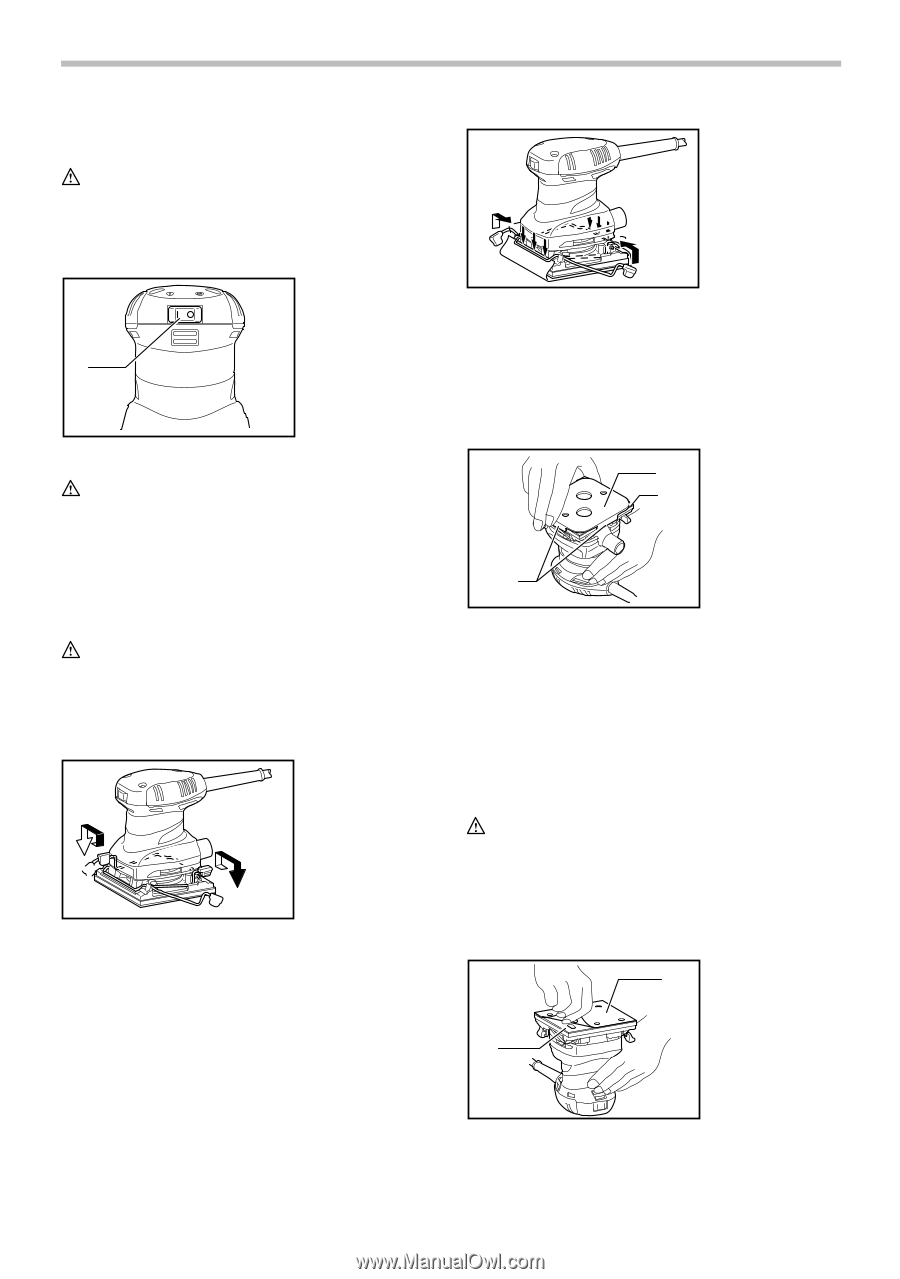
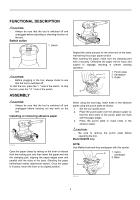
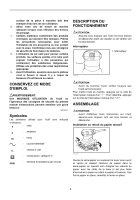
FUNCTIONAL DESCRIPTION CAUTION: • Always be sure that the tool is switched off and unplugged before adjusting or checking function on the tool. Switch action 1. Switch 008293 1 008302 CAUTION: • Before plugging in the tool, always check to see that the tool is switched off. To start the tool, press the " I " side of the switch. To stop the tool, press the " O " side of the switch. ASSEMBLY CAUTION: • Always be sure that the tool is switched off and unplugged before carrying out any work on the tool. Installing or removing abrasive paper 008299 Open the paper clamp by raising on the lever to release from the locking port and then Insert the paper end into the clamping part, aligning the paper edges even and parallel with the sides of the base. (Bending the paper beforehand makes attachment easier). Once the paper is in place, return the lever to its original position. Repeat the same process for the other end of the base, maintaining the proper paper tension. After inserting the paper, make sure the clamping part hold it securely. Otherwise the paper will be loose and subject to slippage, resulting in uneven sanding operation. 1. Punch plate 1 2. Sandpaper 2 3. Guide 3 008297 When using the dust bag, make holes in the abrasive paper using the punch plate as follows: 1. Set the tool upside down. 2. Place the punch plate over the abrasive paper so that the bent sides of the punch plate are flush with the paper edges. 3. Press the punch plate to make holes in the abrasive paper. CAUTION: • Be sure to remove the punch plate before operating the tool. Model BO4555 only NOTE: Use Makita hook-and-loop sandpaper with this sander. 2 1. Velcro sandpaper 2. Base 1 008296 4
-
 1
1 -
 2
2 -
 3
3 -
 4
4 -
 5
5 -
 6
6 -
 7
7 -
 8
8 -
 9
9 -
 10
10 -
11
-
12
-
13
-
14
-
15
-
16
-
17
-
18
-
19
-
20
 |
 |