Makita BO4556K Owners Manual - Page 5
Operation - pad
 |
View all Makita BO4556K manuals
Add to My Manuals
Save this manual to your list of manuals |
Page 5 highlights
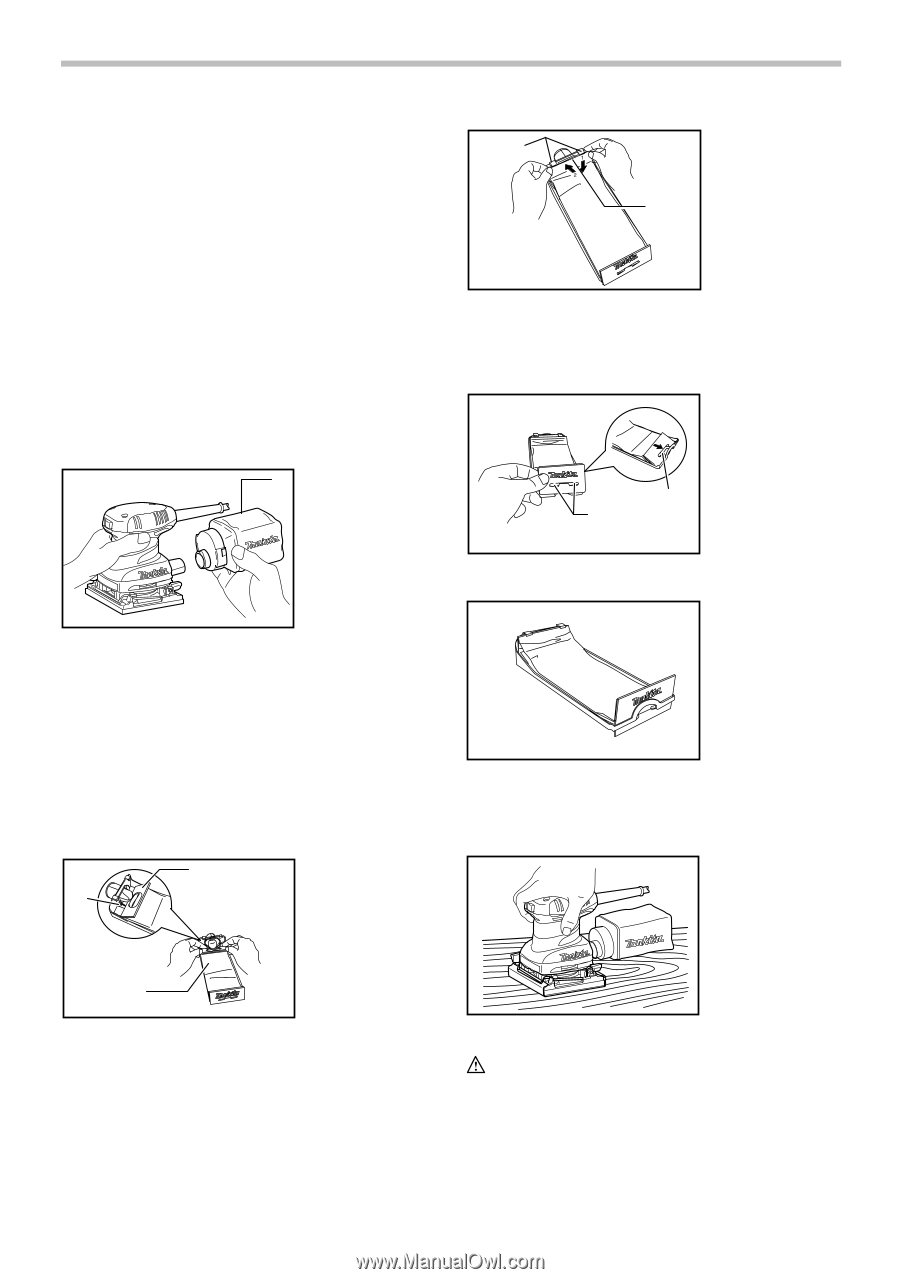
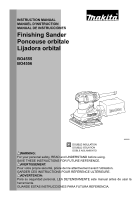
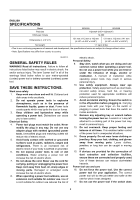
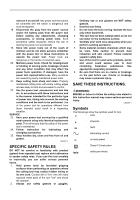
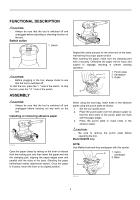
1. Set the tool upside down so that the pad is on top. 2. Position the sandpaper to fit the shape of the base. Be sure to align the holes on the sandpaper with the holes on the pad (the dust will be sucked into these holes; it is therefore important to leave them open). 3. Press the paper firmly over the pad. To remove the sandpaper: 1. Set the tool upside down so that the sandpaper is on top. 2. Grasping one corner of the sandpaper, peel it from the pad. NOTE: • If the sandpaper is in good condition, save it for further use. Dust bag 1 1. Dust bag 1 1. Claws 2. Upper part 2 003743 Insert the notch of the paper dust bag into the guide of the paper dust bag holder. Then install the paper dust bag holder set on the tool. 1. Notch 2. Guide 2 1 003744 008301 The use of the dust bag makes sanding operations clean and dust collection easy. To attach the dust bag, fit the bag's entry port onto the dust spout on the tool. Make sure that the hole in the bag's entry port is just over the pimple-like protrusion on the dust spout. For the best results, empty the dust bag when it becomes approximately half full, tapping it lightly to remove as much dust as possible. Installing paper dust bag (optional accessory) 2 1. Groove 1 2. Front fixing cardboard 3. Front side of paper dust bag 003745 OPERATION Sanding operation 3 003742 008294 Place the paper dust bag on the paper dust bag holder with its front side upward. Insert the front fixing cardboard of the paper dust bag into the groove of the paper dust bag holder. Then press the upper part of the front fixing cardboard in arrow direction to hook it onto the claws. CAUTION: • Never run the tool without the abrasive paper. You may seriously damage the pad. • Never force the tool. Excessive pressure may decrease the sanding efficiency, damage the abrasive paper and/or shorten tool life. 5
-
 1
1 -
 2
2 -
 3
3 -
 4
4 -
 5
5 -
 6
6 -
 7
7 -
 8
8 -
 9
9 -
 10
10 -
 11
11 -
12
-
13
-
14
-
15
-
16
-
17
-
18
-
19
-
20
 |
 |