Makita CT322W XDT11 Instruction Manual - Page 6
Assembly
 |
View all Makita CT322W manuals
Add to My Manuals
Save this manual to your list of manuals |
Page 6 highlights
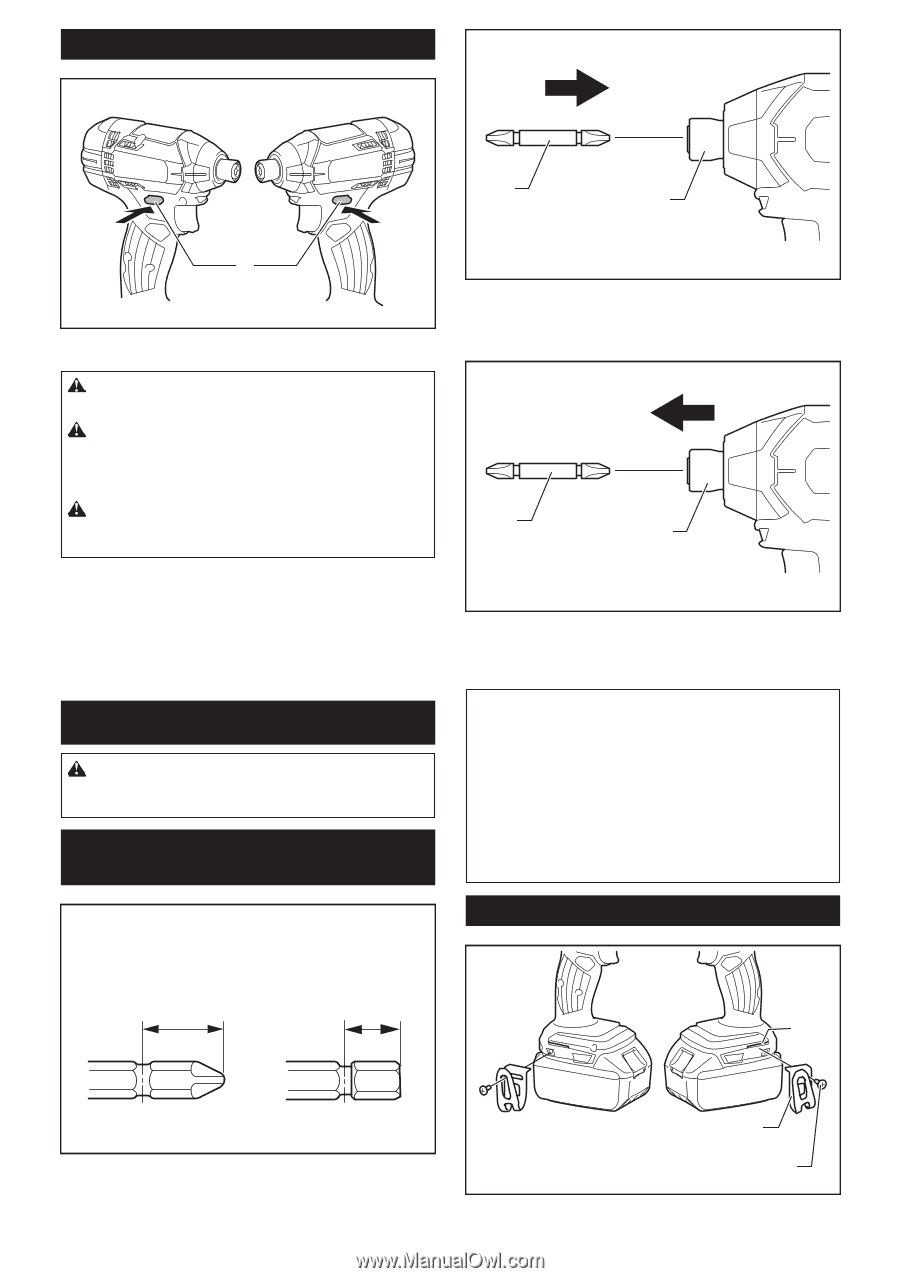
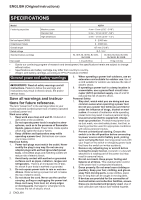
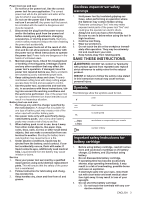
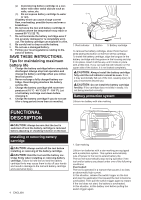
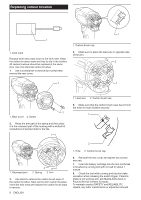
Reversing switch action A 1 1. Reversing switch lever 1 2 B 1. Driver bit 2. Sleeve To install the driver bit, insert it into the sleeve as far as it will go. CAUTION: Always check the direction of rotation before operation. CAUTION: Use the reversing switch only after the tool comes to a complete stop. Changing the direction of rotation before the tool stops may damage the tool. CAUTION: When not operating the tool, always set the reversing switch lever to the neutral position. This tool has a reversing switch to change the direction of rotation. Depress the reversing switch lever from the A side for clockwise rotation or from the B side for counterclockwise rotation. When the reversing switch lever is in the neutral position, the switch trigger cannot be pulled. ASSEMBLY CAUTION: Always be sure that the tool is switched off and the battery cartridge is removed before carrying out any work on the tool. Installing or removing driver bit/ socket bit 1 2 1. Driver bit 2. Sleeve To remove the driver bit, pull the sleeve in the direction of the arrow and pull the driver bit out. NOTE: If the driver bit is not inserted deep enough into the sleeve, the sleeve will not return to its original position and the driver bit will not be secured. In this case, try re-inserting the bit according to the instructions above. NOTE: When it is difficult to insert the driver bit, pull the sleeve and insert it into the sleeve as far as it will go. NOTE: After inserting the driver bit, make sure that it is firmly secured. If it comes out, do not use it. Installing hook 12 mm 9 mm (15/32") (3/8") 1 Use only the driver bit/socket bit shown in the figure. Do not use any other driver bit/socket bit. 6 ENGLISH 1. Groove 2. Hook 3. Screw 2 3
-
 1
1 -
 2
2 -
 3
3 -
 4
4 -
 5
5 -
 6
6 -
 7
7 -
 8
8 -
 9
9 -
 10
10 -
 11
11 -
 12
12 -
13
-
14
-
15
-
16
-
17
-
18
-
19
-
20
-
21
-
22
-
23
-
24
-
25
-
26
-
27
-
28
 |
 |