Makita FS6200TP Owners Manual - Page 4
Screwdriver Safety, Warnings, Save These Instructions., Symbols, Functional Description - power tools
 |
View all Makita FS6200TP manuals
Add to My Manuals
Save this manual to your list of manuals |
Page 4 highlights
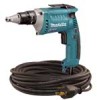
Fig. A Grounding Blade 000269 Cover of Grounded Outlet Box GEB017-3 SCREWDRIVER SAFETY WARNINGS DO NOT let comfort or familiarity with product (gained from repeated use) replace strict adherence to safety rules for the subject product. If you use this power tool unsafely or incorrectly, you can suffer serious personal injury. 1. Hold power tool by insulated gripping surfaces, when performing an operation where the fastener may contact hidden wiring or its own cord. Fasteners contacting a "live" wire may make exposed metal parts of the power tool "live" and could give the operator an electric shock. 2. Always be sure you have a firm footing. Be sure no one is below when using the tool in high locations. 3. Hold the tool firmly. 4. Keep hands away from rotating parts. 5. Do not touch the bit or the workpiece immediately after operation; they may be extremely hot and could burn your skin. SAVE THESE INSTRUCTIONS. WARNING: MISUSE or failure to follow the safety rules stated in this instruction manual may cause serious personal injury. USD101-2 Symbols The followings show the symbols used for tool. ・ volts ・ amperes ・ hertz ・ alternating current ・ no load speed ・ revolutions or reciprocation per minute FUNCTIONAL DESCRIPTION CAUTION: • Always be sure that the tool is switched off and unplugged before adjusting or checking function on the tool. Depth adjustment 1. Lock ring A 009960 B 1 The depth can be adjusted by turning the lock ring. Turn it in "B" direction for less depth and in "A" direction for more depth. One full turn of the lock ring equals 1.5 mm (1/16") change in depth. Adjust the lock ring that the distance between the tip of the locator and the screw head is approximately 1 mm (3/64") as shown in the figures. Drive a trial screw into your material or a piece of duplicate material. If the depth is still not suitable for the screw, continue adjusting until you obtain the proper depth setting. 1mm (3/64") 1. Locator 1 002619 4
-
 1
1 -
 2
2 -
 3
3 -
 4
4 -
 5
5 -
 6
6 -
 7
7 -
 8
8 -
 9
9 -
 10
10 -
11
-
12
-
13
-
14
-
15
-
16
-
17
-
18
-
19
-
20
-
21
-
22
-
23
-
24
 |
 |
