Makita HCU02C1 Owners Manual - Page 8
models with Battery BL3622A - power tools
 |
View all Makita HCU02C1 manuals
Add to My Manuals
Save this manual to your list of manuals |
Page 8 highlights
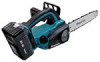
Checking the run-down brake Switch on the chain saw. Release the switch trigger completely. The saw chain must come to a standstill within one second. CAUTION: • Should the saw chain not come to a stop within one second when this test is performed, the saw must not be used. Consult a MAKITA specialist repair shop. Adjusting the chain lubrication 1. Adjusting screw 1 011459 You can adjust the oil pump feed rate with the adjusting screw. The amount of oil can be adjusted using the universal wrench. Carabiner (rope attachment point) caused by the activation of protection system and does not show the tool trouble. • When the tool is overloaded: At this time, release the switch trigger and remove causes of overload and then pull the switch trigger again to restart. When the tool does not work even after pulling the switch trigger, the battery power auto-stop is still at work. Charge the battery cartridge before use. • When the remaining battery capacity becomes low: Recharge the battery cartridge. Battery remaining capacity indicator (only for models with Battery BL3622A) Battery BL3622A is equipped with the battery remaining capacity indicator. 1. Indicator lamps 2. CHECK button 1 2 011715 Press the CHECK button to indicate the battery remaining capacity. The indicator lamps will then light for approx. three seconds. Indicator lamps Lighted Off E Blinking F Remaining capacity 70% to 100% 45% to 70% 20% to 45% 0% to 20% Charge the battery. 1 The battery may have malfunctioned. 1. Carabiner (rope attachment point) 011458 Carabiner (Rope attachment point) is for use of tool hanging. Before using carabiner, pull it out and tie it with a rope. Battery protection system The tool is equipped with the protection system, which automatically cuts off the output power for its long service life. The tool may stop during operation when the tool and/or battery are placed under the following situation. This is 011713 • When only the lowermost indicator lamp (next to the "E") blinks, or when none of the indicator lamps light, the battery capacity has run out, so the tool does not operate. In these cases, charge the battery or replace the empty battery with a fully charged one. • When two or more indicator lamps do not light even after charging is complete, the battery has reached the end of its service life. • When the upper two and lower two indicator lamps light alternately, the battery may have 8
-
 1
1 -
2
-
 3
3 -
 4
4 -
 5
5 -
 6
6 -
 7
7 -
 8
8 -
 9
9 -
 10
10 -
 11
11 -
 12
12 -
 13
13 -
14
-
15
-
16
-
17
-
18
-
19
-
20
-
21
-
22
-
23
-
24
-
25
-
26
-
27
-
28
-
29
-
30
-
31
-
32
-
33
-
34
-
35
-
36
-
37
-
38
-
39
-
40
-
41
-
42
-
43
-
44
-
45
-
46
-
47
-
48
-
49
-
50
-
51
-
52
 |
 |
