Makita JN1601 Owners Manual - Page 6
Operation - die
 |
View all Makita JN1601 manuals
Add to My Manuals
Save this manual to your list of manuals |
Page 6 highlights
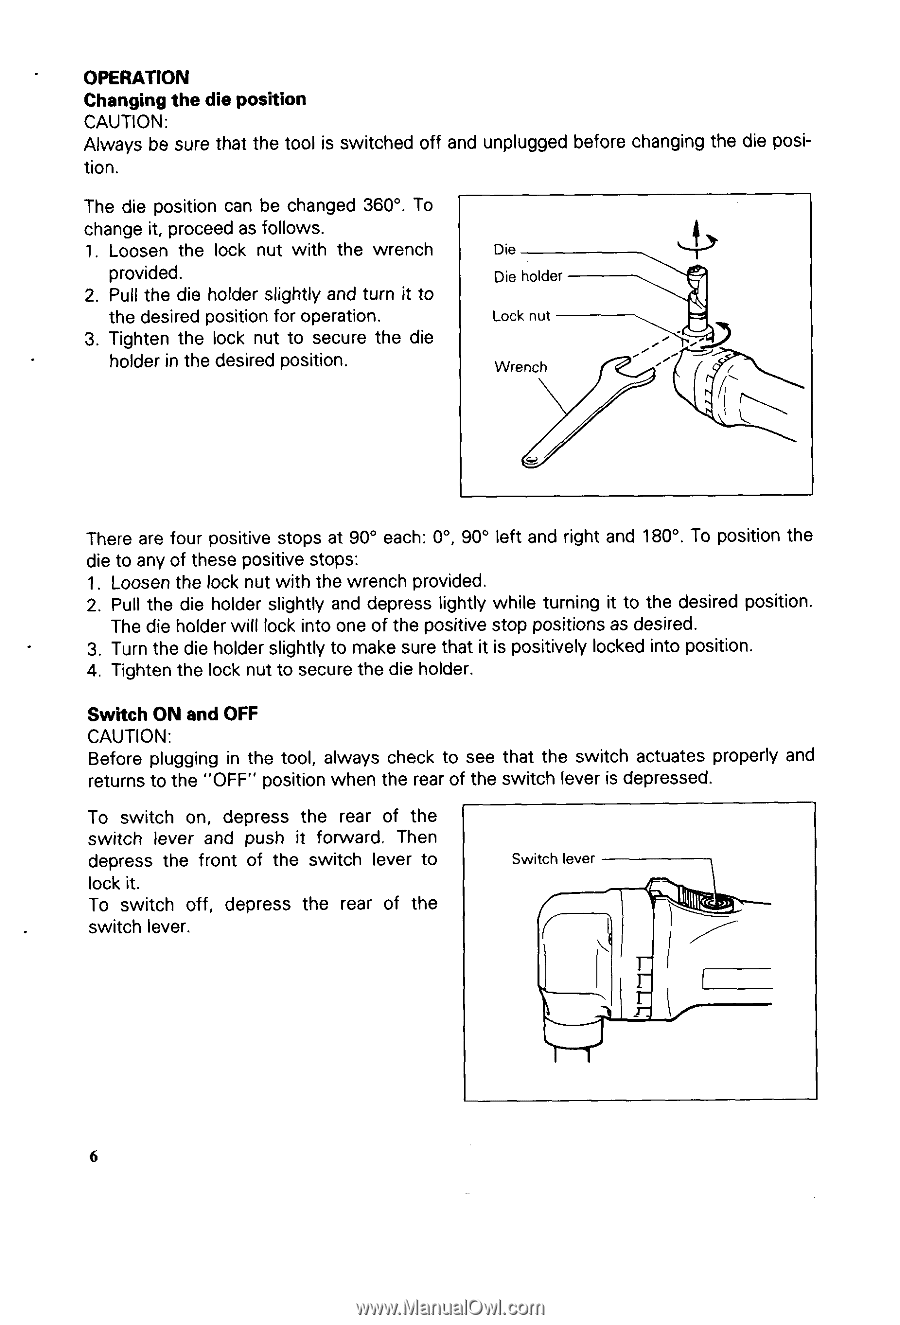
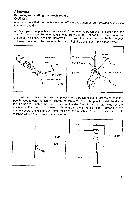
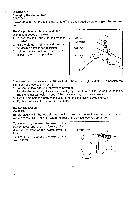
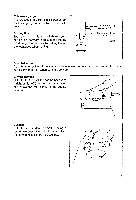
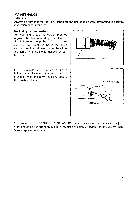
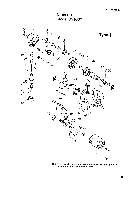
. OPERATION Changing the die position CAUTION: Always be sure that the tool is switched off and unplugged before changing the die posi- tion. The die position can be changed 360". To change it, proceed as follows. 1. Loosen the lock nut with the wrench Die provided. \+ 2. Pull the die holder slightly and turn it to the desired position for operation. 3. Tighten the lock nut to secure the die holder in the desired position. There are four positive stops at 90" each: 0".90" left and right and 180". To position the die to any of these positive stops: 1. Loosen the lock nut with the wrench provided. 2. Pull the die holder slightly and depress lightly while turning it to the desired position. The die holder will lock into one of the positive stop positions as desired. 3. Turn the die holder slightly to make sure that it is positively locked into position. 4. Tighten the lock nut to secure the die holder. To switch on, depress the rear of the switch lever and push it forward. Then depress the front of the switch lever to ,- Switch lever 6
-
 1
1 -
 2
2 -
 3
3 -
 4
4 -
 5
5 -
 6
6 -
 7
7 -
 8
8 -
 9
9 -
 10
10 -
 11
11 -
 12
12
 |
 |