Makita JN3201 Owners Manual - Page 5
Assembly, Operation
 |
View all Makita JN3201 manuals
Add to My Manuals
Save this manual to your list of manuals |
Page 5 highlights
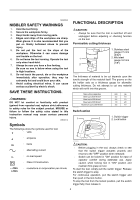
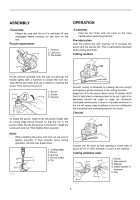
ASSEMBLY OPERATION CAUTION: • Always be sure that the tool is switched off and unplugged before carrying out any work on the tool. Punch replacement 1. Wrench 1 2. Lock nut 3. Die holder CAUTION: • Hold the tool firmly with one hand on the main handle when performing the tool. Pre-lubrication Coat the cutting line with machine oil to increase the punch and die service life. This is particularly important when cutting aluminum. Cutting method 2 3 013357 Fit the wrench provided onto the lock nut and tap the handle lightly with a hammer to loosen the lock nut. Take off the die holder and use a wrench to remove the screw. Then remove the punch. 1. Punch 1 2. Screw 2 3 3. Wrench 013358 To install the punch, insert it into the punch holder with its cutting edge facing forward so that the pin in the punch holder fits into the groove in the punch. Install the screw and lock nut. Then tighten them securely. 013359 Smooth cutting is achieved by holding the tool upright and applying gentle pressure in the cutting direction. Apply tool oil to the punch about every 10 meters (32.8 feet) of mild steel or stainless steel to be cut. Light oil or kerosene should be used to keep an aluminum lubricated continuously. Failure to lubricate aluminum in the cut will cause chips to adhere to the tool, dulling the die and punch and increasing load on the motor. Cutouts NOTE: • When installing the screw and lock nut, be sure to tighten securely. If they become loose during operation, the tool may break down. 1. Cutting edge 2. Punch 3. Groove 2 1 4. Punch holder 3 5. Pin 4 5 004785 013360 Cutouts can be done by first opening a round hole of about 42 mm (1-5/8") diameter or more in the material. Cutting stainless steel 1 2 004792 3 4 5 1. Screw 2. Hex wrench 3. Washer 4. Insert washer in between 5. Die 5
-
 1
1 -
 2
2 -
 3
3 -
 4
4 -
 5
5 -
 6
6 -
 7
7 -
 8
8 -
 9
9 -
 10
10 -
 11
11 -
12
-
13
-
14
-
15
-
16
-
17
-
18
-
19
-
20
-
21
-
22
-
23
-
24
 |
 |
