Makita XHU04Z XHU04Z Instruction Manual - Page 9
Maintenance
 |
View all Makita XHU04Z manuals
Add to My Manuals
Save this manual to your list of manuals |
Page 9 highlights
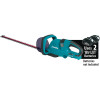
MAINTENANCE CAUTION: • Always be sure that the tool is switched off and the battery cartridge is removed before attempting to perform inspection or maintenance. • Never use gasoline, benzine, thinner, alcohol or the like. Discoloration, deformation or cracks may result. Cleaning the tool Clean out the tool by wiping off dust with a dry or soapdipped rag. Blade maintenance Smear the blade before and once per hour during operation using machine oil or similars. NOTE: • Before smearing the blade, remove the chip receiver. After operation, remove dust from both sides of the blade with wired brush, wipe it off with a rag and then apply enough low-viscosity oil, such as machine oil etc. and spray-type lubricating oil. CAUTION: • Do not wash the blades in water. Failure to do so may cause rust or damage on the tool. Removing or installing shear blade CAUTION: • Before removing or installing shear blade, always be sure that the tool is switched off and the battery cartridge is removed. • When replacing the shear blade, always wear gloves without removing blade cover so that hands and face does not directly contact the blade. Failure to do so may cause personal injury. NOTE: • Do not wipe off grease from the gear and crank. Failure to do so may cause damage to the tool. • For specific way of removing and installing shear blades refer to the reverse of a package for accessory shear blades. Removing the shear blades Reverse the tool and loosen four screws. 1 1. Blade cover 2 2. Screws 011157 NOTE: • Be careful not to get your hands dirty as grease is applied in the shear blade driving area. Remove the under cover. 1 3 1. Under cover 2. Blade cover 3. Screws 014772 Remove the plate. 1 2 1. Plate 011159 Set the crank at the angle as shown in the figure with a slotted screwdriver. 1. Crank 1 011256 Remove two screws from the shear blades and the shear blade unit will be taken out. 9
-
 1
1 -
2
-
3
-
 4
4 -
 5
5 -
 6
6 -
 7
7 -
 8
8 -
 9
9 -
 10
10 -
 11
11 -
 12
12 -
 13
13 -
 14
14 -
15
-
16
-
17
-
18
-
19
-
20
-
21
-
22
-
23
-
24
-
25
-
26
-
27
-
28
-
29
-
30
-
31
-
32
-
33
-
34
-
35
-
36
 |
 |
