Maytag CWE5800ACS Installation Instructions - Page 7
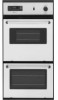
Install Oven - double oven
 |
UPC - 719881149059
View all Maytag CWE5800ACS manuals
Add to My Manuals
Save this manual to your list of manuals |
Page 7 highlights
WARNING Excessive Weight Hazard Use two or more people to move and install oven. Failure to do so can result in back or other injury. Install Oven 3. Securely fasten oven to cabinet using the 0.188 x 2.1" screws (4 for single oven, 6 for double oven) provided. Insert the screws through holes in decorative trim. To avoid cabinet damage, use the 0.140" diameter (number 28) drill bit to predrill the pilot holes before driving screws. Do not overtighten screws. 1. Using 2 or more people, lift oven partially into cabinet cutout. A Use the oven opening as an area to grip. NOTE: Push against seal area of oven front frame when B pushing oven into cabinet. Do not push against outside edges. 2. Push oven completely into cabinet and center oven into cabinet cutout. A. Decorative trim B. Insert screw. 4. Replace oven racks. 5. Grasp sides of the door and align slots in door with the hinge arms. 6. Slightly pull the door open as you slide the door down onto the hinge arms. The sliding action of the door will disengage the latches on the hinge arms. 7. Gently push the door downward until the door rests evenly on the hinges. 8. Close door. 9. Repeat for lower oven door. 10. Reconnect power. 11. Display panel will light briefly, and "PF" should appear in the display. 12. If display panel does not light, please reference the "Assistance or Service" section of the Use and Care Guide or contact the dealer from whom you purchased your oven. 7
-
 1
1 -
 2
2 -
 3
3 -
 4
4 -
 5
5 -
 6
6 -
 7
7 -
 8
8
 |
 |
