Maytag M0RXEMMWM User Instructions - Page 10
thecontrol
 |
UPC - 883049191713
View all Maytag M0RXEMMWM manuals
Add to My Manuals
Save this manual to your list of manuals |
Page 10 highlights
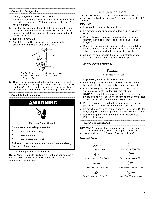
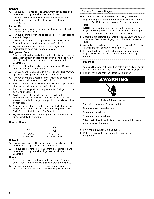
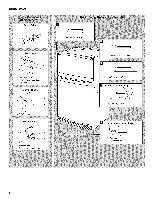
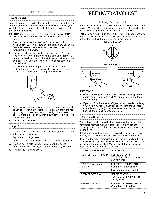
Style 2 Youcancontrothl eamounotfhumiditiynthemoisture-sealed crispeAr.djustthecontrotol anysettingbetweeLnOWand HIGH. LOW(openfo) rbeststoragoeffruitsandvegetablewsithskins. HIGH(closedfo) rbeststoragoeffreshl,eafyvegetables. To Turn the Ice Maker On/Off: To turn the ice maker ON, simply lower the wire shutoff arm. To manually turn the ice maker OFF, lift the wire shutoff arm to the OFF (arm up) position and listen for the click. NOTE: Your ice maker has an automatic shutoff. As ice is made, the ice cubes will fill the ice storage bin and the ice cubes will raise the wire shutoff arm to the OFF (arm up) position. Do not force the wire shutoff arm up or down. Style I To Turn the Ice Maker On/Off: To turn the ice maker ON, simply lower the wire shutoff arm. To manually turn the ice maker OFF, lift the wire shutoff arm to the OFF (arm up) position and listen for the click. NOTE: Your ice maker has an automatic shutoff. As ice is made, the ice cubes will fill the ice storage bin and the ice cubes will raise the wire shutoff arm to the OFF (arm up) position. Do not force the wire shutoff arm up or down. Ice Production Rate: • The ice maker should produce approximately of ice in a 24-hour period. 8 to 12 batches • To increase ice production, lower the freezer and refrigerator temperature. See "Using the Controls." Wait 24 hours between adjustments. • For maximum ice production (on some models), push the switch to ICE PLUS. The ice maker should produce 16 to 20 batches of ice in a 24-hour period in the Ice Plus mode. /J // A. Wire shutoff arm B. Ice level adjustment arm Ice Production Rate: • The ice maker should produce approximately 8 to 12 batches of ice in a 24-hour period with the ice level adjustment arm in the factory set 100% position. NOTE: Adjust the ice level by slightly pressing in on the ice level adjustment arm, to release it from the wire shutoff arm, and then moving it up or down to the desired setting. • To decrease the amount of ice produced, move the ice level adjustment arm to the 75% or 50% position. • For maximum ice production move the ice level adjustment arm to the 100% position. Remember • Allow 24 hours to produce the first batch of ice. Discard the first three batches of ice produced. • The quality of your ice will be only as good as the quality of the water supplied to your ice maker. Avoid connecting the ice maker to a softened water supply. Water softener chemicals (such as salt) can damage parts of the ice maker and lead to poor quality ice. If a softened water supply cannot be avoided, make sure the water softener is operating properly and is well maintained. • Do not use anything sharp to break up the ice in the bin. This can cause damage to the ice container and the dispenser mechanism. • Do not store anything on top of or in the ice maker or ice bin. 10
-
 1
1 -
2
-
3
-
4
-
 5
5 -
 6
6 -
 7
7 -
 8
8 -
 9
9 -
 10
10 -
 11
11 -
 12
12 -
 13
13 -
 14
14 -
 15
15 -
16
-
17
-
18
-
19
-
20
-
21
-
22
-
23
-
24
-
25
-
26
-
27
-
28
-
29
-
30
-
31
-
32
 |
 |
