Maytag MAL2000AXW Instruction Sheet - Page 2
Before you start, Riser Installation - pedestal
 |
View all Maytag MAL2000AXW manuals
Add to My Manuals
Save this manual to your list of manuals |
Page 2 highlights
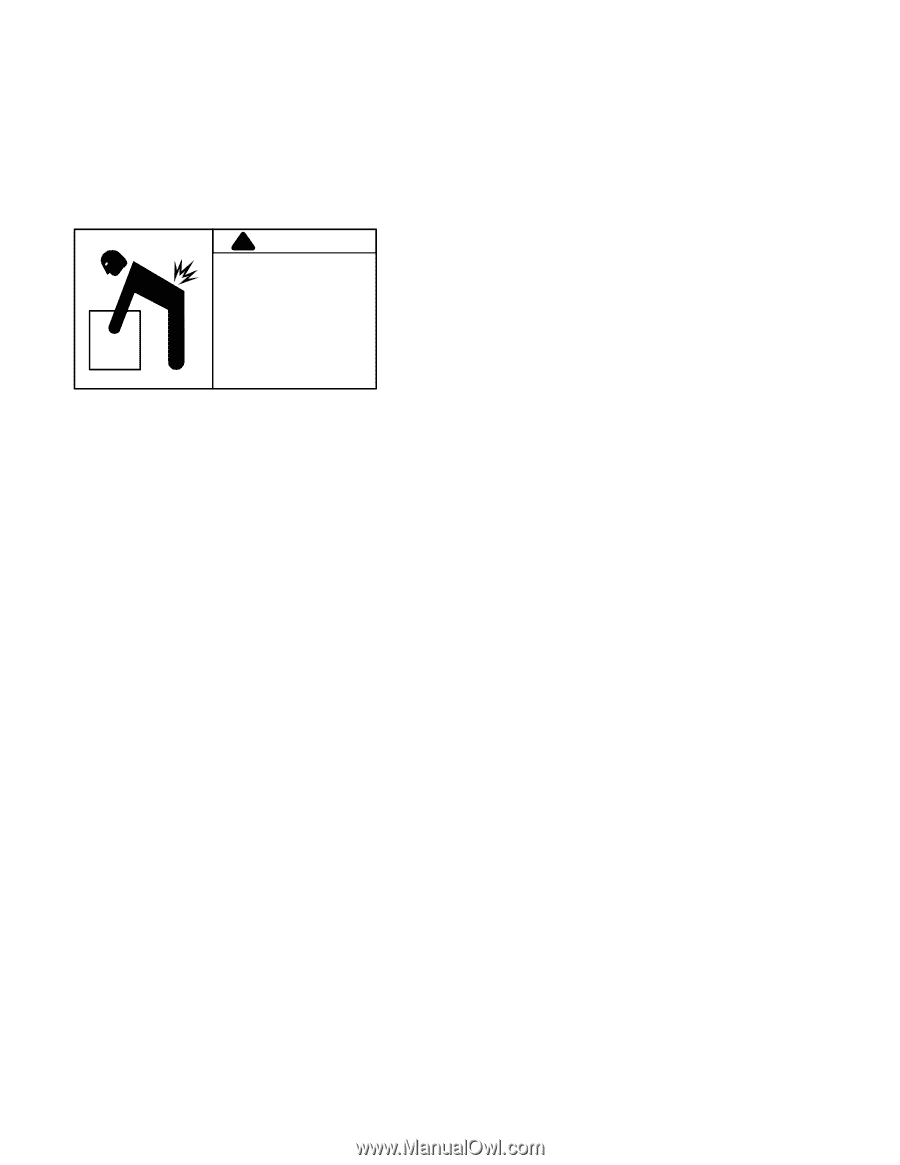
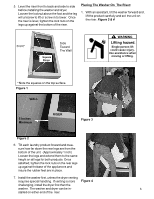
Before you start.... Important: If your washer and dryer are already installed, they MUST be uninstalled. If you need to uninstall your washer or dryer, locate the installation instructions that came with your laundry product. This information will prove useful when reinstalling the products. ! WARNING Lifting hazard. Single person lift could cause injury. Use assistance when moving or lifting. 2. Pull the dryer away from the wall enough to loosen the vent clamp. Loosen the vent clamp and carefully remove the exhaust vent from the dryer exhaust outlet. 3. Protect the floor with a large piece of cardboard cut from the pedestal carton. 4. Pull the dryer away from wall to make room for the pedestal to be positioned and position the dryer onto the cardboard. Go to " Pedestal Installation". Uninstalling the gas dryer: 1. Unplug the power supply cord and extinguish all open flames or smoking materials prior to proceeding. Uninstalling the washer: 1. Turn off the hot and cold water faucets. 2. Turn off the gas supply and disconnect the gas supply to the dryer. 2. Briefly start a wash cycle to release any pressure in the fill hoses. Press "Off" to stop the cycle. 3. Unplug the power supply cord. 4. Remove the "HOT" and "COLD" fill hoses from the back of the washer. Have a towel handy to catch spills. If spills occur, dry the floor prior to pedestal installation. 5. Disconnect the drain hose from the drain standpipe and drain any water in the hose into a bucket. 6. Protect the floor with a large piece of cardboard cut from the pedestal carton. 7. Pull the washer away from wall to make room for the pedestal to be positioned and position the washer onto the cardboard. Uninstalling the electric dryer: 1. Unplug the power cord from the outlet. Or, if hard wired, disconnect the power supply to the dryer at the circuit box and then remove the wire hook up at the dryer. 3. Pull the dryer away from the wall enough to loosen the vent clamp. Loosen the vent clamp and carefully remove the exhaust vent from the dryer exhaust outlet. 4. Protect the floor with a large piece of cardboard cut from the riser carton. 5. Pull the dryer away from wall to make room for the riser to be positioned and position the dryer onto the cardboard. Go to " Riser Installation". Riser Installation: 1. Locate the plastic bag containing the leveling legs and locking nuts. 2. Thread one locking nut onto each leveling leg. Thread the locking nut down on the threaded leg to within one inch of the foot. 3. Position the riser into the desired location. Figure 1 & 2 4. Position the rear of the riser a minimum of 5 inches from the wall. This will allow sufficient room for dryer venting, inlet hoses and drain hose attachments. This will enable access to the exhaust system for maintenance as recommended in the Dryer care & use manual. 2
-
 1
1 -
 2
2 -
 3
3 -
 4
4
 |
 |