Maytag MAL2000AXW Instruction Sheet - Page 4
Fuel Gas Code ANSI/Z223.1, latest revi
 |
View all Maytag MAL2000AXW manuals
Add to My Manuals
Save this manual to your list of manuals |
Page 4 highlights
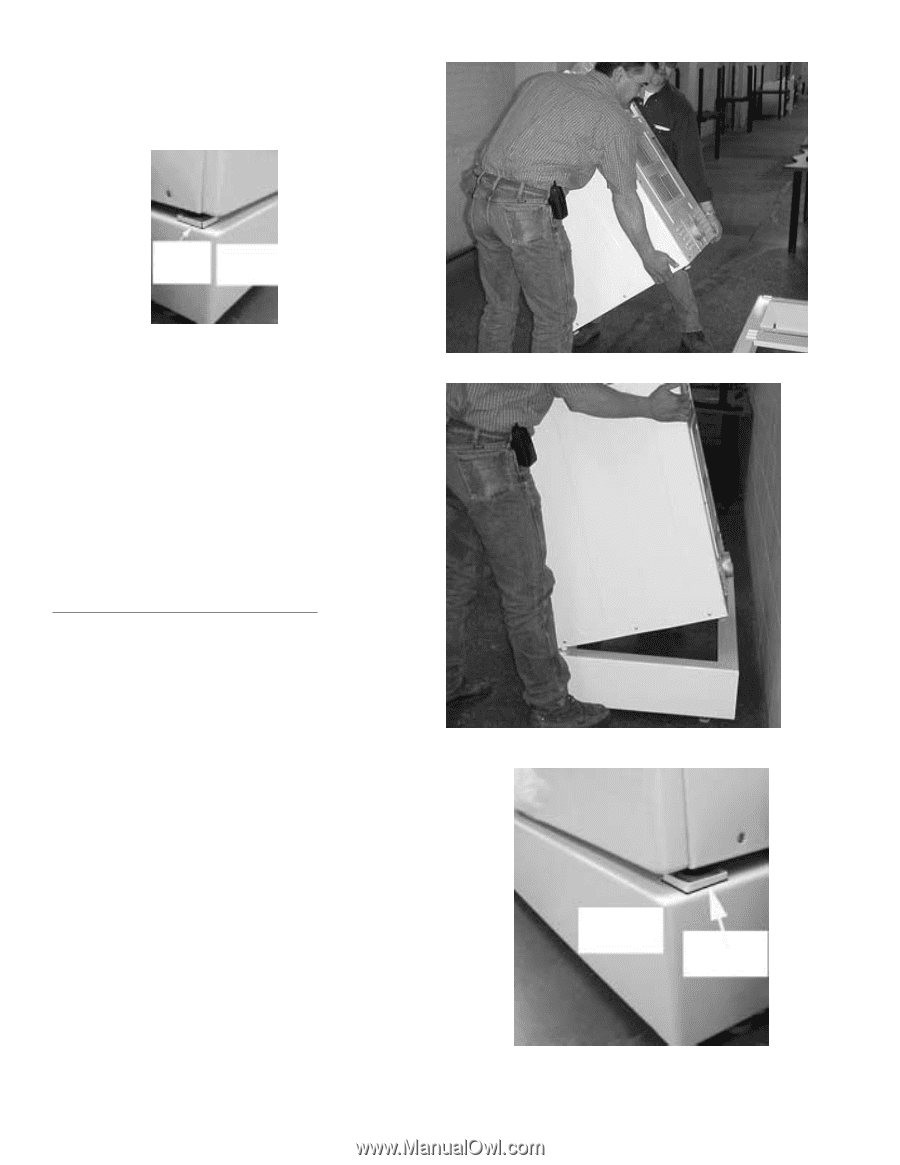
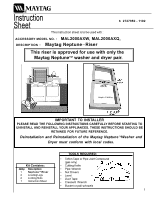
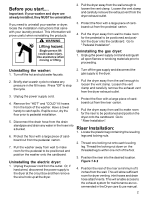
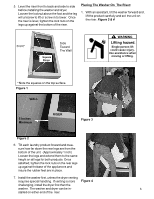
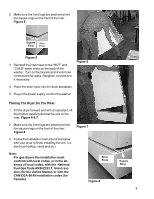
2. Make sure the front legs are positioned into the square rings on the front of the riser. Figure 5 Square Riser Ring Front Figure 5 3. Reinstall the inlet hoses to the "HOT" and "COLD" water inlets on the back of the washer. Turn on the faucets and check hose connections for leaks. Retighten connections if necessary. Figure 6 4. Place the drain hose into the drain standpipe. 5. Plug in the power supply cord for the washer. Placing The Dryer On The Riser: 1. Tilt the dryer forward and with an assistant, lift the product carefully and set the unit on the riser. Figure 6 & 7 2. Make sure the front legs are positioned into the square rings on the front of the riser. Figure 8 Figure 7 3. Follow the Installation Instructions that came with your dryer to finish installing the unit. (i.e. electrical hookup, vents and etc.) Note: For gas dryers the installation must conform with local codes, or in the absence of local codes, with the National Fuel Gas Code ANSI/Z223.1, latest revision (for the United States), or with the CAN/CGA-B149 installation codes (for Canada). Riser Front Figure 8 Square Ring 4
-
 1
1 -
 2
2 -
 3
3 -
 4
4
 |
 |