Maytag MDB6709AWQ Installation Instructions - Page 8
todetermine
 |
UPC - 883049154343
View all Maytag MDB6709AWQ manuals
Add to My Manuals
Save this manual to your list of manuals |
Page 8 highlights
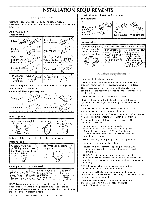
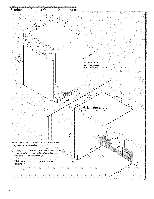
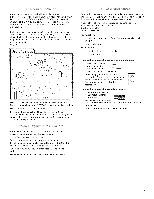
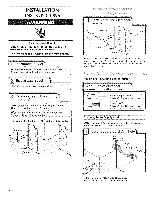
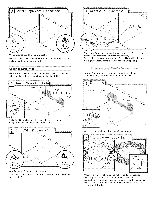
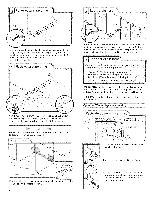
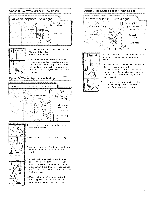
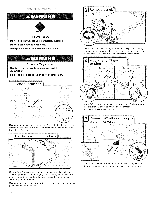
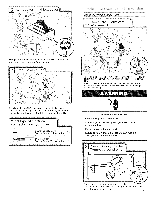
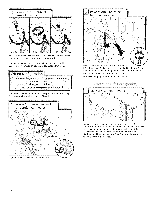
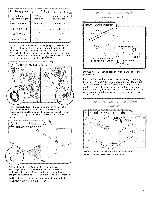
Slowlryoutewatesr upplyinethrougholeincabine(tI.fusing coppetur bingit,willbendandkinkeasilsyo, begentleL.)t shoulbdefarenougihntothecabineotpenintgoconnecittto thedishwashinelreot nthefrontleft sideofthedishwasher. Slowltyurnwatesr hutovffalveto"ONp"ositionF.luswh ater intoashallowpanunticl leatrogetridofparticlethsatcould clogtheinlevt alveT.urnshutovffalveto"OFFp"osition. IMPORTAANlTw:ayusseanewdrainhoseC. heclkocacl odes todeterminifeanairgapisrequired. Routderainhoseasshowtnhrougholeincabinetot thefront centeorfopeninwgheredrainconnectiwonillbemadeT.ape drainhosetothefloorinareashownT.hiswillprohibiittfrom movinwghendishwashisemr oveidntocabineotpening. , Option A; Waste disposer _n0 air gap i Option B, No Waste disP0ser-no air gap , Option C, Waste disposer : with air gap ' opt 0n D, No waste disp0ser- with air gap IMPORTANT: The drain hose connection of the disposer or a waste tee must be made before the drain trap and at least 20" (50.8 cm) above the floor where the dishwasher will be installed. Helpful Tip: To reduce vibration of the hose, keep the hose away from the floor. Option A, Waste disposer - no air gap t ;t ; :i 1. Using a hammer and screwdriver, knock plug into disposer. 2. Use needle-nose pliers to remove plug. Ifneededr,illa 11/(23".8cm)diametheor leincabinewtallorside oftheopenincglosetsotthesink. 3. Attach drain hose to disposer inlet with large silver drain hose clamp (provided). Use pliers to squeeze clamp open and move into position.
-
 1
1 -
2
-
 3
3 -
 4
4 -
 5
5 -
 6
6 -
 7
7 -
 8
8 -
 9
9 -
 10
10 -
 11
11 -
 12
12 -
 13
13 -
14
-
15
-
16
-
17
-
18
-
19
-
20
-
21
-
22
-
23
-
24
-
25
-
26
-
27
-
28
-
29
-
30
-
31
-
32
-
33
-
34
-
35
-
36
-
37
-
38
-
39
-
40
 |
 |
