Maytag MET8665XS Owners Manual - Page 11
Oven Use
 |
UPC - 883049199337
View all Maytag MET8665XS manuals
Add to My Manuals
Save this manual to your list of manuals |
Page 11 highlights
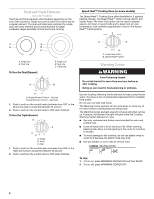
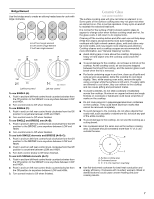
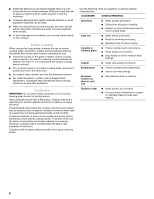
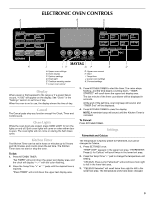
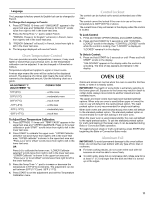
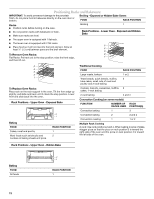
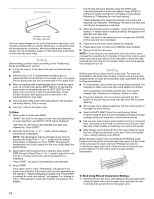
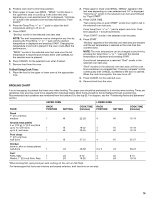
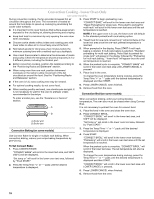
Language The Language is factory preset to English but can be changed to French. To Change the Language to French: 1. Press SETTINGS 10 times until "LANGUAGE" appears in the upper text area and "ENGLISH. Press (+) for French" scrolls twice from right to left in the lower text area. 2. Press the Temp/Time "+" pad to select French. "FRENCH. Press (+) for English" will scroll, in French, twice from right to left in the lower text area. 3. "FRENCH Selected" will scroll, in French, twice from right to left in the lower text area. 4. The language displayed will now be French. Oven Temperature Control The oven provides accurate temperatures; however, it may cook faster or slower than your previous oven, so the temperature calibration can be adjusted. It can be changed in Fahrenheit or Celsius. Temperature adjustment applies to upper or lower ovens. A minus sign means the oven will be cooler by the displayed amount. The absence of a minus sign means the oven will be warmer by the displayed amount. Use the following chart as a guide. ADJUSTMENT °F (ADJUSTMENT °C) COOKS FOOD 10°F (6°C) ...a little more 20°F (12°C) ...moderately more 30°F (17°C) ...much more -10°F (-6°C) ...a little less -20°F (-12°C) ...moderately less -30°F (-17°C) ...much less To Adjust Oven Temperature Calibration: 1. Press SETTINGS 11 times until "TEMP CALIB" appears in the upper text area and "UPPER CALIBRATE. Press (+) for Lower calibrate or push START" scrolls twice from right to left in the lower text area. 2. Press START to calibrate the upper oven. "UPPER Calibrate selected" will scroll twice from right to left in the lower text area. "UPPER calibrate" is shown in the upper text area and "Press (+) or (-) for offset" scrolls twice from right to left in the lower text area. OR Press (+) to calibrate the lower oven. "LOWER Calibrate selected" scrolls twice from right to left in the lower text area. "LOWER Calibrate" is shown in the upper text area and "Press (+) or (-) to set offset" scrolls twice from right to left in the lower text area. 3. Press the Temp/Time "+" pad to increase or decrease the temperature in 5°F (3°C) increments. The adjustment can be set between 30°F (17°C) and -30°F (-17°C). 4. Press START to set the adjustment and exit the Temperature Calibration menu. Control Lockout The control can be locked out to avoid unintended use of the oven. The control cannot be locked if the oven is in use or the oven temperature is 400°F (205°C) or above. The current time of day will remain in the display when the control is locked. To Lock Control: 1. Press and release UPPER CANCEL and LOWER CANCEL. 2. Press and hold START for 3 seconds or until "CONTROL LOCKED" scrolls in the display. "CONTROL LOCKED" scrolls while the control is locking, then "LOCKED" is displayed. "LOCKED" remains lit in the display. To Unlock Control: 1. Press and hold START for 3 seconds or until "Press and hold START" scrolls in the display. "UNLOCKING" appears in the display while the control is unlocking. The time of day appears and remains in the display. OVEN USE Odors and smoke are normal when the oven is used the first few times, or when it is heavily soiled. IMPORTANT: The health of some birds is extremely sensitive to the fumes given off. Exposure to the fumes may result in death to certain birds. Always move birds to another closed and wellventilated room. The upper and lower ovens have rapid and standard preheat options. When only one oven is used (either upper or lower) the oven in use will default to the rapid preheat option. The rapid preheat option is only recommended for single-rack baking. When both ovens are used simultaneously, the ovens will default to the standard preheat option. The standard preheat option is recommended for multi-rack baking in the lower oven. When the lower oven is used independently, the oven will default to the rapid preheat option. To use the standard preheat option for multi-rack baking in the lower oven, it can be selected during Bake or Convection Bake operation. To toggle between single or multi-rack baking, press START after beginning the Bake or Convection Bake mode. Aluminum Foil IMPORTANT: To avoid permanent damage to the oven bottom finish, do not line the oven bottom with any type of foil, liner or cookware. ■ For best cooking results, do not cover entire rack with foil because air must be able to move freely. ■ To catch spills, place foil on rack below dish. Make sure foil is at least ¹⁄₂" (1.3 cm) larger than the dish and that it is turned up at the edges. 11
-
 1
1 -
2
-
3
-
4
-
5
-
 6
6 -
 7
7 -
 8
8 -
 9
9 -
 10
10 -
 11
11 -
 12
12 -
 13
13 -
 14
14 -
 15
15 -
 16
16 -
17
-
18
-
19
-
20
-
21
-
22
-
23
-
24
-
25
-
26
-
27
-
28
-
29
-
30
-
31
-
32
-
33
-
34
-
35
-
36
-
37
-
38
-
39
-
40
-
41
-
42
-
43
-
44
-
45
-
46
-
47
-
48
-
49
-
50
-
51
-
52
-
53
-
54
-
55
-
56
 |
 |
