Maytag MFW2055FRZ Use & Care Guide - Page 10
Handle Installation, Door Closing and Door Alignment
 |
View all Maytag MFW2055FRZ manuals
Add to My Manuals
Save this manual to your list of manuals |
Page 10 highlights
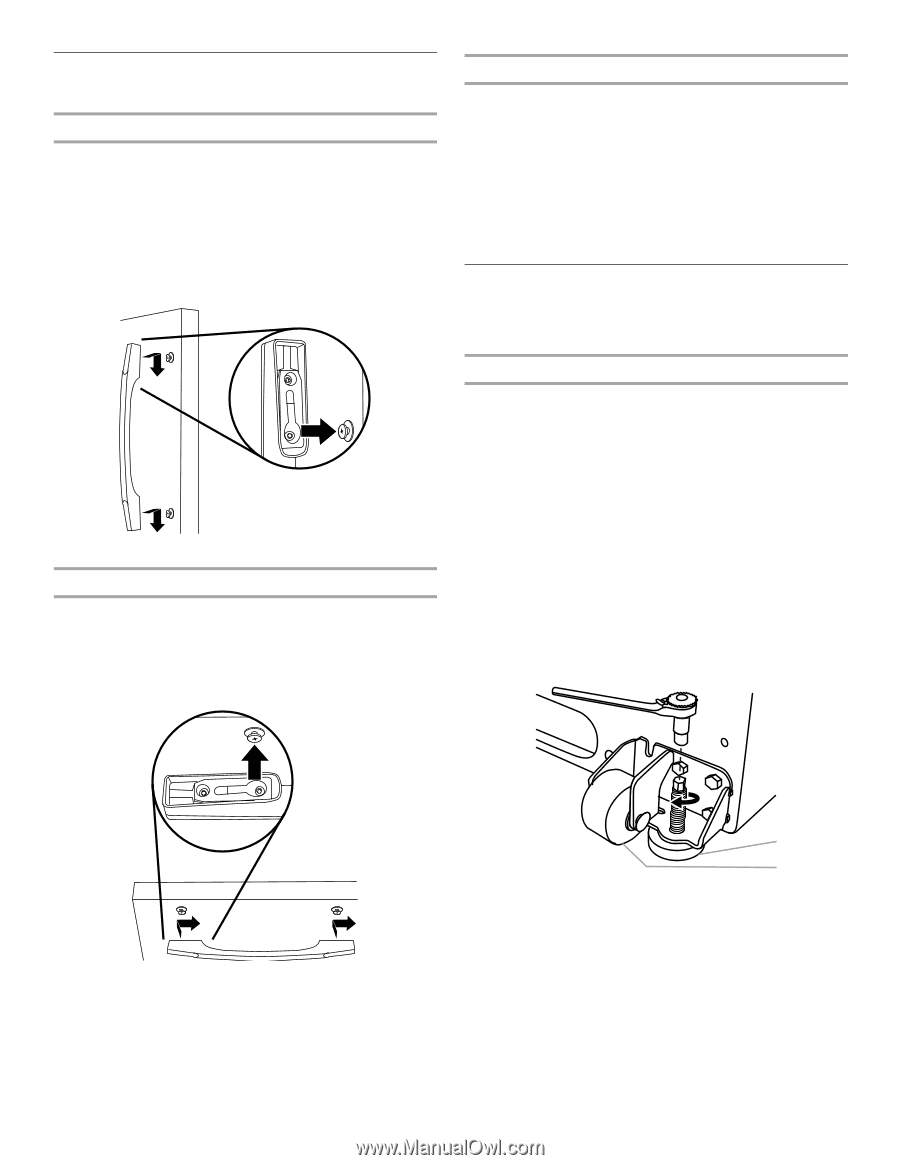
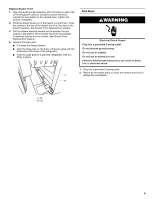
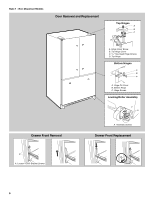
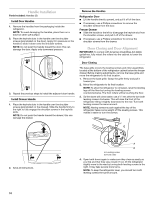
Handle Installation Parts Included: Handles (3) Install Door Handles 1. Remove the handles from the packaging inside the refrigerator. NOTE: To avoid damaging the handles, place them on a towel or other soft surface. 2. Place the keyhole slots in the handle over the shoulder screws (preinstalled on the door). Apply firm pressure on the handle to slide it down onto the shoulder screws. NOTE: Do not push the handle toward the door; this can damage the door. Apply only downward pressure. 3. Repeat the previous steps to install the adjacent door handle. Install Drawer Handle 1. Place the keyhole slots in the handle over the shoulder screws (preinstalled on the drawer). Slide the handle firmly to the right to fully engage the shoulder screws in the keyhole slots. NOTE: Do not push the handle toward the drawer; this can damage the drawer. Remove the Handles Refrigerator Door ■ Lift the handle directly upward, and pull it off of the door. ■ If necessary, use a Phillips screwdriver to remove the shoulder screws from the door. Freezer Drawer ■ Slide the handle to the left to disengage the keyhole slot from the shoulder screws, and pull it off of the drawer. ■ If necessary, use a Phillips screwdriver to remove the shoulder screws from the drawer. Door Closing and Door Alignment IMPORTANT: To comply with American Disabilities Act (ADA) guidelines, fully retract the rollers into the cabinet to lower the refrigerator. Door Closing The base grille covers the leveling screws and roller assemblies located at the bottom of the refrigerator cabinet below the freezer drawer. Before making adjustments, remove the base grille and move the refrigerator to its final location. 1. Remove the base grille. Grasp the grille firmly and pull it toward you. 2. Move the refrigerator to its final location. NOTE: To allow the refrigerator to roll easier, raise the leveling legs off the floor by turning the leveling screws counterclockwise. The front rollers will be touching the floor. 3. So the doors will close easier, use a ¹⁄₄" hex driver to turn both leveling screws clockwise. This will raise the front of the refrigerator tilting it slightly downward to the rear. Turn both leveling screws the same amount. NOTE: Having someone push against the top of the refrigerator takes some weight off the leveling screws. This makes it easier to turn the screws. ¹⁄₄" 2. Save all instructions. A B A. Leveling screw B. Front roller 4. Open both doors again to make sure they close as easily as you like and that they stay closed. If not, tilt the refrigerator slightly more to the rear by turning both leveling screws to the right. It may take several more turns. NOTE: To keep the refrigerator level, you should turn both leveling screws the same amount. 10
-
 1
1 -
2
-
3
-
4
-
 5
5 -
 6
6 -
 7
7 -
 8
8 -
 9
9 -
 10
10 -
 11
11 -
 12
12 -
 13
13 -
 14
14 -
 15
15 -
16
-
17
-
18
-
19
-
20
-
21
-
22
-
23
-
24
-
25
-
26
-
27
-
28
-
29
-
30
-
31
-
32
-
33
-
34
-
35
-
36
-
37
-
38
-
39
-
40
-
41
-
42
-
43
-
44
-
45
-
46
-
47
-
48
-
49
-
50
-
51
-
52
-
53
-
54
-
55
-
56
-
57
-
58
-
59
-
60
-
61
-
62
-
63
-
64
-
65
-
66
-
67
-
68
-
69
-
70
-
71
-
72
-
73
-
74
-
75
-
76
-
77
-
78
-
79
-
80
-
81
-
82
-
83
-
84
-
85
-
86
-
87
-
88
 |
 |