Maytag MGD5500FC Instruction Sheet - Page 1
Maytag MGD5500FC Manual
 |
View all Maytag MGD5500FC manuals
Add to My Manuals
Save this manual to your list of manuals |
Page 1 highlights
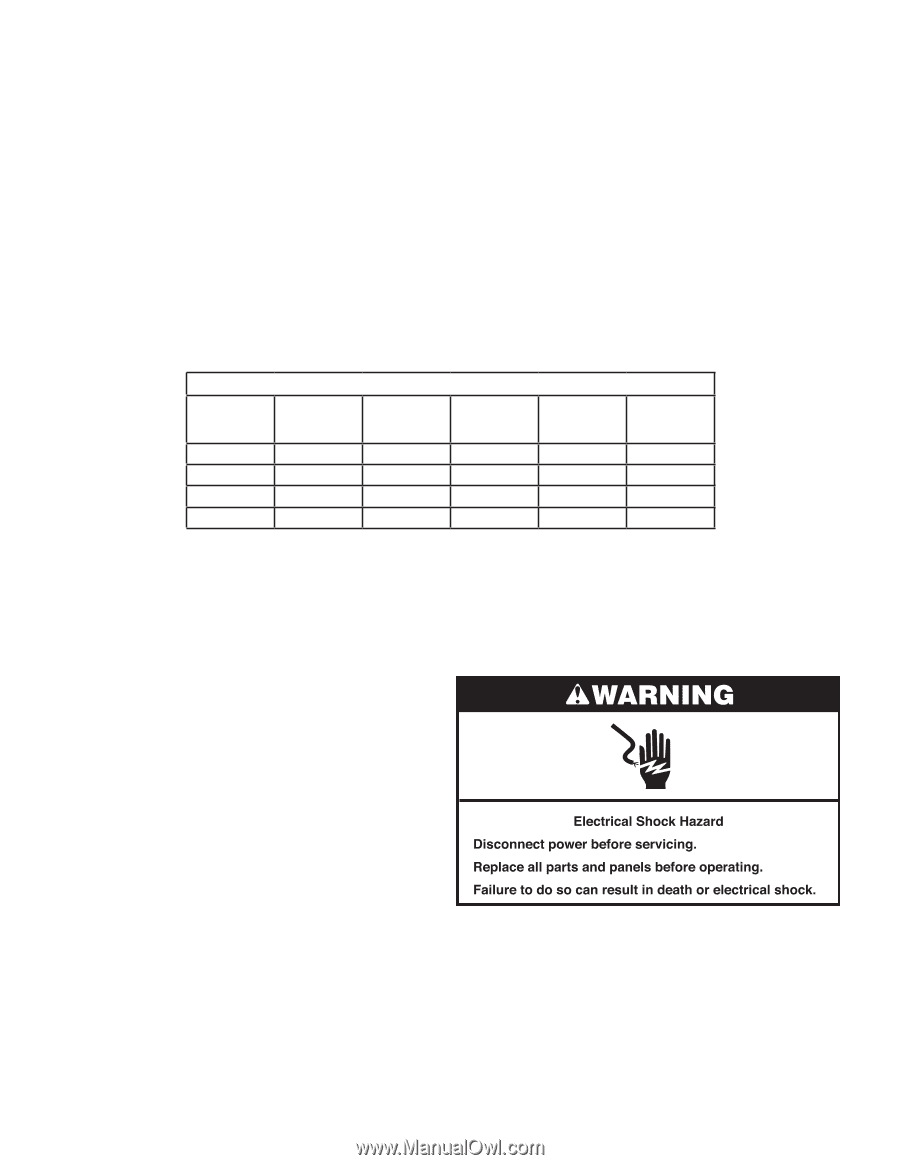
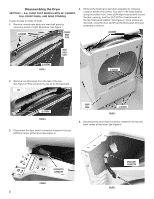
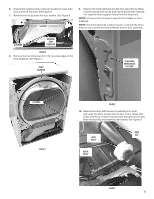
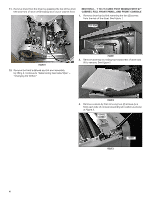
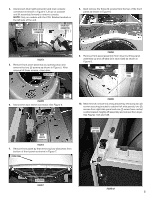
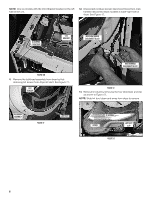
Installation Instructions for W10606694 L.P. (Propane and Butane) Gas Conversion Kit Converting 20,000 BTU/hr Gas Burners from Natural Gas to Liquefied Petroleum (Bottled Gas) Parts included in Kit: 1 Instruction Sheet 1 Blocking Pin 1 Orifice, Burner-Butane No. .049 1 Orifice, Burner-Propane No. 55 1 Label, Rating Plate Conversion (English) 1 Label, Rating Plate Conversion (French) 1 Label, Conversion Record (English) 1 Label, Conversion Record (French) 1 Label, Burner Baseplate (English/French) Tools and Accessories required: 1/4" Socket and Ratchet Wrench 1/4" Nut Driver 5/16" Nut Driver Phillips-Head Screwdriver T-20 Torx®-head Screwdriver† Pliers or Flat-Head Screwdriver Section 1 2 3 4 Cabinet Width 29" 27" 29" 27" Disassembling the Dryer Console Location Rear Front Rear Rear Front Panel Type Full Full Full Toe Panel Rated Capacity (cubic feet) 8.8+ 7 to 7.5 7 to 7.6 7 to 7.5 Page 2 4 8 9 Warning: This conversion kit shall be installed by a qualified service agency in accordance with the manufacturer's instructions and all applicable codes and requirements of the authority having jurisdiction. The information in these instructions must be followed to minimize the risk of fire or explosion or to prevent property damage, personal injury, or death. The qualified service agency is responsible for the proper installation of this kit. The installation is not proper and complete until the operation of the converted appliance is checked as specified in the manufacturer's instructions supplied with this kit. This dryer has been manufactured for use with Natural Gas. Installation of this conversion kit converts the dryer for use with L.P. gas with supply pressure between 8" (203 mm) and 13" (330 mm) water column. If this dryer is converted for use with L.P. gas by means of this kit, the input rating will be 20,000 BTU's per hour, for altitudes up to 10,000 feet (3,048 m). For installations above 2,000 feet (610 m), contact a qualified service agency for derating instructions. NOTE: A qualified service technician is any person or representative of a company who is experienced or trained in servicing gas equipment and is familiar with necessary precautions. Canada Only THIS CONVERSION KIT SHALL BE CARRIED OUT IN ACCORDANCE WITH THE REQUIREMENTS OF THE PROVINCIAL AUTHORITIES HAVING JURISDICTION AND IN ACCORDANCE WITH THE REQUIREMENTS OF THE CAN-B49.1 AND CAN1-B149.2 INSTALLATION CODE. NOTE: Read these instructions before proceeding. IMPORTANT: The LP Conversion Kit you received is an approved kit for converting your gas dryer from natural to LP propane or butane gas. The kit number shown on the Burner Data Label located on the Burner Base may not match the kit you receive due to kit consolidation. †® Torx and T-20 are registered trademarks of Acument Intellectual Properties, LLC. W10740674A Preparing for Kit Installation READ THOROUGHLY AND FOLLOW STEPS 1. Unplug dryer or disconnect power. 2. Turn off gas supply using the shut-off valve that supplies the dryer. 3. Fill out information on the appropriate Conversion Record Label (English or French) and apply in a conspicuous location adjacent to model and serial tag located in the door well. Go to Section 1, 2, or 3, depending on model.
-
 1
1 -
 2
2 -
 3
3 -
 4
4 -
 5
5 -
 6
6 -
 7
7 -
8
-
9
-
10
-
11
-
12
-
13
-
14
-
15
-
16
-
17
-
18
-
19
-
20
-
21
-
22
-
23
-
24
-
25
-
26
-
27
-
28
 |
 |