Miele CVA 6401 Product Manual - Page 2
Important information, Control and display elements, Making drinks, Cleaning and care, Description, - white
 |
View all Miele CVA 6401 manuals
Add to My Manuals
Save this manual to your list of manuals |
Page 2 highlights
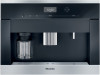
Important information Control and display elements Before using for the first time ĜĜThe coffee machine must be correctly installed and connected before it is used for the first time. Operation You are in the drinks menu when the following appears in the display: For more information please see the Operating and Installation Instructions. ĺĺ Clean the appliance and the milk cont- ainer thoroughly before filling with water and coffee beans. ĺĺ Please see the information in the "Cleaning and care" chapter in the Operating To make a drink, tap one of the drink buttons. and Installation Instructions. On/Off button Turn on and off Selecting a menu and navigating within Drink buttons For making a menu Water hardness Program the coffee machine to the water hardness level of your area so that it fun- Espresso Coffee Cappuccino Latte macchiato To select a menu, tap the relevant button. The arrow keys allow you to display further settings. ctions correctly and does not get dama- Additional programs Additional drinks such as long coffee, caffè latte, hot The setting which is currently selected will ged. milk, milk froth, and hot water have a check beside it. See the Operating and Installation Instruc- "Maintenance" menu tions for detailed information. Display Shows information about the current action or status "Back" For returning to the previous menu, canceling unwanted actions Arrow keys For displaying further options and highlighting a selection. OK button Profile Settings Two portions k Parameters Optical interface For confirming display messages and saving settings For saving and editing profiles For altering settings, displaying information or checking which settings are currently active. For making two portions of a drink Check or change settings for preparing coffee (for Miele customer service only) To select a setting use the arrow keys until the setting you want is highlighted in white. Tap the OK button to confirm your selection. Exiting a menu or canceling an action To leave the current menu, tap the "Back" button. If none of the buttons have been tapped for a while, the coffee machine will revert to the drinks menu. Description Front view On/Off button Control and display elements Door handle Steam and hot water dispenser Drip tray Main dispenser (height-adjustable with lighting) Milk container with lid Interior view Ground coffee chute cover Brew unit Ground coffee chute Grind control lever Coffee bean container Water container Drip tray with grid Waste container Drip tray inside machine door Main dispenser connector cap Service lid CONTROL AND DISPLAY ELEMENTS GUIDE TO THE MACHINE / PREPARING FOR USE MAKING DRINKS Preparing for use Filling the water container Change the water every day to prevent a build-up of bacteria. ĺĺ Fill the water container with fresh, cold tap water up to the "Max" marker. Filling the coffee bean container Attention! Only put roasted espresso/coffee beans in the container. ĺĺ Open the appliance door and remove the coffee bean container. ĺĺ Fill the container with roasted coffee beans. Making drinks Making espresso or coffee ĺĺ Place a cup under the main dispenser. ĺĺ Tap the button for the desired drink. Espresso Coffee In "Additional programs": Long coffee The desired drink will be dispensed from the main dispenser into the cup. Making two portions ĺĺ Place one cup under each of the coffee spouts. Drinks with milk Notes on the milk container Milk is not cooled in the milk container. Therefore, place the milk flask in the refrigerator if you are not going to use milk for a while. Cold milk (below 55°F/13°C) gives the best results for milk froth. Preparing drinks with milk ĺĺ Place a suitable cup underneath the main dispenser. ĺĺ Tap the button for the desired drink. Cappuccino Latte macchiato "Additional programs": Caffè Latte, Hot Milk, Milk Froth Hot water Place a suitable cup underneath the hot water dispenser. ĺĺ Tap and select "Hot water." Then tap the OK button. Hot water will be dispensed into the vessel under the hot water dispenser. To cancel preparation, ĺĺ tap the OK button. The coffee machine will now prepare the desired drink. ĺĺ Tap . ĺĺ Tap the sensor button for the drink you want. Two portions of the desired drink will be dispensed from the main dispenser. Lid Sensor rod Milk intake tube Glass container ĺĺ Fill the milk container up to a maximum of 3/4" (2 cm) below the rim. Canceling preparation Drink preparation can be canceled as long as "Stop" is visible in the display. ĺĺ Tap the OK button. When making two portions at once, tapping the OK button once will stop the first drink. To cancel both portions, ĺĺ keep your finger on the OK button a bit longer. ĺĺ Push the milk container into the coffee machine. Cleaning and care Please observe the detailed information on cleaning and care in the Operating and Installation Instructions. Clean the coffee machine every day after use. Recommended frequency Daily (at the end of the day) Once a week (or more often if needed) Once a month When prompted as required What do I need to clean / maintain? -- Milk container with lid -- Water container -- Waste unit -- Drip tray and drip tray cover -- Main dispenser -- Main dispenser connector -- Clean the milk valve with the cleaning brush -- Interior -- Small drip tray inside the machine door -- Brew unit -- Front of the machine (especially immediately after descaling) -- Lubricate the cap on the main dispenser connector -- Milk pipework (with the original Miele cleaning agent for milk pipework) -- Brew unit (degrease with the cleaning tablets) -- Descale the machine -- Coffee bean container -- Blocked milk pipework The following parts must not be cleaned in a dishwasher: -- Main dispenser cover -- Milk container lid -- Brew unit -- Coffee bean container and lid -- Service flap All other removable components of the coffee machine are dishwasher safe. CVA 6401, CVA 6405 en - US, CA 1414 M.-Nr. 09 741 530 / 00
-
 1
1 -
 2
2
 |
 |
