Milwaukee Tool 6185-20 Operators Manual - Page 7
Maintenance
 |
View all Milwaukee Tool 6185-20 manuals
Add to My Manuals
Save this manual to your list of manuals |
Page 7 highlights
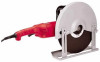
Preventing Kickback Kickback is the sudden reaction to a pinched wheel which could cause a cut-off machine that is not under control to lift up and out of the workpiece towards the user. Take the precautions below to help prevent kickback. 1. Maintain a firm grip and correct body position. Position arms and body to control the backward and upward reaction force of kickback. Control the cut-off machine at all times. 2. Set the depth of cut for no more than necessary. The less wheel exposed, the less chance of binding and kickback. Before cutting, be sure shoe assembly is tight. 3. Always allow the wheel to come to a full stop before removing the cut-off machine from the workpiece. Never remove the cut-off machine from a cut while the wheel is moving. If restarting or correcting direction in mid-cut, allow the wheel to coast to a stop, back the cut-off machine up a few inches and center it in the kerf before restarting. 4. Stay alert. Any distraction can cause twisting or binding. Repetitive cuts may lull the user into careless movements. 5. Do not force the tool. Forcing a cut-off machine reduces control and cutting efficiency. If kickback should occur, continue to grip the cut-off machine firmly and immediately release trigger. Wheel Selection WARNING To reduce the risk of injury, only use Type "1" abrasive and diamond cutting wheels with at least 1/8" thickness which is rated with a maximum safe operating speed at least 5400 RPM. Read safety information sup- plied with cut-off wheel. Non-metallic Materials When cutting non-metallic materials, use a silicone carbide abrasive cut-off wheel of at least 1/8" thickness which is rated with a maximum safe operating speed at least 5400 RPM. READ SAFETY INFORMATION SUPPLIED WITH CUT-OFF WHEEL. Always wear proper safety equipment, including a dust mask. Metallic Materials When cutting metals, use an aluminum oxide abrasive cut-off wheel of at least 1/8" thickness which is rated with a maximum safe operating speed at least 5400 RPM. READ SAFETY INFORMATION SUPPLIED WITH CUT-OFF WHEEL. Protect everyone in the area from sparks. Masonry Materials When cutting masonry materials, use dry diamond wheels or silicone carbide abrasive cut-off wheel of at least 1/8" thickness which is rated with a maximum safe operating speed at least 5400 RPM. READ SAFETY INFORMATION SUPPLIED WITH CUTOFF WHEEL. Always wear proper safety equipment, including a dust mask. Making a Cut 1. Unplug tool. Select a cutting depth and adjust the height of the shoe assembly as described in "Adjusting the Depth of Cut". 2. Plug the tool in and pull the trigger. Allow the motor to reach full speed and then slowly lower the wheel into the workpiece. NOTE: Always start the cut gently pushing the saw through the workpiece. Do not bang or bump a wheel when starting or during a cut. Always push the saw away from you 3. While cutting, keep the shoe flat against the workpiece and maintain a firm grip. Do not force the cut-off machine through the work. Forcing a cut-off machine can cause kickback. Make repeated passes at depths of less than 1/2" to achieve the desired depth. Cutting at a depth of more than 1/2" will damage the wheel. Frequently clean dust from air vents and guards. 4. When the cut is finished, always allow the motor to come to a complete stop. Never remove the cut-off machine from a cut while the wheel is moving. 5. If making a partial cut, restarting a cut or correcting cut direction, allow the wheel to come to a complete stop. To resume cutting, center the wheel in the kerf (cutting slot), back the saw away from cutting edge a few inches, pull the trigger and reenter the cut slowly. NOTE: If the cut-off machine stalls, maintain a firm grip and release the trigger immediately. Correct the problem before continuing. Overload Protector To protect the motor from damage, the overload protector automatically turns off the tool when the motor is overloaded. The tool can become overloaded when cutting material that is too thick or cutting materials too quickly. To prevent the overload protector from activating, always follow the cutting instructions under the "Operation" section. Do not attempt to defeat or override the overload protector. If the tool turns off automatically: 1. Release the trigger and unplug the tool. 2. Remove the wheel from the workpiece. 3. Allow the tool to rest for a miniumum of two minutes. 4. Reset the overload protector by pushing in the button. 5. Allow the tool to run under no load to ensure the tool has properly cooled. 6. Resume the cut. When restarting a saw in the workpiece, center the saw wheel in the kerf, or cut, and check that the wheel is not engaged into the material. If saw wheel is binding, it may walk up or KICKBACK from the workpiece as the saw is restarted. MAINTENANCE WARNING To reduce the risk of injury, always unplug the tool before performing any maintenance. Never disassemble the tool. Contact a MILWAUKEE service facility for ALL repairs. Maintaining Tools Keep your tool in good repair by adopting a regular maintenance program. Inspect your tool for issues such as undue noise, misalignment or binding of moving parts, breakage of parts, or any other condition that may affect the tool operation. Return the tool to a MILWAUKEE service facility for repair. After six months to one year, depending on use, return the tool to a MILWAUKEE service facility for inspection. WARNING To reduce the risk of personal injury, electric shock and damage, never immerse your tool in liquid or allow a liquid to flow inside it. 7
-
 1
1 -
 2
2 -
 3
3 -
 4
4 -
 5
5 -
 6
6 -
 7
7 -
 8
8 -
 9
9 -
 10
10 -
 11
11 -
 12
12 -
13
-
14
-
15
-
16
-
17
-
18
-
19
-
20
-
21
-
22
-
23
-
24
 |
 |
