Motorola LS700 User Guide - Page 8
Switching your Digital Photo Frame to standby - how
 |
UPC - 899705002477
View all Motorola LS700 manuals
Add to My Manuals
Save this manual to your list of manuals |
Page 8 highlights
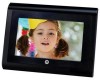
Mounting your Digital Photo Frame on the wall Mounting holes TIP Your Digital Photo Frame will also power up automatically when the power source is connected and switched on for the first time. Switching your Digital Photo Frame to standby mode Press and hold f button for 2 seconds. Viewing your first slideshow Use wall mounting screws (not included) to mount your Digital Photo Frame securely to the wall. Switching on your Digital Photo Frame Press any key to power up your Digital Photo Frame. If you have inserted a memory card with pictures that are in JPEG format, the slideshow starts automatically when you switch on your Digital Photo Frame. TIP If there is no memory card inserted the first time you switch on your Digital Photo Frame, preloaded photos will be displayed in slideshow. 8 Getting started
-
 1
1 -
2
-
 3
3 -
 4
4 -
 5
5 -
 6
6 -
 7
7 -
 8
8 -
 9
9 -
 10
10 -
 11
11 -
 12
12 -
 13
13 -
14
-
15
-
16
-
17
-
18
-
19
-
20
 |
 |
