Motorola MOTOSLVR L7 User Manual - Page 34
Print Options, Print Marked, Files, Print, Print Marked Files, Template, Change, Select, Settings
 |
View all Motorola MOTOSLVR L7 manuals
Add to My Manuals
Save this manual to your list of manuals |
Page 34 highlights
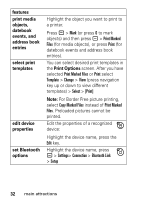
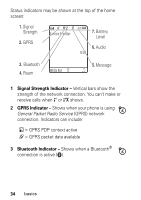
features print media objects, datebook events, and address book entries select print templates edit device properties set Bluetooth options Highlight the object you want to print to a printer. Press - > Mark (or press 0 to mark objects) and then press - > Print Marked Files (for media objects), or press Print (for datebook events and address book entries). You can select desired print templates in the Print Options screen. After you have selected Print Marked Files or Print select Template > Change > View (press navigation key up or down to view different templates) > Select > [Print] Note: For Border Free picture printing, select Copy Marked Files instead of Print Marked Files. Preloaded pictures cannot be printed. Edit the properties of a recognized device: Highlight the device name, press the Edit key. Highlight the device name, press - > Settings> Connection > Bluetooth Link > Setup 32 main attractions
-
 1
1 -
2
-
3
-
4
-
5
-
6
-
7
-
8
-
9
-
10
-
11
-
12
-
13
-
14
-
15
-
16
-
17
-
18
-
19
-
20
-
21
-
22
-
23
-
24
-
25
-
26
-
27
-
28
-
 29
29 -
 30
30 -
 31
31 -
 32
32 -
 33
33 -
 34
34 -
 35
35 -
 36
36 -
 37
37 -
 38
38 -
 39
39 -
40
-
41
-
42
-
43
-
44
-
45
-
46
-
47
-
48
-
49
-
50
-
51
-
52
-
53
-
54
-
55
-
56
-
57
-
58
-
59
-
60
-
61
-
62
-
63
-
64
-
65
-
66
-
67
-
68
-
69
-
70
-
71
-
72
-
73
-
74
-
75
-
76
-
77
-
78
-
79
-
80
-
81
-
82
-
83
-
84
-
85
-
86
-
87
-
88
-
89
-
90
-
91
-
92
-
93
-
94
-
95
-
96
-
97
-
98
-
99
-
100
-
101
-
102
-
103
-
104
-
105
-
106
-
107
-
108
-
109
-
110
-
111
-
112
-
113
-
114
-
115
-
116
-
117
-
118
-
119
-
120
-
121
-
122
-
123
-
124
-
125
-
126
-
127
-
128
-
129
-
130
-
131
-
132
-
133
-
134
-
135
-
136
-
137
-
138
-
139
-
140
-
141
-
142
-
143
-
144
-
145
-
146
-
147
-
148
-
149
-
150
-
151
-
152
-
153
-
154
-
155
-
156
-
157
-
158
-
159
-
160
-
161
-
162
-
163
-
164
-
165
-
166
-
167
-
168
-
169
-
170
-
171
-
172
-
173
-
174
-
175
-
176
-
177
-
178
-
179
-
180
-
181
-
182
-
183
-
184
-
185
-
186
-
187
-
188
-
189
-
190
-
191
-
192
-
193
-
194
-
195
-
196
-
197
-
198
-
199
-
200
-
201
-
202
-
203
-
204
-
205
-
206
-
207
-
208
-
209
-
210
-
211
-
212
-
213
-
214
-
215
-
216
-
217
-
218
 |
 |
