Motorola SB5100 Installation Manual - Page 17
Installing a Single User, SURFboard Cable Modem Installation Manual, Cable connections - cd
 |
UPC - 612572073193
View all Motorola SB5100 manuals
Add to My Manuals
Save this manual to your list of manuals |
Page 17 highlights
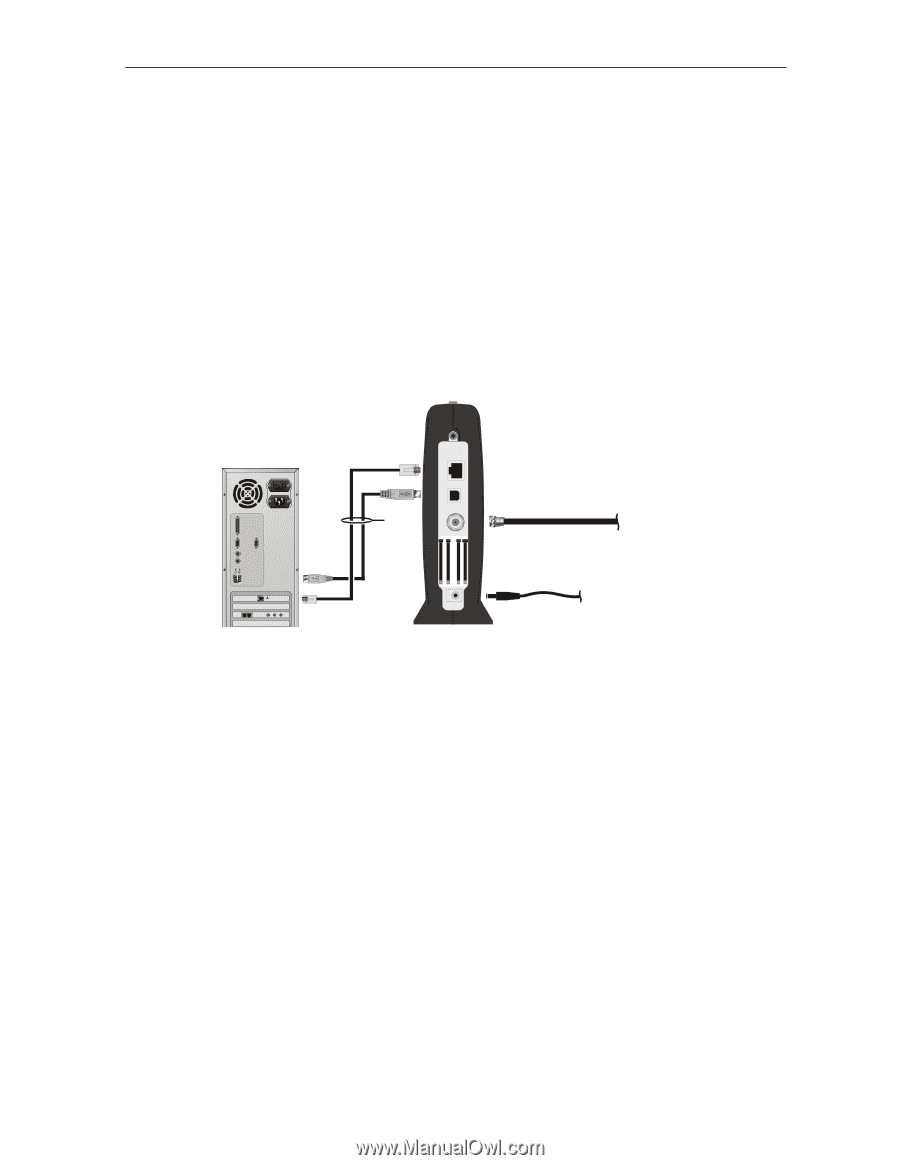
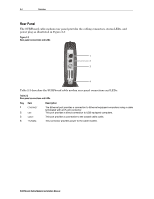
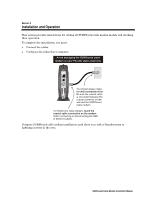
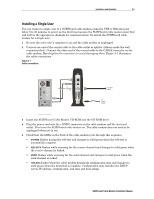
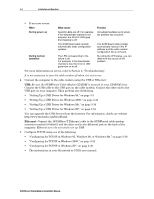
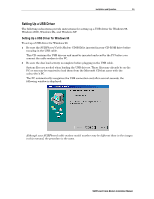
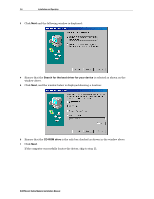
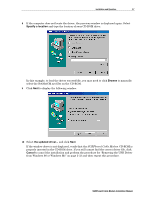
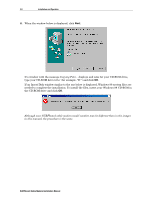
Installation and Operation 3-3 Installing a Single User You can connect a single user to a SURFboard cable modem using the USB or Ethernet port. Allow 5 to 30 minutes to power up the first time because the SURFboard cable modem must find and lock on the appropriate channels for communications. To install the SURFboard cable modem for a single user: 1 Be sure the subscriber's computer is on and the cable modem is unplugged. 2 Connect one end of the coaxial cable to the cable outlet or splitter (Always make the wall connection first). Connect the other end of the coaxial cable to the CABLE connector on the cable modem. Hand-tighten the connectors to avoid damaging them. Figure 3-1 illustrates the cable connections: Figure 3-1 Cable connections ETHERNET USB To Ethernet or USB +12VDC CABLE CUSTOMERS/N:BCDFGHJKLMNP S/N: PPPPMMYJJJSSSSSCAABBCCCC HFC MACID: ABCDEF012345 USB CPEMAC ID:ABDCEF012345 To cable outlet To power outlet 3 Insert the SURFboard Cable Modem CD-ROM into the CD-ROM drive. 4 Plug the power cord into the +12VDC connector on the cable modem and the electrical outlet. This turns the SURFboard cable modem on. The cable modem does not need to be unplugged when not in use. 5 Check that the LEDs on the front of the cable modem cycle through this sequence: # POWER flashes during the self-test and changes to solid green when the self-test is successfully complete. # RECEIVE flashes while scanning for the receive channel and changes to solid green when the receive channel is locked. # SEND flashes while scanning for the send channel and changes to solid green when the send channel is locked. # ONLINE flashes while the cable modem downloads configuration data and changes to solid green when the download is complete. Configuration data includes the DHCP server IP address, configuration, and time and date stamp. SURFboard Cable Modem Installation Manual
-
 1
1 -
2
-
3
-
4
-
5
-
6
-
7
-
8
-
9
-
10
-
11
-
 12
12 -
 13
13 -
 14
14 -
 15
15 -
 16
16 -
 17
17 -
 18
18 -
 19
19 -
 20
20 -
 21
21 -
 22
22 -
23
-
24
-
25
-
26
-
27
-
28
-
29
-
30
-
31
-
32
-
33
-
34
-
35
-
36
-
37
-
38
-
39
-
40
-
41
-
42
-
43
-
44
-
45
-
46
-
47
-
48
-
49
-
50
-
51
-
52
-
53
-
54
-
55
-
56
-
57
-
58
-
59
-
60
-
61
-
62
-
63
-
64
-
65
-
66
-
67
-
68
-
69
-
70
-
71
-
72
-
73
-
74
-
75
-
76
-
77
-
78
-
79
-
80
-
81
-
82
-
83
-
84
-
85
-
86
-
87
-
88
-
89
-
90
-
91
-
92
-
93
-
94
-
95
-
96
-
97
-
98
-
99
-
100
 |
 |