Motorola TK30 TK30 - User Guide - Page 10
ounting nut.
 |
View all Motorola TK30 manuals
Add to My Manuals
Save this manual to your list of manuals |
Page 10 highlights
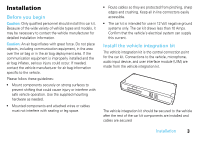
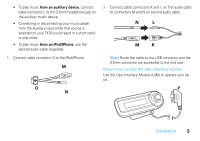
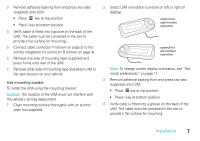
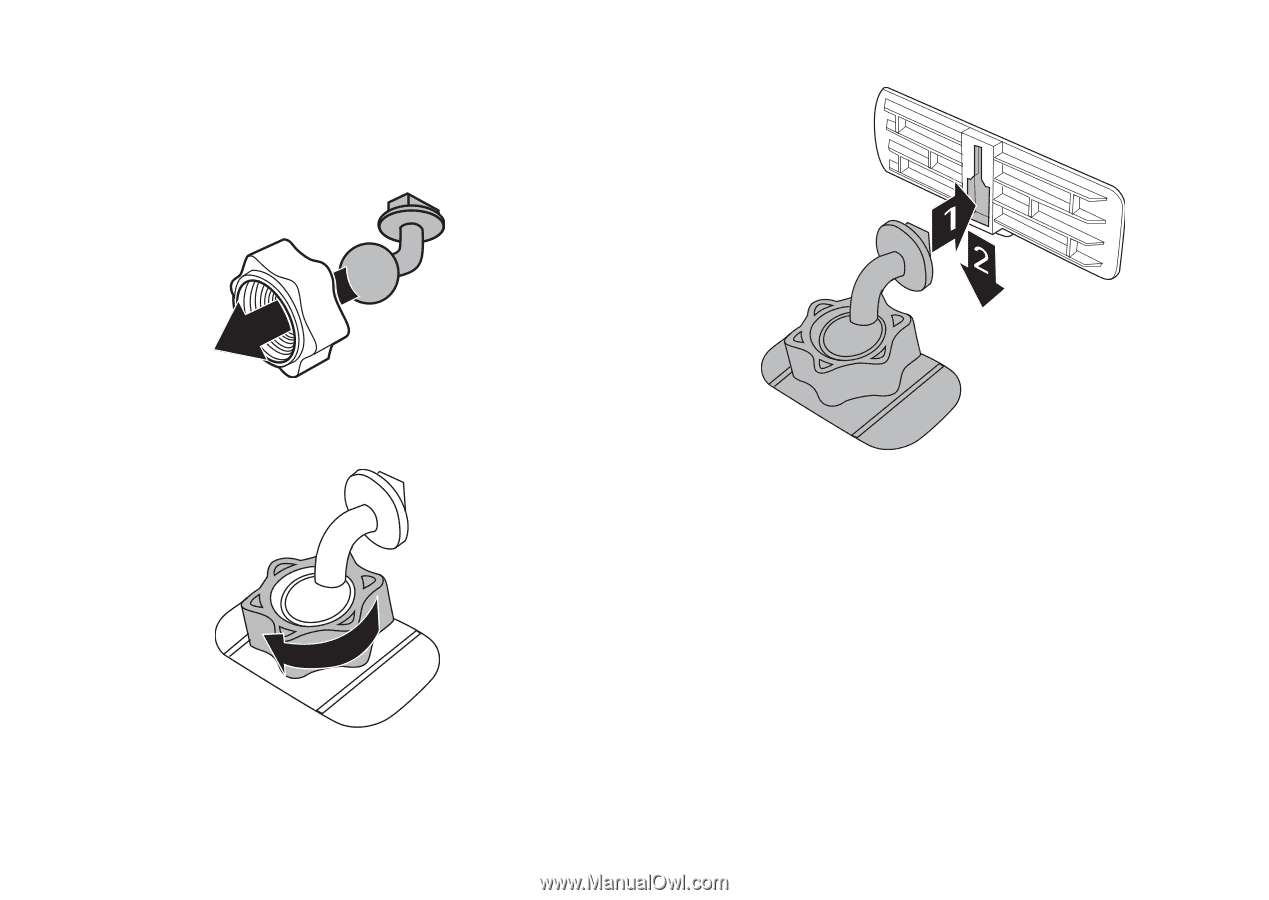
5 Connect cable connector P (shown on page 5) to the junction box connector B (shown on page 4). 6 Place mounting nut (straight or curved) onto selected mounting arm. 8 Slide mounting bracket onto arm. 7 Push arm into mounting base, and fasten onto base using mounting nut. 9 Attach mounting base to flat spot location on your vehicle. 10 Attach one side of mounting tape (supplied) to back of mounting bracket. 11 Remove other side of mounting tape on bracket, and press the UIM firmly into place. 8 Installation
-
 1
1 -
2
-
3
-
4
-
 5
5 -
 6
6 -
 7
7 -
 8
8 -
 9
9 -
 10
10 -
 11
11 -
 12
12 -
 13
13 -
 14
14 -
 15
15 -
16
-
17
-
18
-
19
-
20
-
21
-
22
-
23
-
24
-
25
-
26
-
27
-
28
-
29
-
30
-
31
-
32
-
33
-
34
-
35
-
36
 |
 |
8
Installation
5
Connect cable connector P (shown on page 5) to the
junction box connector B (shown on page 4).
6
Place
m
ounting nut (straight or curved) onto selected
m
ounting ar
m
.
7
Push ar
m
into
m
ounting base, and fasten onto base
using
m
ounting nut.
8
Slide
m
ounting bracket onto ar
m
.
9
Attach
m
ounting base to flat spot location on your
vehicle.
10
Attach one side of
m
ounting tape (supplied) to back of
m
ounting bracket.
11
Re
m
ove other side of
m
ounting tape on bracket, and
press the UIM fir
m
ly into place.