NEC NP-PE401H User's Manual - Page 56
How to use web browser to control your projector - service manual
 |
View all NEC NP-PE401H manuals
Add to My Manuals
Save this manual to your list of manuals |
Page 56 highlights
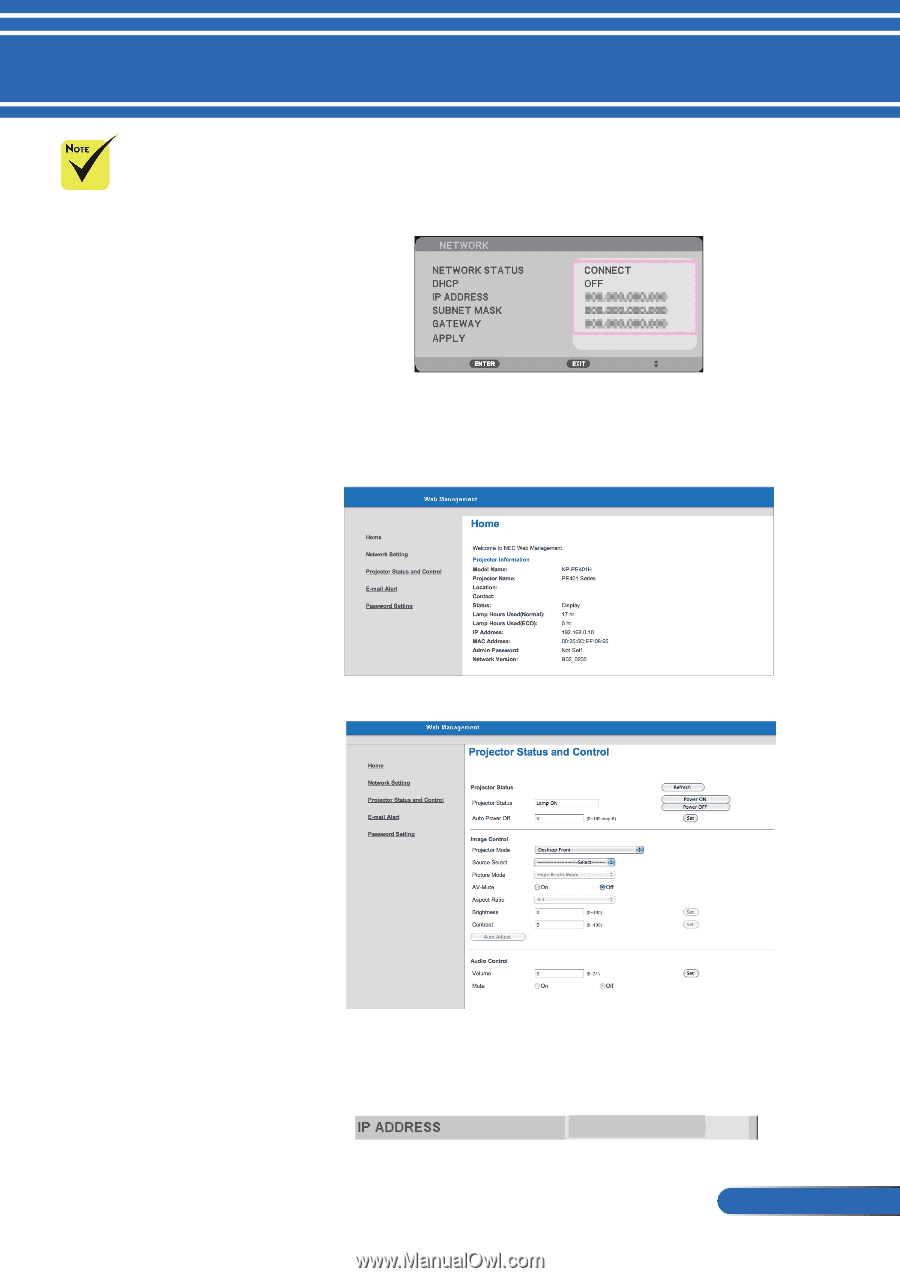
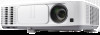
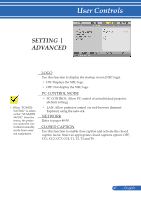
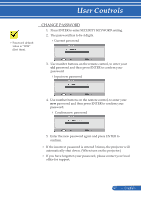
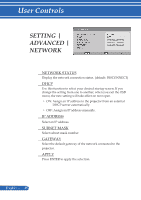
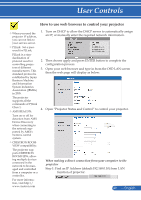
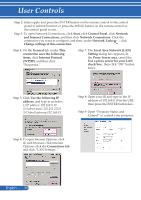
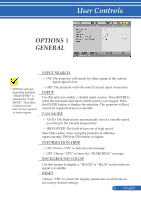
User Controls How to use web browser to control your projector When you used the projector IP address, you can not link to your service server. PJLink: Set a password for PJLink. PJLink is a standardization of protocol used for controlling projectors of different manufacturers. This standard protocol is established by Japan Business Machine and Information System Industries Association (JBMIA) in 2005. The projector supports all the commands of PJLink Class 1. AMX BEACON: Turn on or off for detection from AMX Device Discovery when connecting to the network supported by AMX's NetLinx control system. CRESTRON ROOMVIEW compatibility: The projector supports CRESTRON ROOMVIEW, allowing multiple devices connected in the network to be managed and controlled from a computer or a controller. For more information, visit http:// www.crestron.com 1. Turn on DHCP to allow the DHCP server to automatically assign an IP, or manually enter the required network information. 2. Then choose apply and press ENTER button to complete the configuration process. 3. Open your web browser and type in from the OSD LAN screen then the web page will display as below: 4. Open "Projector Status and Control" to control your projector. When making a direct connection from your computer to the projector Step 1: Find an IP Address (default:192.168.0.10) from LAN function of projector. 192.168.0.10 49 ... English
-
 1
1 -
2
-
3
-
4
-
5
-
6
-
7
-
8
-
9
-
10
-
11
-
12
-
13
-
14
-
15
-
16
-
17
-
18
-
19
-
20
-
21
-
22
-
23
-
24
-
25
-
26
-
27
-
28
-
29
-
30
-
31
-
32
-
33
-
34
-
35
-
36
-
37
-
38
-
39
-
40
-
41
-
42
-
43
-
44
-
45
-
46
-
47
-
48
-
49
-
50
-
 51
51 -
 52
52 -
 53
53 -
 54
54 -
 55
55 -
 56
56 -
 57
57 -
 58
58 -
 59
59 -
 60
60 -
 61
61 -
62
-
63
-
64
-
65
-
66
-
67
-
68
-
69
-
70
-
71
-
72
-
73
-
74
-
75
-
76
-
77
-
78
-
79
-
80
-
81
-
82
-
83
-
84
-
85
-
86
-
87
 |
 |