NEC NP-PE401H User's Manual - Page 57
Local Area Network LAN, and Internet Connections
 |
View all NEC NP-PE401H manuals
Add to My Manuals
Save this manual to your list of manuals |
Page 57 highlights
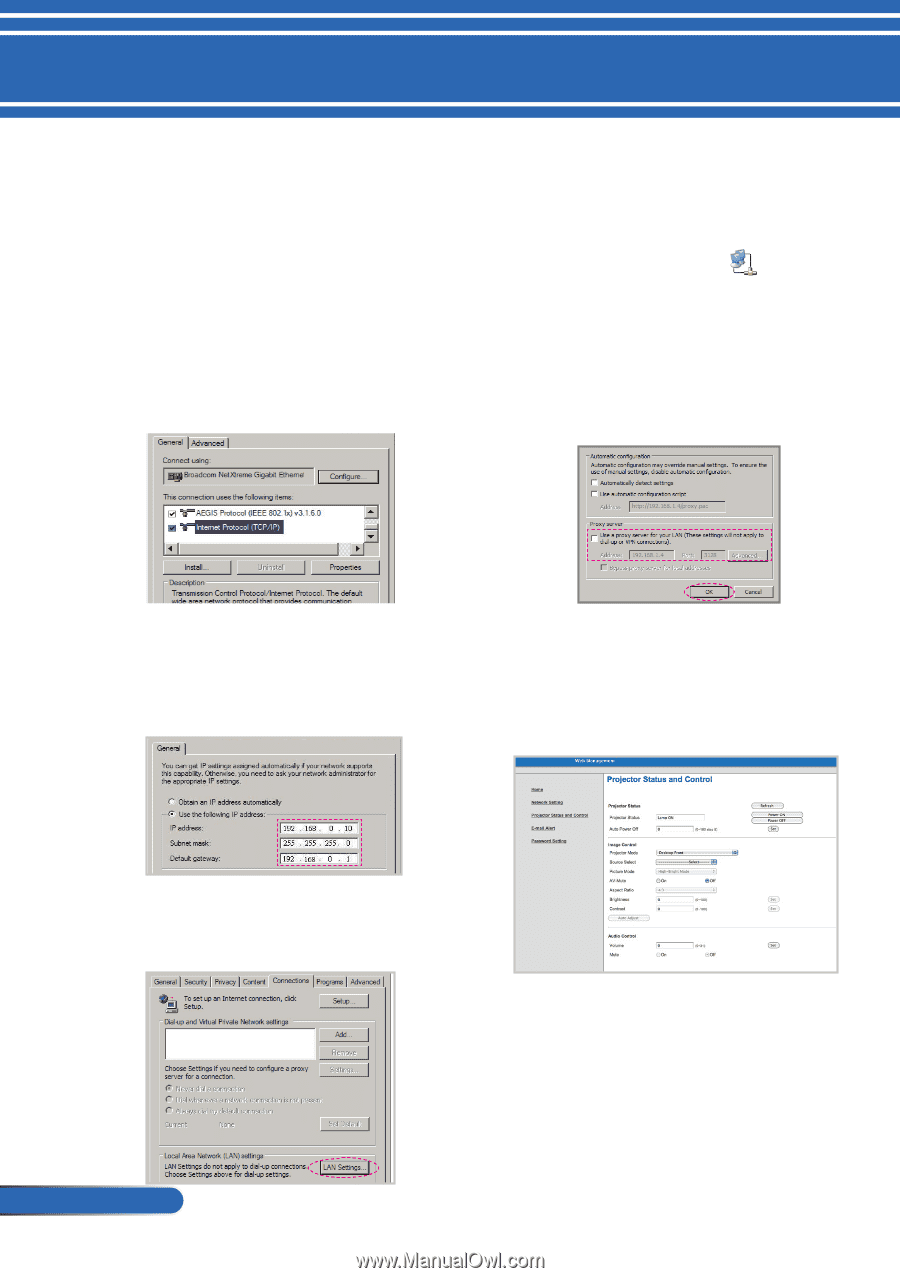
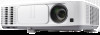
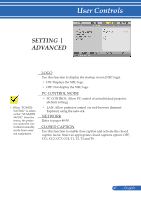
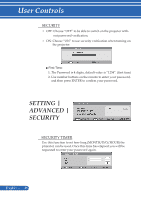
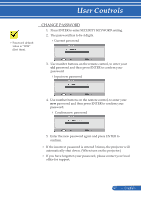
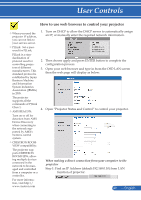
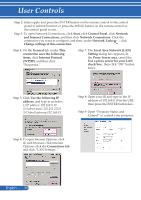
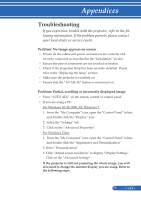
User Controls Step 2: Select apply and press the ENTER button on the remote control or the control panel to submit function or press the MENU button on the remote control or the control panel to exit. Step 3: To open Network Connections, click Start, click Control Panel, click Network and Internet Connections, and then click Network Connections. Click the connection you want to configure, and then, under Network Tasks , click Change settings of this connection. Step 4: On the General tab, under This connection uses the following items, click Internet Protocol (TCP/IP), and then click "Properties." Step 7: The Local Area Network (LAN) Setting dialog box appears, In the Proxy Server area, cancel the Use a proxy server for your LAN check box., then click "OK" button twice. Step 5: Click Use the following IP address, and type in as below: 1) IP address: 192.168.0.10 2) Subnet mask: 255.255.255.0 3) Default gateway:192.168.0.1 Step 8: Open your IE and type in the IP address of 192.168.0.10 in the URL then press the ENTER button key. Step 9: Open "Projector Status and Control" to control your projector. Step 6: To open Internet Options, click IE web browser, click Internet Options, click the Connections tab and click "LAN Settings..." English ... 50
-
 1
1 -
2
-
3
-
4
-
5
-
6
-
7
-
8
-
9
-
10
-
11
-
12
-
13
-
14
-
15
-
16
-
17
-
18
-
19
-
20
-
21
-
22
-
23
-
24
-
25
-
26
-
27
-
28
-
29
-
30
-
31
-
32
-
33
-
34
-
35
-
36
-
37
-
38
-
39
-
40
-
41
-
42
-
43
-
44
-
45
-
46
-
47
-
48
-
49
-
50
-
51
-
 52
52 -
 53
53 -
 54
54 -
 55
55 -
 56
56 -
 57
57 -
 58
58 -
 59
59 -
 60
60 -
 61
61 -
 62
62 -
63
-
64
-
65
-
66
-
67
-
68
-
69
-
70
-
71
-
72
-
73
-
74
-
75
-
76
-
77
-
78
-
79
-
80
-
81
-
82
-
83
-
84
-
85
-
86
-
87
 |
 |