NEC VT491 VT49/490/491/590/595/695 UM
NEC VT491 - SVGA LCD Projector Manual
 |
UPC - 050927254161
View all NEC VT491 manuals
Add to My Manuals
Save this manual to your list of manuals |
NEC VT491 manual content summary:
- NEC VT491 | VT49/490/491/590/595/695 UM - Page 1
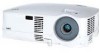
Portable Projector VT695/VT595/VT590/VT490/VT59/VT49 User's Manual - NEC VT491 | VT49/490/491/590/595/695 UM - Page 2
of this user's manual may not be reprinted in part or whole without permission. (2) The contents of this user's manual are subject to change this user's manual; however, should you notice any questionable points, errors or omissions, please contact us. (4) Notwithstanding article (3), NEC will not - NEC VT491 | VT49/490/491/590/595/695 UM - Page 3
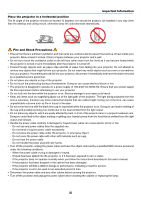
Important Information Safety Cautions Precautions Please read this manual carefully before using your NEC VT695/VT595/VT590/VT490/VT59/VT49 projector and keep the manual handy for future reference. Your serial number is located on the bottom of your projector. Record it here: CAUTION To turn off - NEC VT491 | VT49/490/491/590/595/695 UM - Page 4
unit EXCEPT those specified by NEC Corporation of America in this manual. Failure to comply with this government regulation could void your right to operate this equipment. This equipment has been tested and found to comply with the limits for a Class B digital device, pursuant to Part 15 of the FCC - NEC VT491 | VT49/490/491/590/595/695 UM - Page 5
Important Information Place the projector in a horizontal position The tilt angle of the projector should not exceed 10 degrees, nor should the projector be installed in any way other than the desktop and ceiling mount, otherwise lamp life could decrease dramatically. 10˃ - NEC VT491 | VT49/490/491/590/595/695 UM - Page 6
a high-pressure mercury lamp as a light source. A lamp has a characteristic that its brightness gradually decreases with age. Also repeatedly turning the lamp on and off will increase the possibility of its lower brightness. CAUTION: When removing the lamp from a ceiling-mounted projector, make sure - NEC VT491 | VT49/490/491/590/595/695 UM - Page 7
1 ᕢ Introduction to the Projector 2 ᕣ Part Names of the Projector 3 Attaching the supplied carrying handle (VT695, VT595, VT590 and VT490 only 4 Top Features 5 Terminal Panel Features 6 ᕤ Part Names of the Remote Control 7 Battery Installation 8 Remote Control Precautions 8 Operating Range - NEC VT491 | VT49/490/491/590/595/695 UM - Page 8
30 ᕤ Changing Lamp Mode 31 ᕥ Preventing the Unauthorized Use of the Projector 31 ᕦ Using the Optional Remote Mouse Receiver (NP01MR Reset 49 6. Maintenance 50 ᕡ Cleaning or Replacing the Filters 50 ᕢ Cleaning the Cabinet and the Lens 51 ᕣ Replacing the Lamp 52 7. Appendix 55 ᕡ Troubleshooting - NEC VT491 | VT49/490/491/590/595/695 UM - Page 9
ever need to ship your projector. Projector AUTO ADJ. SOURCE EXIT ON/STAND BY SELECT LAMP MODE ADJ. R-CLICK EXIT FREEZE OFF MAGNIFY PIC-MUTPEOWER ON UP PAGE DOWN Remote control (7N900731) Batteries (AAAן2) Quick Setup Guide Important Information CD-ROM User's manual For VT695 - NEC VT491 | VT49/490/491/590/595/695 UM - Page 10
The remote control can be used wirelessly. *1 Do not attempt to mount the projector on a ceiling yourself. The projector must be installed by qualified technicians in order to ensure proper operation and reduce the risk of bodily injury. In addition, the ceiling must be strong enough to support the - NEC VT491 | VT49/490/491/590/595/695 UM - Page 11
ᕣ Part Names of the Projector Front/Top Zoom Lever (VT695/VT595/VT590/VT490/VT59) Digital Zoom Button (VT49) (→ page 24) Remote sensor Filter Cover (→ page 50) Two filters on VT695, VT595, VT590 and VT490 One filter on VT59 and VT49 Built-in Security Slot ( )* Lens Cap * This security slot supports - NEC VT491 | VT49/490/491/590/595/695 UM - Page 12
) Adjustable Tilt Foot Button (→ page 23) 1. Introduction Lamp Cover (→ page 52) Attaching the supplied carrying handle (VT695, VT595, VT590 and VT490 only) You can carry the projector by attaching the supplied carrying handle securely to the projector. To attach the supplied carrying handle, use - NEC VT491 | VT49/490/491/590/595/695 UM - Page 13
ENTER SELECT EXIT 10 9 ON/STAND BY SOURCE AUTO ADJ. 3456 1. LAMP Indicator (→page 52,55) 2. STATUS Indicator (→page 55) 3. POWER Indicator (→page 20,28,55) 4. POWER Button (ON / STAND BY) ( ) (→page 20,28) 5. SOURCE Button (→page 22) 6. AUTO ADJ. Button (→page 27) 7. MENU Button (→page 36 - NEC VT491 | VT49/490/491/590/595/695 UM - Page 14
1. COMPUTER 1 IN/ Component Input Connector (Mini D-Sub 15 Pin) (VT695/VT595) (→page 13,15) COMPUTER IN/ Component Input Connector (Mini D-Sub connect a PC or control system. This enables you to control the projector using serial communication protocol. If you are writing your own program, typical - NEC VT491 | VT49/490/491/590/595/695 UM - Page 15
ᕤ Part Names of the Remote Control 1 OFF ON 3 POWER 2 MAGNIFY PIC-MUTE PAGE UP 4 6 DOWN 5 7 MENU 8 1. Introduction 9 11 13 14 19 17 ENTER EXIT L-CLICK R-CLICK MOUSE VIDEO CCOOMMPUTTEERR AUTO ADJ. 1 S-VIDEO LAMP MODE 2 VOLUME ASPECT HELP PICTURE FREEZE 10 12 16 15 18 21 22 - NEC VT491 | VT49/490/491/590/595/695 UM - Page 16
MENU FOCUS ZOOM LAMP STATUS POWER ENTER 7m/22feet Remote control *NOTE: The VT590, VT490, VT59 and VT49 do not have the remote sensor on the remote sensor on the projector cabinet. • The projector will not respond if there are objects between the remote control and the sensor, or if strong light - NEC VT491 | VT49/490/491/590/595/695 UM - Page 17
and any other cables are disconnected before moving the projector. When moving the projector or when it is not in use, cover the lens with the lens cap. ᕡ Setting Up the Screen and the Projector Selecting a Location (VT695) The further your projector is from the screen or wall, the larger the - NEC VT491 | VT49/490/491/590/595/695 UM - Page 18
is 300" (7.6 m) when the projector is about 434 inches (11.0 m) from the wall or screen. Use the drawing below as a guide. Screen Size (Unit: cm/inch by intermediate values between tele and wide. Use as a rule of thumb. • Digital Zoom can result in a blurry image due to the electronic zoom. • The - NEC VT491 | VT49/490/491/590/595/695 UM - Page 19
Projector bottom C Screen center Lens center B = Vertical distance between lens center and screen center C = Throw distance D = Vertical distance between lens center and screen bottom (top of screen for ceiling application) B α = Throw angle D NOTE: Distances may vary +/-5%. Screen bottom VT695 - NEC VT491 | VT49/490/491/590/595/695 UM - Page 20
so heat can dissipate. Do not cover the vents on the side or the front of the projector. Reflecting the Image Using a mirror to reflect your projector's image enables you to enjoy a much larger image when a smaller space is required. Contact your NEC dealer if you need a mirror system. If you - NEC VT491 | VT49/490/491/590/595/695 UM - Page 21
display to come on or off. For example, NEC laptops use Fn + F3, while Dell laptops use Fn + F8 key combinations to toggle through external display selections. Connecting Your PC or Macintosh Computer NOTE: • VT695/VT595: The COMPUTER 1 connector supports Plug & Play (DDC2). • VT590/VT490/VT59/VT49 - NEC VT491 | VT49/490/491/590/595/695 UM - Page 22
Connections When Viewing a DVI Digital Signal (VT695/VT595) To project a DVI digital signal, be sure to connect the PC and the projector using a DVI cable (not supplied) before turning on your PC or projector. Turn on the projector first and select Computer 2 (Digital) from the source menu before - NEC VT491 | VT49/490/491/590/595/695 UM - Page 23
2. Installation and Connections Using Two Analog COMPUTER Inputs Simultaneously (VT695/VT595) If you need to use two analog COMPUTER inputs simultaneously, connect a VGA signal for an extended period of time, remove it from the projector. Failure to do so may cause damage to the connector of the - NEC VT491 | VT49/490/491/590/595/695 UM - Page 24
(not supplied) You can connect a separate, external monitor to your projector to simultaneously view on a monitor the RGB analog image you're connector on VT695 and VT595. • When the DVI Digital signal is selected, no signals will be output from the MONITOR OUT connector on VT695 and VT595. - NEC VT491 | VT49/490/491/590/595/695 UM - Page 25
Installation and Connections Connecting Your DVD Player with Component Output VT695/VT595 VT590/VT490/VT59/VT49 AUDIO IN COMPUTER 1 IN S- in the Component radio button. NOTE: Refer to your DVD player's owner's manual for more information about your DVD player's video output requirements. 17 - NEC VT491 | VT49/490/491/590/595/695 UM - Page 26
AUDIO IN L/MONO and R jacks (RCA) are shared between the Video and S-Video inputs. NOTE: Refer to your VCR or laser disc player owner's manual for more information about your equipment's video output requirements. NOTE: An image may not be displayed correctly when a Video or S-Video source is played - NEC VT491 | VT49/490/491/590/595/695 UM - Page 27
on the left front (when seen from the front) as it can become heated while the projector is turned on and immediately after the projector is turned off. CAUTION: Do not turn off the AC power by pressing the main power switch or by unplugging the power cable when the projector is powered on. Doing so - NEC VT491 | VT49/490/491/590/595/695 UM - Page 28
cause premature lamp failure. MENU LAMP STATUS POWER SELECT EXIT ON/STAND BY SOURCE AUTO ADJ. OFF ON POWER MAGNIFY PIC-MUTE PAGE UP MENU DOWN Standby LAMP STATUS POWER Blinking LAMP STATUS POWER Power On LAMP STATUS POWER Steady orange light Blinking green Steady green light light - NEC VT491 | VT49/490/491/590/595/695 UM - Page 29
system. If this happens, wait for the projector's internal components to cool down. • When the lamp reaches its end of usable life, the projector will not turn on. If this happens, replace the lamp. • If the lamp fails to light, and if the STATUS indicator flashes on and off in a cycle of six - NEC VT491 | VT49/490/491/590/595/695 UM - Page 30
Digital / Analog)" (VT695/VT595 only), "Video" (VCR or laser disc player), "SVideo", To display the selected source, allow 1 second to elapse. MENU LAMP STATUS POWER The COMPUTER 2 button on the remote control toggles the Computer 2 source between [Computer 2 (Digital)] and [Computer 2 (Analog)]. - NEC VT491 | VT49/490/491/590/595/695 UM - Page 31
tilt foot. There is approximately 10 degrees (up) of adjustment for the front of the projector. The rear foot height can be adjusted up to 0.4 inch/10 mm to carry or hang (from the wall or ceiling) the projector can cause damage to the projector. 2 Adjustable Tilt Foot 4 3 POWERSTATUSLAMP ON/ - NEC VT491 | VT49/490/491/590/595/695 UM - Page 32
size on the screen. 3. Projecting an Image (Basic Operation) VT695/VT595/VT590/VT490/VT59 AUTO ADJ. SOURCE EXIT ON/STAND BY SELECT ENTER MENU POWESRTATULSAMP ZOOM FOCUS VT49 Use the Digital ZOOM button on the projector cabinet to electronically enlarge or reduce the image size. NOTE - NEC VT491 | VT49/490/491/590/595/695 UM - Page 33
the Keystone correction. From the menu, select [Setup] → [General] → [Keystone]. The changes can be saved with [Keystone Save]. (→page 44) Adjusting with the Remote Control 1. Press the MENU button. The menu will be displayed. 2. Press the SELECT ̄ button to select [Setup] and press the ENTER button - NEC VT491 | VT49/490/491/590/595/695 UM - Page 34
VT695 and VT595 only) The Auto Keystone correction feature will correct the vertical distortion of a projected image on the screen. No special operation required. Just put the projector feet of the projector can be adjusted to level the projector. NOTE: • Auto and Manual Keystone correction angle - NEC VT491 | VT49/490/491/590/595/695 UM - Page 35
STATUS POWER ENTER SELECT EXIT ON/STAND BY SOURCE AUTO ADJ. L-CLICK R-CLICK MOUSE VIDEO COMPUTER AUTO ADJ. 1 S-VIDEO LAMP MODE 2 VOLUME ASPECT HELP PICTURE FREEZE [Normal picture] NOTE: Some signals may take time to display or may not be displayed correctly. • VT695/VT595: The Auto - NEC VT491 | VT49/490/491/590/595/695 UM - Page 36
On LAMP STATUS POWER Steady green light Fan running LAMP STATUS POWER Standby LAMP STATUS POWER Blinking Steady orange orange light light POWERSTATUSLAMP ON/STAND BY SOURCE AUTO ADJ. SELECT EXIT MENU ZOOM FOCUS CAUTION: Parts of the projector will become heated during operation. Use - NEC VT491 | VT49/490/491/590/595/695 UM - Page 37
4. Cover the lens with the lens cap. 5. Put the projector and accessories in the supplied soft case. Place the projector in the soft case with the lens facing upward as shown below. This is to prevent the lens from damage. Insert the projector with the lens facing upward LAMP STATUS POWER SOURCE - NEC VT491 | VT49/490/491/590/595/695 UM - Page 38
from the AUDIO OUT jack (Stereo mini) on the VT695/VT595 can be turned off. OFF ON POWER MAGNIFY PIC-MUTE PAGE UP MENU DOWN ENTER EXIT · the SELECT ̆,̄,̇ or ̈button. 1 S-VIDEO LAMP MODE 2 VOLUME ASPECT HELP PICTURE FREEZE OFF ON POWER MAGNIFY PIC-MUTE PAGE UP MENU DOWN ENTER - NEC VT491 | VT49/490/491/590/595/695 UM - Page 39
setting (100% Off Brightness). LAMP STATUS POWER Select this mode to increase the lamp life (approx. 80% Brightness). *approx. 75% Brightness: VT695 Steady Green light LAMP STATUS POWER To change to the [Eco] mode, do the following: 1. Press the LAMP MODE button on the remote control to display - NEC VT491 | VT49/490/491/590/595/695 UM - Page 40
̆̄̇̈ and press the ENTER button. NOTE: A keyword must be 4 to 10 digits in length. Please make a note of your keyword. The [Confirm Keyword] screen NOTE: Do not forget your keyword. However, if you forget your keyword, NEC or your dealer will provide you with your Release Code upon proof of ownership - NEC VT491 | VT49/490/491/590/595/695 UM - Page 41
NOTE: The security disable mode is maintained until the main power is turned off (by setting the main power switch to "O" or unplugging the power cord). To disable the Security function: 1. Press the MENU button code. • The [Security] setting cannot be cancelled by using the [Reset] of the menu. 33 - NEC VT491 | VT49/490/491/590/595/695 UM - Page 42
mouse receiver To USB port of PC or Macintosh When operating a computer via the remote mouse receiver 7m/22 feet 30˚ 30˚ Remote sensor on the remote mouse receiver When connecting using the USB terminal For PC, the mouse receiver can only be used with a Windows 98/Me/XP*, Windows 2000 or - NEC VT491 | VT49/490/491/590/595/695 UM - Page 43
control You can operate your computer's mouse from the remote control. 4. Convenient Features PAGE UP/DOWN Button: scrolls the viewing area of the window or to move to the previous or next slide in PowerPoint - NEC VT491 | VT49/490/491/590/595/695 UM - Page 44
: The on-screen menu may not be displayed correctly while interlaced motion video image is projected. 1. Press the MENU button on the remote control or projector cabinet to display the Menu. OFF ON POWER MAGNIFY PIC-MUTE PAGE UP MENU DOWN ENTER EXIT 2. Press the SELECT ̆ or ̄ button on the - NEC VT491 | VT49/490/491/590/595/695 UM - Page 45
4. Use the SELECT ̆ or ̄ button on the remote control or the projector cabinet to select the item you want to adjust or set. 5. Adjusting the level of a selected item or selecting an item. 5. Using On-Screen Menu - NEC VT491 | VT49/490/491/590/595/695 UM - Page 46
group of features in a dialog box. Selecting on any tab brings its page to the front. Radio button Use this round button to select an option in a dialog box. Check mark Lock is enabled. Thermometer symbol Indicates the lamp mode is forcibly set to Eco mode because the internal temperature is too high. - NEC VT491 | VT49/490/491/590/595/695 UM - Page 47
, Light rose, Pink Lamp Mode Language Normal Normal, Eco Yes English English, Deutsch, Français, Italiano, Español, - Português, Nederlands, Svenska, Norsk, Suomi, , Magyar, Polski, Türkçe, , , , , , , Dansk Beep Orientation On Off, On Yes Desktop Front Desktop Front, Ceiling Rear - NEC VT491 | VT49/490/491/590/595/695 UM - Page 48
) (VT695/VT595) Number Firmware Data Item RGB, Component, Video, S-Video, HDTV, Digital NTSC, NTSC3.58, NTSC4.43, PAL, PAL-M, PAL-N, PAL60, SECAM Separate Sync, Composite Sync, Sync on Green, Sync on Video Interlace, Non-interlace Reset Item Current Signal All Data Clear Lamp Hours Clear Filter - NEC VT491 | VT49/490/491/590/595/695 UM - Page 49
There are six factory presets optimized for various types of images, you can set user adjustable settings. High-Bright Recommended for the use in a brightly lit room. Presentation .......... Recommended for making a presentation using a PowerPoint file. Video Recommended for standard video such as - NEC VT491 | VT49/490/491/590/595/695 UM - Page 50
Brightness Adjusts the brightness red level is used as reference. This adjustment is only valid for Video and Component inputs (not valid for RGB). Reset The settings and adjustments for [Picture] will be returned to the factory settings with the exception of the following; Preset numbers - NEC VT491 | VT49/490/491/590/595/695 UM - Page 51
the projector's native resolution, the image will be displayed in the projector's adjust the image manually for position cross talk. (This is evident when part of your image appears to be shimmering.) signals. Selecting Video Filter Level [Video Filter] (not available for Digital RGB, Video and - NEC VT491 | VT49/490/491/590/595/695 UM - Page 52
). Eco Mode Select this mode to increase the lamp life (approx. 80% Brightness). * approx. 75% Brightness: VT695 Selecting Menu Language [Language] You can choose one of 21 languages for the on-screen menu. Enabling Key Sound and Error Sound [Beep] This feature turns on or off the keypad sound - NEC VT491 | VT49/490/491/590/595/695 UM - Page 53
Selecting Projector Orientation [Orientation] This sets your image for your type of projection application. The options are: desktop front projection, ceiling rear projection, desktop rear projection, and ceiling front projection. Desktop front Ceiling rear Desktop rear Ceiling front Selecting - NEC VT491 | VT49/490/491/590/595/695 UM - Page 54
RGB image will not be automatically adjusted. You can manually optimize the RGB image. Normal Default setting. The RGB projector on automatically when the power cable is inserted into an active power outlet. This eliminates the need to always use the POWER button on the remote control or projector - NEC VT491 | VT49/490/491/590/595/695 UM - Page 55
built-in fans run at a fixed high speed. When you wish to cool down the temperature inside the projector quickly, projector is started up. (VT695/ VT595 only) Computer 2 (Digital) ... Displays the DVI digital source from the COMPUTER 2 IN connector every time the projector is started up. (VT695 - NEC VT491 | VT49/490/491/590/595/695 UM - Page 56
and starts counting down. If the remaining lamp time reaches 0 hours, the projector will not turn on regardless of whether the lamp mode is set to Normal or Eco. Model VT695/VT595/ VT590/VT490 Lamp life(H) Normal Eco 2000 3000 Replacement lamp VT85LP VT59/VT49 3000 4000 VT80LP [Source - NEC VT491 | VT49/490/491/590/595/695 UM - Page 57
service. If this happens, press the HELP button on the remote control for ten seconds to reset the lamp clock back to zero. Do this only after replacing the lamp. * VT59 and VT49: 3100 hours (up to 4100 hours in Eco mode). Clearing the Filter Usage Hours [Clear Filter Hours] Resets the filter usage - NEC VT491 | VT49/490/491/590/595/695 UM - Page 58
projector before replacing the filters. • Only clean the outside of the filter cover with a vacuum cleaner. • Do not attempt to operate the projector without the filter cover. To clean the air-filter: Vacuum the filter-through the filter cover. VT59/VT49 VT695/VT595/VT590/VT490 To replace the filter - NEC VT491 | VT49/490/491/590/595/695 UM - Page 59
out dust and dirt during filter replacement. NOTE: When you replace the lamp, it is also wise to replace the filter. The filter comes in the same package with your replacement lamp. · Cleaning the Cabinet and the Lens 1. Turn off the projector before cleaning. 2. Clean the cabinet periodically with - NEC VT491 | VT49/490/491/590/595/695 UM - Page 60
any button on the projector cabinet or the remote control. To replace the lamp: Optional lamp and tools needed for replacement: • Replacement lamp VT85LP (VT695/VT595/VT590/VT490) or VT80LP (VT59/VT49) 1. Place the projector on a soft cloth and turn it over to access the lamp cover on the bottom. 52 - NEC VT491 | VT49/490/491/590/595/695 UM - Page 61
Remove the lamp cover. (1)Press firmly and slide the lamp cover by 1 cm (0.4") • Do not force to pull the lamp cover (2)Push to release two catches on both sides and slide the lamp cover off. 6. Maintenance 1 3 1 2 3. Remove the lamp housing. (1)Loosen the two screws securing the lamp housing - NEC VT491 | VT49/490/491/590/595/695 UM - Page 62
the NEC replacement lamp VT85LP (VT695/VT595/VT590/VT490) or VT80LP (VT59/VT49). Order this from your NEC dealer. (2)Secure it in place with the two screws. Be sure to tighten the screws. 5. Reattach the lamp cover. (1)Place the lamp cover, aligning it with the guiding line. (2)Slide the lamp cover - NEC VT491 | VT49/490/491/590/595/695 UM - Page 63
for a moment. The projector is turned on. - The projector is in Standby. - Status Indicator Blinking light Steady light Indicator Condition Projector Condition Note Off Normal - Red 1 cycle (0.5 sec On, Lamp cover error or lamp housing error Replace the lamp cover or lamp 2.5 sec Off - NEC VT491 | VT49/490/491/590/595/695 UM - Page 64
Common Problems & Solutions (→ "Power/Status/Lamp Indicator" on page 55.) Problem Does not turn on Check These Items • Check that the power cable is plugged in and that the power button on the projector cabinet or the remote control is on. (→ pages 19 and 20) • Ensure that the lamp cover is - NEC VT491 | VT49/490/491/590/595/695 UM - Page 65
to come on or off. For example, NEC laptops use Fn + F3, while Dell laptops other than those supported by your Macintosh and the projector, changing the projector with a Macintosh PowerBook, output may not be set to 1024 x 768 unless "mirroring" is off on your PowerBook. Refer to owner's manual - NEC VT491 | VT49/490/491/590/595/695 UM - Page 66
7. Appendix This section provides technical information about the VT695/VT595/VT590/VT490/VT59/VT49 projector's performance. Model Number VT695/VT595/VT590/VT490/VT59/VT49 Optical LCD Panel Resolution Lens Lamp Light Output** Contrast Ratio Image Size (Diagonal) Projection Distance - NEC VT491 | VT49/490/491/590/595/695 UM - Page 67
mode / 205W in Lamp Normal mode / 170W in Lamp Eco mode Mechanical Installation Orientation Desktop/Front, Desktop/Rear, Ceiling/Front, Ceiling/Rear Dimensions 12.2" (W)ן4.4" (H)ן10.2" (D) 309mm (W)ן112mm (H)ן258mm (D) (not including protrusions) Weight VT695/VT595: approx. 6.6 lbs - NEC VT491 | VT49/490/491/590/595/695 UM - Page 68
7. Appendix Regulations VT695/VT595/VT590/VT490/VT49: For United States: UL Approved (UL 60950 - 1) Meets FCC US : http://www.necvisualsystems.com Europe : http://www.neceurope.com/ Global : http://www.nec-pj.com/ For information on our optional accessories, visit our website or see our brochure. - NEC VT491 | VT49/490/491/590/595/695 UM - Page 69
SELECT ENTER LAMP STATUS POWER ON/STAND BYSOURCE EXIT AUTO ADJ. S-VIDEO IN L PC CTRL COMPUTER 2 (DVI-I) IN AUDIO IN COMPUTER 1 IN R VIDEO IN AUDIO IN AUDIO OUT MONITOR OUT (COMP 1) 7. Appendix ᕣ Cabinet Dimensions Although the appearance is slightly different, the VT695, VT595, VT590 - NEC VT491 | VT49/490/491/590/595/695 UM - Page 70
Ground Ground Red Ground Green Ground Blue Ground No Connection Sync Signal Ground No Connection Bi-directional DATA (SDA)* Horizontal Sync or Composite Sync Vertical Sync Data Clock* YCbCr Signal Cr Y Cb Cr Ground Y Ground Cb Ground * Only COMPUTER 1 input connector supported on VT695/VT595. 62 - NEC VT491 | VT49/490/491/590/595/695 UM - Page 71
50.00 Interlaced # : Images in above flagged with # are compressed with Advanced AccuBlend on VT695/VT595/ VT590/VT59. D : Images in above flagged with "D" are supported by the DVI digital signals on VT695/VT595. @ : Images in above flagged with @ are compressed with Advanced AccuBlend on VT490 - NEC VT491 | VT49/490/491/590/595/695 UM - Page 72
ᕦ PC Control Codes and Cable Connection PC Control Codes (VT695/VT595) Function Code Data POWER ON 02H 00H 00H 00H 00H 02H POWER OFF 02H 01H 00H 00H 00H 03H INPUT SELECT COMPUTER 1 02H 03H 00H 00H 02H 01H 01H 09H INPUT SELECT COMPUTER 2 (Digital) 02H 03H 00H 00H 02H 01H 1AH 22H INPUT SELECT - NEC VT491 | VT49/490/491/590/595/695 UM - Page 73
PC Control Connector (DIN-8P) To TxD of PC To GND of PC 12 34 6 7 5 8 To RxD of PC NOTE: Pins 2, 3, 5, 6 and 8 are used inside the projector. 7. Appendix 65 - NEC VT491 | VT49/490/491/590/595/695 UM - Page 74
Check List Before contacting your dealer or service personnel, check the following list to be sure repairs are needed also by referring to the "Troubleshooting" section in your user's manual. This checklist below will help us solve your problem more efficiently. * Print this page and the - NEC VT491 | VT49/490/491/590/595/695 UM - Page 75
light Ⅺ Orange Ⅺ Green Flashing light [ ] cycles Remote control model number: Projector PC Installation environment Screen size: inch Screen type: Ⅺ White matte Ⅺ Beads Ⅺ Polarization Ⅺ Wide angle Ⅺ High contrast Throw distance: feet/inch/m Orientation: Ⅺ Ceiling mount Ⅺ Desktop Power - NEC VT491 | VT49/490/491/590/595/695 UM - Page 76
business days, not including shipping time. During the term of warranty, the cost of maintenance parts, labor costs for repairs and shipping costs within the service station's coverage area are covered by the warranty. 2 Replacement product rental service If the customer desires, he or she can rent - NEC VT491 | VT49/490/491/590/595/695 UM - Page 77
Email Address: [email protected] WEB Address: http://www.necarecenter.com (Regions Covered) Malaysia 7. Appendix Tele Service Co., Ltd. Address: 2nd .com (Regions Covered) Saudi Arabia NOTE: In countries designated with an asterisk(*), replacement product rental service are offered. 69 - NEC VT491 | VT49/490/491/590/595/695 UM - Page 78
office Address : Phone No., Fax No. : User's Model Name : Date of Purchase : Serial No. on cabinet : Problem of units per User : Required Service : (1) Repair and Return (2) Loan unit Requested period of Loan unit : Payment method : (1) Credit Card (2) Travelers Cheque (3) Cash In - NEC VT491 | VT49/490/491/590/595/695 UM - Page 79
agents which do not form part of the Product covered by this warranty); 4) Any act of God, fire, flood, war, act of violence or any similar occurrence; 5) Any attempt by any person other than any person authorized by NEC to adjust, modify, repair, install or service the product. 6) Any Cross-border
-
 1
1 -
 2
2 -
 3
3 -
 4
4 -
 5
5 -
 6
6 -
 7
7 -
8
-
9
-
10
-
11
-
12
-
13
-
14
-
15
-
16
-
17
-
18
-
19
-
20
-
21
-
22
-
23
-
24
-
25
-
26
-
27
-
28
-
29
-
30
-
31
-
32
-
33
-
34
-
35
-
36
-
37
-
38
-
39
-
40
-
41
-
42
-
43
-
44
-
45
-
46
-
47
-
48
-
49
-
50
-
51
-
52
-
53
-
54
-
55
-
56
-
57
-
58
-
59
-
60
-
61
-
62
-
63
-
64
-
65
-
66
-
67
-
68
-
69
-
70
-
71
-
72
-
73
-
74
-
75
-
76
-
77
-
78
-
79
 |
 |
Portable Projector
VT695/VT595/VT590/VT490/VT59/VT49
User’s Manual