Netgear 1000 Powerline User Manual - Page 20
Connect to the PowerLINE Access Point, Use WPS to Connect to Your Network (PLW Models), Customize
 |
View all Netgear 1000 manuals
Add to My Manuals
Save this manual to your list of manuals |
Page 20 highlights
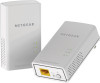
PowerLINE Connect to the PowerLINE Access Point You can connect your WiFi devices (laptop, tablet, or smartphone) to the PowerLINE access point using WPS or the SSID and WiFi key. To connect to the PowerLINE access point: 1. On your computer or WiFi device (tablet, smartphone) use the adapter's normal method of connecting to a wireless network. Note: The product label includes the default SSID and WiFi key. Use WPS to Connect to Your Network (PLW Models) After your PowerLINE network is installed and running, you can use WPS to connect your access point to your WiFi network. To automatically connect to the PowerLINE access point using the WPS button: 1. Press and hold the WPS button on the PowerLINE access point for two seconds and release it. The Wireless LED starts to blink. 2. Press the WPS button on your WiFi device for two seconds and release it. When the Wireless LED stops blinking, your WiFi device is automatically connected to the PowerLINE access point. Customize Your Network Settings (PLW Models) You can use a web browser-based setup guide as a simple way to customize the WiFi settings of your PowerLINE access point. Before changing your network settings, connect using the default settings. For information see either Connect to the PowerLINE Access Point on page 20, or Use WPS to Connect to Your Network (PLW Models) on page 20. PowerLINE Networks 20 User Manual
-
 1
1 -
2
-
3
-
4
-
5
-
6
-
7
-
8
-
9
-
10
-
11
-
12
-
13
-
14
-
 15
15 -
 16
16 -
 17
17 -
 18
18 -
 19
19 -
 20
20 -
 21
21 -
 22
22 -
 23
23 -
 24
24 -
 25
25 -
26
-
27
-
28
-
29
-
30
-
31
-
32
-
33
-
34
-
35
-
36
-
37
 |
 |
