Netgear A6210 Installation Guide - Page 2
Standalone Driver Installation, Join a Wireless Network, Check Your Connection Status, Support - drivers
 |
View all Netgear A6210 manuals
Add to My Manuals
Save this manual to your list of manuals |
Page 2 highlights
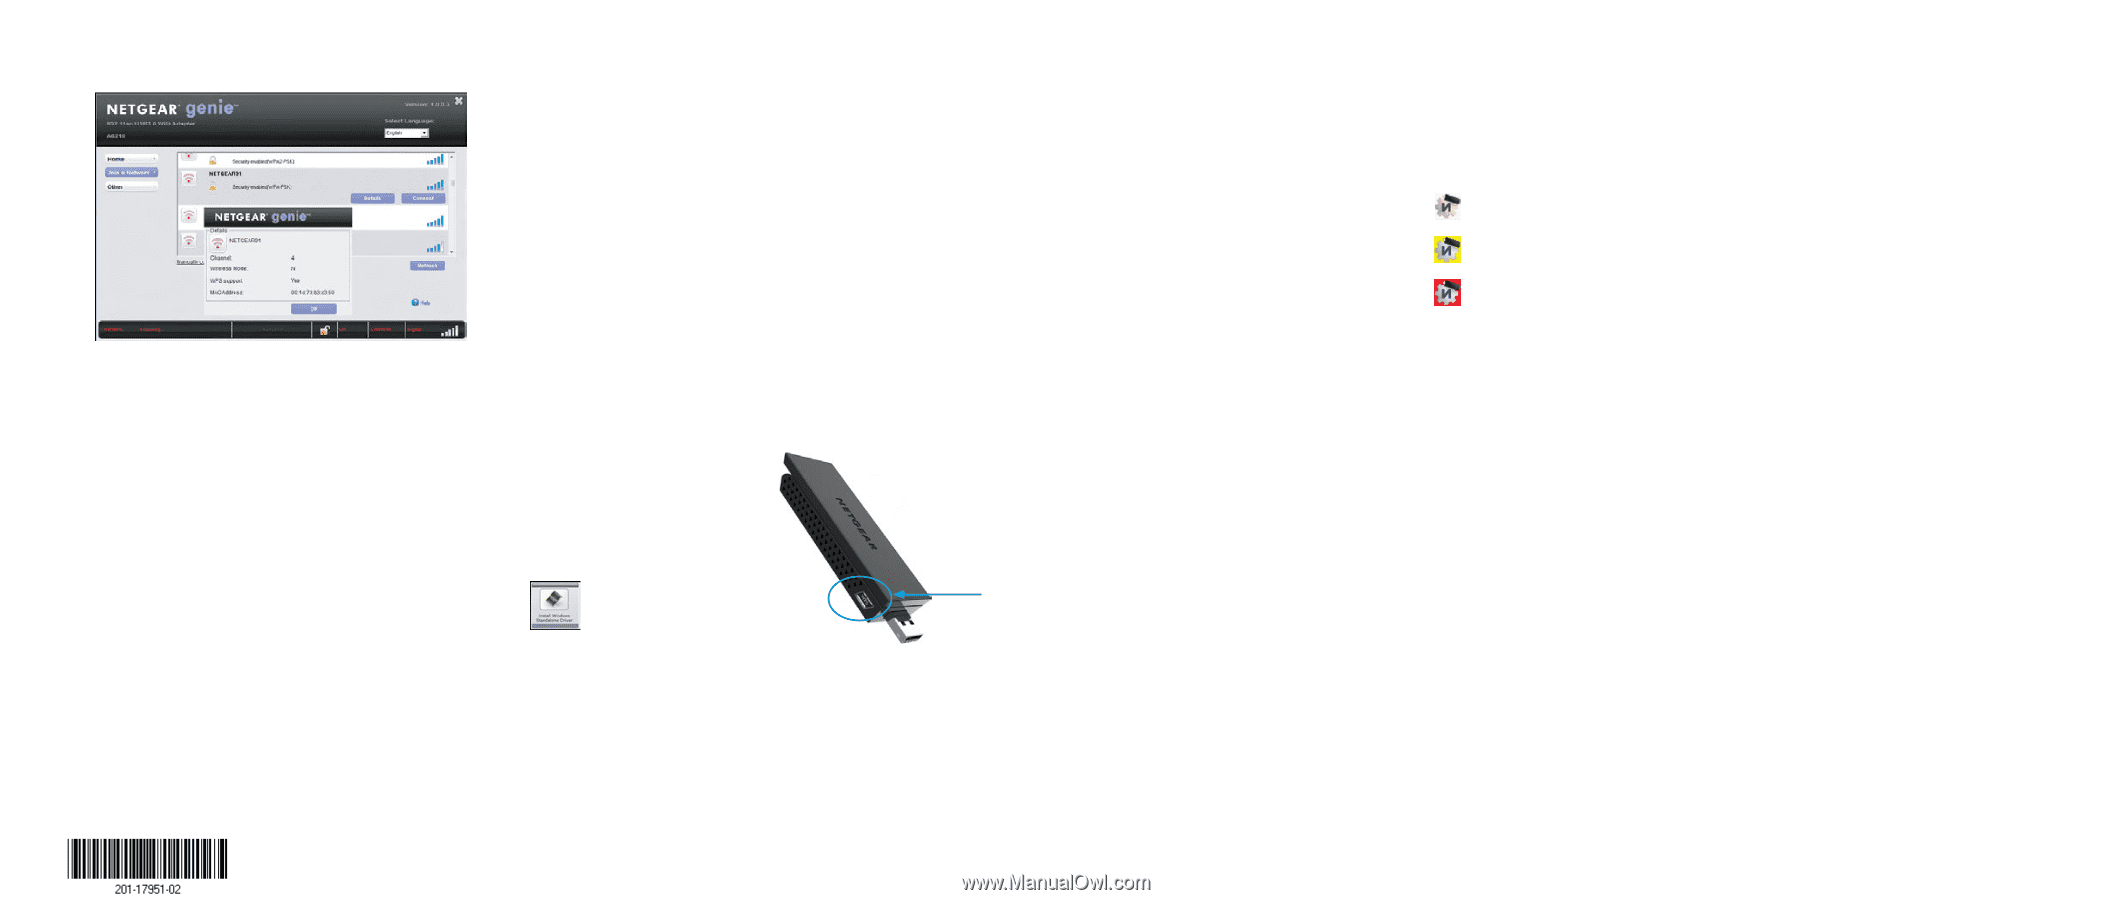
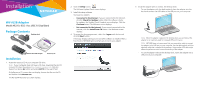
6. Return to the Netgear genie screen and click the Next button. NETGEAR genie displays a list of wireless networks in your area. Standalone Driver Installation 1. Insert the resource CD in your computer CD drive. Note: If your computer does not have a CD drive, download the A6210 resource CD driver by visiting http://support.netgear.com. Click the Support For Home Go button and enter A6210 in the search field. If the Resource CD screen does not display, browse the files on the CD and double-click Autorun.exe. The NETGEAR Resource CD screen displays. 2. Click the Install Windows Standalone Driver button. The driver installs on your computer. 3. When prompted, either place the adapter into the desktop dock and connect the USB cable to a USB port on your computer or use the adapter without the desktop dock and insert the adapter into a USB port on your computer. Note: NETGEAR does not recommend that you use another cable to connect the adapter to the USB port on your computer. Use the desktop dock with the attached cable that is supplied in the package. Using another USB cable might affect the performance and correct functioning of the adapter. May 2014 NETGEAR, Inc. 350 East Plumeria Drive San Jose, CA 95134, USA Join a Wireless Network You can join a wireless network from the NETGEAR genie, or you can use Wi-Fi Protected Setup (WPS) if your wireless router supports it. Join a Network Using NETGEAR genie 1. From the NETGEAR genie screen, click the Join a Network button. 2. Select your wireless network. 3. Click the Connect button. 4. If the network is secure, enter its password or network key. The adapter joins the network, which can take a few minutes. Your settings are saved in a profile. Join a Network Using WPS 1. Press and hold the WPS button on the adapter for two seconds. WPS button 2. Within two minutes, press the WPS button on your wireless router or gateway. The adapter joins the network, which can take a few minutes. Your settings are saved in a profile. Check Your Connection Status When you install your adapter, the NETGEAR genie icon displays in the Windows system tray and on the desktop. You can double-click this icon to open NETGEAR genie to make changes or connect to a different wireless network. The color of the icon indicates the strength of your wireless connection: White. 3-5 bars (strong connection) Yellow. 1-2 bars (weak connection) Red. 0 (zero) bars (no connection) If you remove your adapter, NETGEAR genie is not available, so the icon does not display. When you insert the adapter again, the icon returns. Support Thank you for purchasing this NETGEAR product. After installing your device, locate the serial number on the label of your product and use it to register your product at https://my.netgear.com. You must register your product before you can use NETGEAR telephone support. NETGEAR recommends registering your product through the NETGEAR website. For product updates and web support, visit http://support.netgear.com. NETGEAR recommends that you use only the official NETGEAR support resources. You can get the user manual online at http://downloadcenter.netgear.com or through a link in the product's user interface. For the complete EU Declaration of Conformity, visit http://support.netgear.com/app/answers/detail/a_id/11621/. For regulatory compliance information, visit http://www.netgear.com/about/regulatory/. See the regulatory compliance document before connecting the power supply. NETGEAR, the NETGEAR logo, and Connect with Innovation are trademarks and/or registered trademarks of NETGEAR, Inc. and/or its subsidiaries in the United States and/or other countries. Information is subject to change without notice. © NETGEAR, Inc. All rights reserved.
-
 1
1 -
 2
2
 |
 |