Netgear AC1900 Installation Guide - Page 2
Install the Mac Adapter Soſtware, Insert the Adapter, Join a WiFi Network, Support - router
 |
View all Netgear AC1900 manuals
Add to My Manuals
Save this manual to your list of manuals |
Page 2 highlights
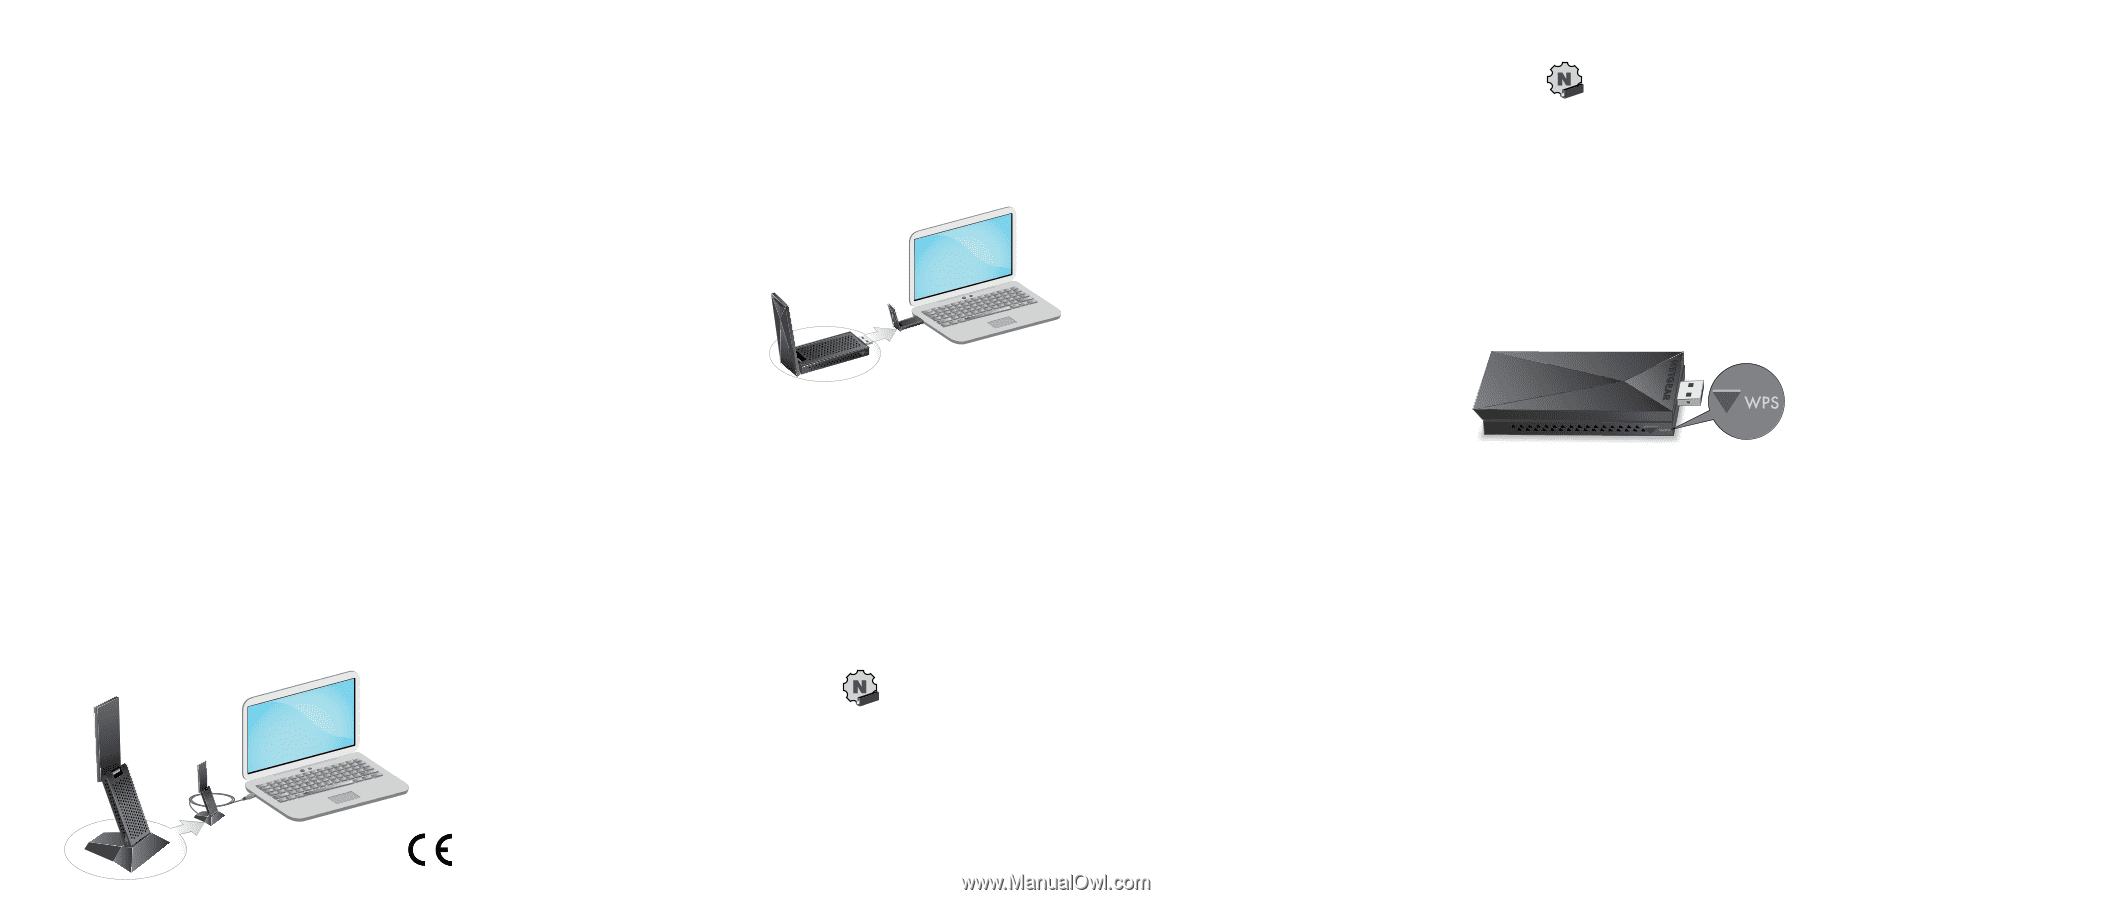
Install the Mac Adapter Software 1. Insert the resource CD in your computer CD drive. Note: If your computer does not include a CD drive, visit netgear.com/support to download the adapter software. The NETGEAR Resource CD window opens. Note: If the NETGEAR Resource CD window does not open, browse the files on the CD and double-click the file ending in .pkg or .dmg. An example of an adapter software file name is A7000_MAC_OS_Installation_1.0.0.7.pkg or A7000_MAC_OS_Installation_1.0.0.7.dmg. 2. Follow the prompts to install the adapter software. 3. When prompted, restart your computer. 4. After your computer restarts, insert your adapter into your computer. For more information, see Insert the Adapter. Insert the Adapter You can insert your adapter into your computer's USB port with or without the desktop dock: • With a desktop dock. To use the adapter with the desktop dock, place the adapter into the dock and connect the USB cable to the USB port on your computer. When the adapter is placed in the desktop dock, you can fold out the adapter to its maximum angle for increased WiFi performance. NETGEAR INTL LTD Building 3, University Technology Centre Curraheen Road, Cork, Ireland Note: We recommend that you do not use another cable to connect the adapter to the USB port on your computer. Use the desktop dock with the attached cable that is supplied in the package. Using another USB cable might affect the performance and correct functioning of the adapter. • Without a desktop dock. To use the adapter without the desktop dock, insert the adapter into a USB port on your computer. Move the antenna to a 90 degree angle for increased WiFi performance. Join a WiFi Network You can connect your adapter to a WiFi network using the adapter software, Wi‑Fi Protected Setup (WPS) if your WiFi router supports it, or a built-in Windows configuration tool. Note: You can connect your adapter to a WiFi network using a built‑in Windows configuration tool if you installed the adapter software or if you installed a standalone driver. For more information about how to connect using a built-in Windows configuration tool, see your computer's documentation. Join a Network Using the Windows Adapter Software 1. Click the icon to launch NETGEAR A7000 genie. 2. Click the Join a Network button. 3. Select a WiFi network. 4. Click the Connect button. 5. If the network is secure, enter its password or network key. The adapter joins the network, which can take a few minutes. Your settings are saved in a profile. Join a Network Using the Mac Adapter Software 1. Click the icon in your Mac's menu bar. A list of WiFi networks in your area displays. 2. Select a WiFi network. 3. If your network is secure, enter its password or network key, and click the Join button. The adapter joins the network, which can take a few minutes. Your settings are saved in a profile. Join a Network Using WPS 1. Press and hold the WPS button on the adapter for two seconds. 2. Within two minutes, press the WPS button on your WiFi router or gateway. The adapter joins the network, which can take a few minutes. Your settings are saved in a profile. Support Thank you for purchasing this NETGEAR product. You can visit www.netgear.com/support to register your product, get help, access the latest downloads and user manuals, and join our community. We recommend that you use only official NETGEAR support resources. For the current EU Declaration of Conformity, visit http://support.netgear.com/app/answers/detail/a_id/11621/. For regulatory compliance information, visit http://www.netgear.com/about/regulatory/. NETGEAR, Inc. 350 East Plumeria Drive San Jose, CA 95134, USA © NETGEAR, Inc., NETGEAR and the NETGEAR Logo are trademarks of NETGEAR, Inc. Any non‑NETGEAR trademarks are used for reference purposes only. December 2017
-
 1
1 -
 2
2
 |
 |