Netgear DS106 DS104 Installation Guide - Page 8
Installation Procedures, Prepare the Site, Install the Hub, Install the Hub on a Flat Surface - exhaust
 |
View all Netgear DS106 manuals
Add to My Manuals
Save this manual to your list of manuals |
Page 8 highlights
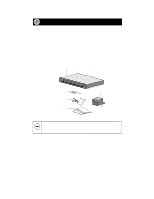
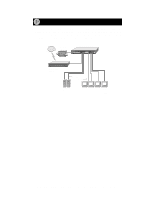
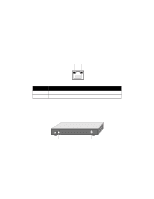
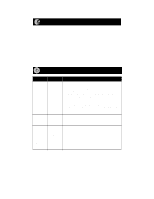
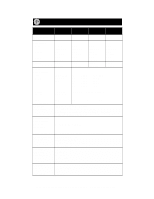
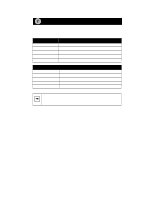
Installation Procedures Prepare the Site Before you begin installing the hub, prepare the installation site. Make sure the site meets the operating environment requirements of the equipment. Characteristic Requirement Temperature Humidity Ambient temperature between 0° and 40° C (32° and 104° F). No nearby heat sources such as direct sunlight, warm air exhausts, or heaters. 90% maximum relative humidity, noncondensing. Ventilation Operating conditions Minimum 2 inches (5.08 cm) on all sides for cooling. Adequate airflow in room or wiring closet. At least 6 feet (1.83 m) to nearest source of electromagnetic noise (such as photocopy machine or arc welder). Service access Minimum 12 inches (19.68 cm) front and back for service access and maintenance. Front and back clearance for cables and wiring hardware such as punchdown blocks. Power Adequate power source within 6 feet (1.83 m). Wiring hardware Wiring hardware, such as punchdown blocks or patch panels, complete before installing the hub. Install the Hub Install the Hub on a Flat Surface If installing the hub on a flat surface such as a tabletop, make sure the bottom of the chassis is clean and dry. To install the hub on a flat surface: 1. Set the hub on a table or shelf so that it has at least 2 inches (5 cm) of space on all sides. 2. Connect the power cord(s) first to the power entry receptacle on the hub rear panel and then to the wall. Install the Hub on a Wall If installing the hub on a wall, make sure you have a Phillips screwdriver. To install the hub on a wall: 1. Set the mounting screws and anchors (supplied with the wall mount hardware) in the wall. 2. Using the slots on the bottom of the hub, hang the hub on the wall. 3. Connect the power cord(s) first to the power entry receptacle on the hub rear panel and then to the wall. Model DS104/DS106/DS108/DS116 Dual Speed Hub Installation Guide
-
 1
1 -
2
-
 3
3 -
 4
4 -
 5
5 -
 6
6 -
 7
7 -
 8
8 -
 9
9 -
 10
10 -
 11
11 -
 12
12 -
 13
13 -
14
-
15
 |
 |