Netgear DS508 DS508 Installation Guide - Page 9
Installation Procedures - set up
 |
UPC - 606449001570
View all Netgear DS508 manuals
Add to My Manuals
Save this manual to your list of manuals |
Page 9 highlights
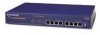
Installation Procedures Install the Hub Install the Hub on a Flat Surface If installing the hub on a flat surface such as a tabletop, make sure the bottom of the chassis is clean and dry and allow at least 2 inches of space on all sides of the hub to ensure proper ventilation. 1. Install the self-adhesive footpads on the bottom of the hub. 2. Set the hub on a table or shelf so that it has at least 2 inches (5 cm) of space on all sides. 3. Connect the power cord(s) first to the power entry receptacle on the hub rear panel and then to the wall. Install the Hub in a Rack To install the hub in a rack, make sure you have #2 and #3 Phillips screwdrivers. Refer to the illustration and follow the steps. #3 Phillips screwdriver (use large screws with spacers) #2 Phillips screwdriver (use small screws) Power Data Collision 1 Link RX 13 5 Link RX 17 Link RX 12 Normal/Uplink 24 8145FA 1. Attach the mounting brackets (supplied in the rack mount kit) to the sides of the hub using the screws provided. 2. Attach the hub (with the mounting brackets) to the rack using two panhead screws with nylon washers. Model DS508/DS516/DS524 Dual Speed Stackable Hub Installation Guide
-
 1
1 -
2
-
3
-
 4
4 -
 5
5 -
 6
6 -
 7
7 -
 8
8 -
 9
9 -
 10
10 -
 11
11 -
 12
12 -
 13
13 -
 14
14 -
15
-
16
 |
 |
