Netgear GSM712 Configuring MAC ACLs - Page 2
Configuring MAC ACLs
 |
View all Netgear GSM712 manuals
Add to My Manuals
Save this manual to your list of manuals |
Page 2 highlights
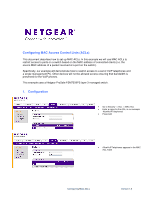
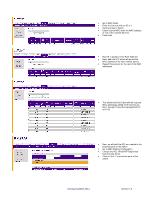
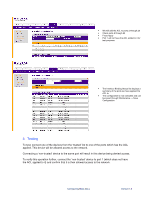
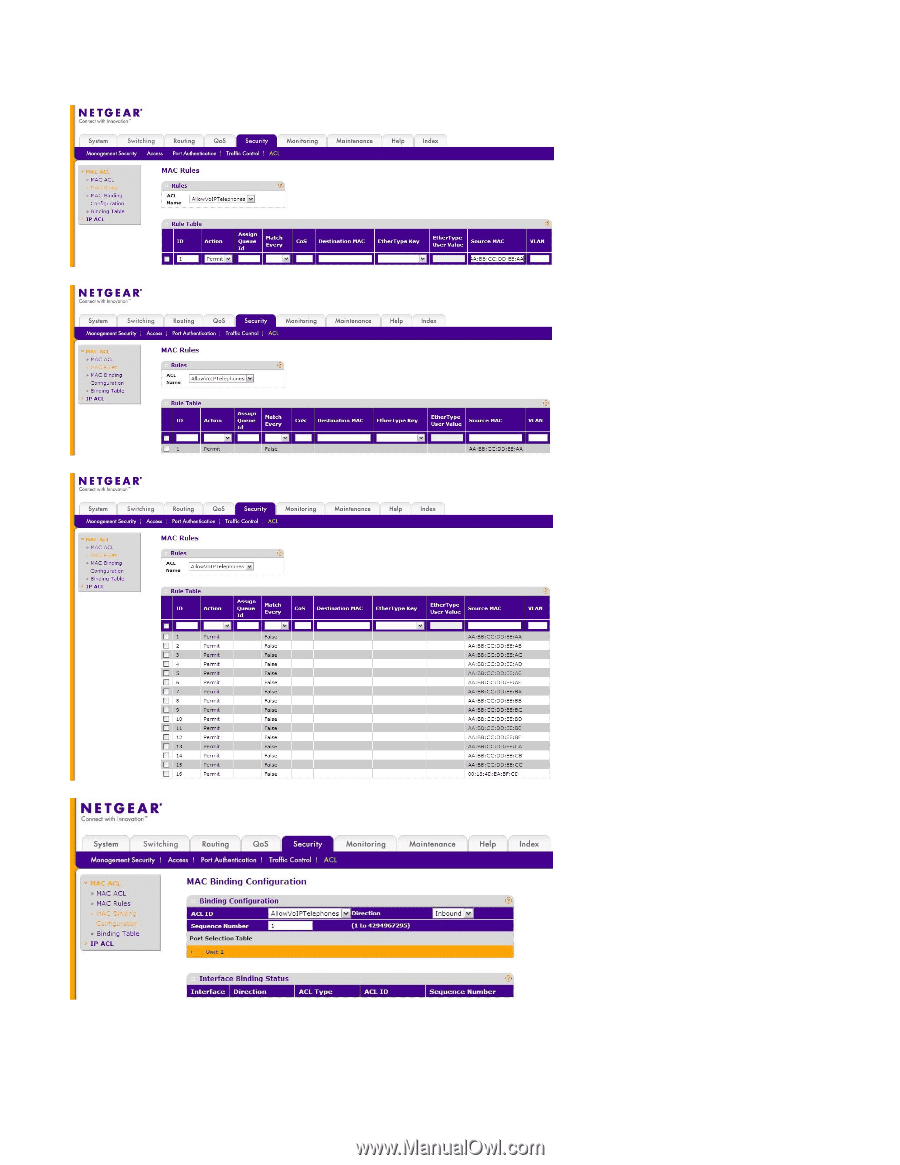
• Go to MAC Rules • Enter the first rule with an ID of 1 • Set the Action to Permit • Under Source MAC enter the MAC address of one of the 'trusted' devices • Press Add • Rule ID 1 appears in the Rule Table list • Next, add rule ID 2 which will permit the MAC address of the next 'trusted' device • Repeat this process for the rest of the MAC addresses • This shows the Rule Table with all required MAC addresses added (VoIP phones are IDs 1 through 15 and the management PC is ID 16) • Next, we will add the ACL we created to the required ports on the switch • Go to MAC Binding Configuration • Choose the ACL 'AllowVoIPTelephones' from the ACL ID list • Click on 'Unit 1' to show the ports of the switch Configuring MAC ACLs Version 1.0
-
 1
1 -
 2
2 -
 3
3
 |
 |
Configuring MAC ACLs
Version 1.0
•
Go to MAC Rules
•
Enter the first rule with an ID of 1
•
Set the Action to Permit
•
Under Source MAC enter the MAC address
of one of the ‘trusted’ devices
•
Press Add
•
Rule ID 1 appears in the Rule Table list
•
Next, add rule ID 2 which will permit the
MAC address of the next ‘trusted’ device
•
Repeat this process for the rest of the MAC
addresses
•
This shows the Rule Table with all required
MAC addresses added (VoIP phones are
IDs 1 through 15 and the management PC
is ID 16)
•
Next, we will add the ACL we created to the
required ports on the switch
•
Go to MAC Binding Configuration
•
Choose the ACL ‘AllowVoIPTelephones’
from the ACL ID list
•
Click on ‘Unit 1’ to show the ports of the
switch