| Section |
Page |
| ProSafe M4100 and M7100 Managed Switches |
1 |
| Table of Contents |
3 |
| 1. Documentation Resources |
15 |
| 2. VLANs |
16 |
| Create Two VLANs |
17 |
| CLI: Create Two VLANS |
17 |
| Web Interface: Create Two VLANS |
18 |
| Assign Ports to VLAN2 |
19 |
| CLI: Assign Ports to VLAN2 |
19 |
| Web Interface: Assign Ports to VLAN2 |
19 |
| Create Three VLANs |
20 |
| CLI: Create Three VLANS |
20 |
| Web Interface: Create Three VLANS |
20 |
| Assign Ports to VLAN3 |
22 |
| CLI: Assign Ports to VLAN3 |
22 |
| Web Interface: Assign Ports to VLAN3 |
23 |
| Assign VLAN3 as the Default VLAN for Port 1/0/2 |
24 |
| CLI: Assign VLAN3 as the Default VLAN for Port 1/0/2 |
24 |
| Web Interface: Assign VLAN3 as the Default VLAN for Port 1/0/2 |
24 |
| Create a MAC-Based VLAN |
25 |
| CLI: Create a MAC-Based VLAN |
25 |
| Web Interface: Assign a MAC-Based VLAN |
26 |
| Create a Protocol-Based VLAN |
28 |
| CLI: Create a Protocol-Based VLAN |
28 |
| Web Interface: Create a Protocol-Based VLAN |
29 |
| Virtual VLANs: Create an IP Subnet–Based VLAN |
31 |
| CLI: Create an IP Subnet–Based VLAN |
31 |
| Web Interface: Create an IP Subnet–Based VLAN |
32 |
| Voice VLANs |
33 |
| CLI: Configure Voice VLAN and Prioritize Voice Traffic |
34 |
| Web Interface: Configure Voice VLAN and Prioritize Voice Traffic |
36 |
| Private VLANs |
44 |
| Assign Private-VLAN Types (Primary, Isolated, Community) |
46 |
| CLI: Assign Private-VLAN Type (Primary, Isolated, Community) |
46 |
| Web Interface: Assign Private-VLAN Type (Primary, Isolated, Community) |
46 |
| Configure Private-VLAN Association |
48 |
| CLI: Configure Private-VLAN Association |
48 |
| Web Interface: Configure Private-VLAN Association |
48 |
| Configure Private-VLAN Port Mode (Promiscuous, Host) |
49 |
| CLI: Configure Private-VLAN Port Mode (Promiscuous, Host) |
49 |
| Web Interface: Configure Private-VLAN Port Mode (Promiscuous, Host) |
49 |
| Configure Private-VLAN Host Ports |
50 |
| CLI: Configure Private-VLAN Host Ports |
50 |
| Web Interface: Assign Private-VLAN Port Host Ports |
51 |
| Map Private-VLAN Promiscuous Port |
52 |
| CLI: Map Private-VLAN Promiscuous Port |
52 |
| Web Interface: Map Private-VLAN Promiscuous Port |
52 |
| 3. LAG s |
54 |
| Create Two LAGs |
55 |
| CLI: Create Two LAGs |
55 |
| Web Interface: Create Two LAGs |
55 |
| Add Ports to LAGs |
56 |
| CLI: Add Ports to the LAGs |
57 |
| Web Interface: Add Ports to LAGs |
58 |
| Enable Both LAGs |
59 |
| CLI: Enable Both LAGs |
59 |
| Web Interface: Enable Both LAGs |
59 |
| 4. Port Routing |
60 |
| Port Routing Configuration |
61 |
| Enable Routing for the Switch |
62 |
| CLI: Enable Routing for the Switch |
62 |
| Web Interface: Enable Routing for the Switch |
62 |
| Enable Routing for Ports on the Switch |
62 |
| CLI: Enable Routing for Ports on the Switch |
63 |
| Web Interface: Enable Routing for Ports on the Switch |
63 |
| Add a Default Route |
65 |
| CLI: Add a Default Route |
65 |
| Web Interface: Add a Default Route |
65 |
| Add a Static Route |
66 |
| CLI: Add a Static Route |
66 |
| Web Interface: Add a Static Route |
67 |
| 5. VLAN Routing |
68 |
| Create Two VLANs |
68 |
| CLI: Create Two VLANs |
69 |
| Web Interface: Create Two VLANs |
70 |
| Set Up VLAN Routing for the VLANs and the Switch |
73 |
| CLI: Set Up VLAN Routing for the VLANs and the Switch |
73 |
| Web Interface: Set Up VLAN Routing for the VLANs and the Switch |
73 |
| 6. RIP |
75 |
| Routing for the Switch |
76 |
| CLI: Enable Routing for the Switch |
76 |
| Web Interface: Enable Routing for the Switch |
76 |
| Routing for Ports |
77 |
| CLI: Enable Routing and Assigning IP Addresses for Ports 1/0/2 and 1/0/3 |
77 |
| Web Interface: Enable Routing for the Ports |
77 |
| RIP for the Switch |
78 |
| CLI: Enable RIP on the Switch |
79 |
| Web Interface: Enable RIP on the Switch |
79 |
| RIP for Ports 1/0/2 and 1/0/3 |
79 |
| CLI: Enable RIP for Ports 1/0/2 and 1/0/3 |
80 |
| Web Interface: Enable RIP for Ports 1/0/2 and 1/0/3 |
80 |
| VLAN Routing with RIP |
82 |
| CLI: Configure VLAN Routing with RIP Support |
82 |
| Web Interface: Configure VLAN Routing with RIP Support |
84 |
| 7. OSPF |
86 |
| Inter-area Router |
87 |
| CLI: Configure an Inter-area Router |
87 |
| Web Interface: Configure an Inter-area Router |
89 |
| OSPF on a Border Router |
92 |
| CLI: Configure OSPF on a Border Router |
92 |
| Web Interface: Configure OSPF on a Border Router |
93 |
| Stub Areas |
98 |
| CLI: Configure Area 1 as a Stub Area on A1 |
98 |
| Web Interface: Configure Area 1 as a Stub Area on A1 |
100 |
| CLI: Configure Area 1 as a Stub Area on A2 |
103 |
| Web Interface: Configure Area 1 as a Stub Area on A2 |
104 |
| nssa Areas |
107 |
| CLI: Configure Area 1 as an nssa Area |
107 |
| Web Interface: Configure Area 1 as an nssa Area on A1 |
108 |
| CLI: Configure Area 1 as an nssa Area on A2 |
111 |
| Web Interface: Configure Area 1 as an nssa Area on A2 |
113 |
| VLAN Routing OSPF |
116 |
| CLI: Configure VLAN Routing OSPF |
118 |
| Web Interface: Configure VLAN Routing OSPF |
119 |
| OSPFv3 |
122 |
| CLI: Configure OSPFv3 |
122 |
| Web Interface: Configure OSPFv3 |
124 |
| 8. ARP |
127 |
| Proxy ARP Examples |
127 |
| CLI: show ip interface |
127 |
| CLI: ip proxy-arp |
128 |
| Web Interface: Configure Proxy ARP on a Port |
128 |
| 9. VRRP |
129 |
| VRRP on a Master Router |
130 |
| CLI: Configure VRRP on a Master Router |
130 |
| Web Interface: Configure VRRP on a Master Router |
131 |
| VRRP on a Backup Router |
132 |
| CLI: Configure VRRP on a Backup Router |
132 |
| Web Interface: Configure VRRP on a Backup Router |
133 |
| 10. ACLs |
136 |
| MAC ACLs |
137 |
| IP ACLs |
137 |
| ACL Configuration |
137 |
| Set Up an IP ACL with Two Rules |
138 |
| CLI: Set Up an IP ACL with Two Rules |
138 |
| Web Interface: Set Up an IP ACL with Two Rules |
139 |
| One-Way Access Using a TCP Flag in an ACL |
142 |
| CLI:Configure One-Way Access Using a TCP Flag in an ACL |
142 |
| Web Interface: Configure One-Way Access Using a TCP Flag in an ACL |
146 |
| Use ACLs to Configure Isolated VLANs on a Layer 3 Switch |
158 |
| CLI: Configure One-Way Access Using a TCP Flag in ACL Commands |
159 |
| Web Interface: Configure One-Way Access Using a TCP Flag in an ACL |
161 |
| Set up a MAC ACL with Two Rules |
169 |
| CLI: Set up a MAC ACL with Two Rules |
170 |
| Web Interface: Set up a MAC ACL with Two Rules |
170 |
| ACL Mirroring |
172 |
| CLI: Configure ACL Mirroring |
173 |
| Web Interface: Configure ACL Mirroring |
174 |
| ACL Redirect |
178 |
| CLI: Redirect a Traffic Stream |
178 |
| Web Interface: Redirect a Traffic Stream |
179 |
| Configure IPv6 ACLs |
183 |
| CLI: Configure an IPv6 ACL |
184 |
| Web Interface: Configure an IPv6 ACL |
186 |
| 11. CoS Queuing |
190 |
| CoS Queue Mapping |
191 |
| Trusted Ports |
191 |
| Untrusted Ports |
191 |
| CoS Queue Configuration |
192 |
| Show classofservice Trust |
192 |
| CLI: Show classofservice Trust |
192 |
| Web Interface: Show classofservice Trust |
193 |
| Set classofservice Trust Mode |
193 |
| CLI: Set classofservice Trust Mode |
193 |
| Web Interface: Set classofservice Trust Mode |
193 |
| Show classofservice IP-Precedence Mapping |
194 |
| CLI: Show classofservice IP-Precedence Mapping |
194 |
| Web Interface: Show classofservice ip-precedence Mapping |
194 |
| Configure Cos-queue Min-bandwidth and Strict Priority Scheduler Mode |
195 |
| CLI: Configure Cos-queue Min-bandwidth and Strict Priority Scheduler Mode |
195 |
| Web Interface: Configure CoS-queue Min-bandwidth and Strict Priority Scheduler Mode |
195 |
| Set CoS Trust Mode for an Interface |
196 |
| CLI: Set CoS Trust Mode for an Interface |
197 |
| Web Interface: Set CoS Trust Mode for an Interface |
197 |
| Configure Traffic Shaping |
197 |
| CLI: Configure traffic-shape |
198 |
| Web Interface: Configure Traffic Shaping |
198 |
| 12. DiffServ |
200 |
| DiffServ |
201 |
| CLI: Configure DiffServ |
202 |
| Web Interface: Configure DiffServ |
204 |
| DiffServ for VoIP |
218 |
| CLI: Configure DiffServ for VoIP |
218 |
| Web Interface: Diffserv for VoIP |
220 |
| Auto VoIP |
225 |
| CLI: Configure Auto VoIP |
226 |
| Web Interface: Configure Auto-VoIP |
228 |
| DiffServ for IPv6 |
229 |
| CLI: Configure DiffServ for IPv6 |
230 |
| Web Interface: Configure DiffServ for IPv6 |
231 |
| Color Conform Policy |
237 |
| CLI: Configure a Color Conform Policy |
237 |
| Web Interface: Configure a Color Conform Policy |
238 |
| 13. IGMP Snooping and Querier |
245 |
| IGMP Snooping |
246 |
| CLI: Enable IGMP Snooping |
246 |
| Web Interface: Enable IGMP Snooping |
246 |
| Show igmpsnooping |
246 |
| CLI: Show igmpsnooping |
247 |
| Web Interface: Show igmpsnooping |
247 |
| Show mac-address-table igmpsnooping |
247 |
| CLI: Show mac-address-table igmpsnooping |
248 |
| Web Interface: Show mac-address-table igmpsnooping |
248 |
| External Multicast Router |
248 |
| CLI: Configure the Switch with an External Multicast Router |
248 |
| Web Interface: Configure the Switch with an External Multicast Router |
249 |
| Multicast Router Using VLAN |
249 |
| CLI: Configure the Switch with a Multicast Router Using VLAN |
249 |
| Web Interface: Configure the Switch with a Multicast Router Using VLAN |
249 |
| IGMP Querier |
250 |
| Enable IGMP Querier |
251 |
| CLI: Enable IGMP Querier |
251 |
| Web Interface: Enable IGMP Querier |
252 |
| Show IGMP Querier Status |
254 |
| CLI: Show IGMP Querier Status |
254 |
| Web Interface: Show IGMP Querier Status |
254 |
| 14. MVR (Multicast VLAN Registration) |
255 |
| Configure MVR in Compatible Mode |
256 |
| CLI: Configure MVR in Compatible Mode |
257 |
| Web Interface: Configure MVR in Compatible Mode |
259 |
| Configure MVR in Dynamic Mode |
263 |
| CLI: Configure MVR in Dynamic Mode |
263 |
| Web Interface: Configure MVR in Dynamic Mode |
265 |
| 15. Security Management |
269 |
| Port Security |
269 |
| Set the Dynamic and Static Limit on Port 1/0/1 |
270 |
| CLI: Set the Dynamic and Static Limit on Port 1/0/1 |
270 |
| Web Interface: Set the Dynamic and Static Limit on Port 1/0/1 |
270 |
| Convert the Dynamic Address Learned from 1/0/1 to a Static Address |
271 |
| CLI: Convert the Dynamic Address Learned from 1/0/1 to the Static Address |
272 |
| Web Interface: Convert the Dynamic Address Learned from 1/0/1 to the Static Address |
272 |
| Create a Static Address |
272 |
| CLI: Create a Static Address |
273 |
| Web Interface: Create a Static Address |
273 |
| Protected Ports |
273 |
| CLI: Configure a Protected Port to Isolate Ports on the Switch |
274 |
| Web Interface: Configure a Protected Port to Isolate Ports on the Switch |
276 |
| 802.1x Port Security |
280 |
| CLI: Authenticating dot1x Users by a RADIUS Server |
280 |
| Web Interface: Authenticating dot1x Users by a RADIUS Server |
281 |
| Create a Guest VLAN |
286 |
| CLI: Create a Guest VLAN |
287 |
| Web Interface: Create a Guest VLAN |
288 |
| Assign VLANs Using RADIUS |
291 |
| CLI: Assign VLANS Using RADIUS |
292 |
| Web Interface: Assign VLANS Using RADIUS |
294 |
| Dynamic ARP Inspection |
297 |
| CLI: Configure Dynamic ARP Inspection |
298 |
| Web Interface: Configure Dynamic ARP Inspection |
299 |
| Static Mapping |
303 |
| CLI: Configure Static Mapping |
303 |
| Web Interface: Configure Static Mapping |
304 |
| DHCP Snooping |
305 |
| CLI: Configure DHCP Snooping |
306 |
| Web Interface: Configure DHCP Snooping |
307 |
| Enter Static Binding into the Binding Database |
309 |
| CLI: Enter Static Binding into the Binding Database |
309 |
| Web Interface: Enter Static Binding into the Binding Database |
310 |
| Maximum Rate of DHCP Messages |
310 |
| CLI: Configure the Maximum Rate of DHCP Messages |
311 |
| Web Interface: Configure the Maximum Rate of DHCP Messages |
311 |
| IP Source Guard |
312 |
| CLI: Configure Dynamic ARP Inspection |
312 |
| Web Interface: Configure Dynamic ARP Inspection |
313 |
| 16. SNTP |
317 |
| Show SNTP (CLI Only) |
317 |
| show sntp |
317 |
| show sntp client |
318 |
| show sntp server |
318 |
| Configure SNTP |
319 |
| CLI: Configure SNTP |
319 |
| Web Interface: Configure SNTP |
320 |
| Set the Time Zone (CLI Only) |
321 |
| Set the Named SNTP Server |
321 |
| CLI: Set the Named SNTP Server |
322 |
| Web Interface: Set the Named SNTP Server |
322 |
| 17. Tools |
324 |
| Traceroute |
324 |
| CLI: Traceroute |
325 |
| Web Interface: Traceroute |
325 |
| Configuration Scripting |
326 |
| script |
327 |
| script list and script delete |
327 |
| script apply running-config.scr |
328 |
| Create a Configuration Script |
328 |
| Upload a Configuration Script |
328 |
| Pre-Login Banner |
329 |
| Create a Pre-Login Banner (CLI Only) |
329 |
| Port Mirroring |
330 |
| CLI: Specify the Source (Mirrored) Ports and Destination (Probe) |
330 |
| Web Interface: Specify the Source (Mirrored) Ports and Destination (Probe) |
330 |
| Dual Image |
331 |
| CLI: Download a Backup Image and Make It Active |
332 |
| Web Interface: Download a Backup Image and Make It Active |
333 |
| Outbound Telnet |
334 |
| CLI: show network |
335 |
| CLI: show telnet |
335 |
| CLI: transport output telnet |
336 |
| Web Interface: Configure Telnet |
336 |
| CLI: Configure the session-limit and session-timeout |
337 |
| Web Interface: Configure the Session Timeout |
337 |
| 18. Syslog |
339 |
| Show Logging |
340 |
| CLI: Show Logging |
340 |
| Web Interface: Show Logging |
340 |
| Show Logging Buffered |
342 |
| CLI: Show Logging Buffered |
342 |
| Web Interface: Show Logging Buffered |
343 |
| Show Logging Traplogs |
343 |
| CLI: Show Logging Traplogs |
343 |
| Web Interface: Show Logging Trap Logs |
343 |
| Show Logging Hosts |
344 |
| CLI: Show Logging Hosts |
344 |
| Web Interface: Show Logging Hosts |
345 |
| Configure Logging for a Port |
345 |
| CLI: Configure Logging for the Port |
345 |
| Web Interface: Configure Logging for the Port |
346 |
| Email Alerting |
347 |
| CLI: Send Log Messages to [email protected] Using Account [email protected] |
348 |
| 19. Switch Stacks |
349 |
| Switch Stack Management and Connectivity |
349 |
| The Stack Master and Stack Members |
350 |
| Stack Master |
350 |
| Stack Members |
351 |
| Stack Member Numbers |
351 |
| Stack Member Priority Values |
352 |
| Install and Power-up a Stack |
352 |
| Compatible Switch Models |
352 |
| Install a Switch Stack |
353 |
| Switch Firmware |
353 |
| Code Mismatch |
354 |
| Upgrade the Firmware |
354 |
| Migrate Configuration with a Firmware Upgrade |
354 |
| Copy Master Firmware to a Stack Member (Web Interface) |
355 |
| Configure a Stacking Port as an Ethernet Port |
355 |
| CLI: Configure a Stacking Port as an Ethernet Port |
356 |
| Web Interface: Configure a Stacking Port as an Ethernet Port |
357 |
| Stack Switches Using 10G Fiber |
359 |
| CLI: Stack Switches Using 10G Fiber |
359 |
| Web Interface: Stack Switches Using 10G Fiber |
360 |
| Add, Remove, or Replace a Stack Member |
361 |
| Add Switches to an Operating Stack |
361 |
| Remove a Switch from the Stack |
362 |
| Replace a Stack Member |
363 |
| Switch Stack Configuration Files |
363 |
| Preconfigure a Switch |
364 |
| Renumber Stack Members |
365 |
| CLI: Renumber Stack Members |
366 |
| Web Interface: Renumber Stack Members |
366 |
| Move the Stack Master to a Different Unit |
368 |
| CLI: Move the Stack Master to a Different Unit |
368 |
| Web Interface: Move the Stack Master to a Different Unit |
368 |
| 20. SNMP |
369 |
| Add a New Community |
369 |
| CLI: Add a New Community |
369 |
| Web Interface: Add a New Community |
370 |
| Enable SNMP Trap |
370 |
| CLI: Enable SNMP Trap |
370 |
| Web Interface: Enable SNMP Trap |
371 |
| SNMP V3 |
371 |
| CLI: Configure SNMP V3 |
372 |
| Web Interface: Configure SNMP V3 |
372 |
| sFlow |
373 |
| CLI: Configure Statistical Packet-Based Sampling of Packet Flows with sFlow |
374 |
| Web Interface: Configure Statistical Packet-based Sampling with sFlow |
375 |
| Time-Based Sampling of Counters with sFlow |
377 |
| CLI: Configure Time-Based Sampling of Counters with sFlow |
377 |
| Web Interface: Configure Time-Based Sampling of Counters with sFlow |
377 |
| 21. DNS |
378 |
| Specify Two DNS Servers |
378 |
| CLI: Specify Two DNS Servers |
378 |
| Web Interface: Specify Two DNS Servers |
378 |
| Manually Add a Host Name and an IP Address |
379 |
| CLI: Manually Add a Host Name and an IP Address |
379 |
| Web Interface: Manually Add a Host Name and an IP Address |
379 |
| 22. DHCP Server |
381 |
| Configure a DHCP Server in Dynamic Mode |
381 |
| CLI: Configure a DHCP Server in Dynamic Mode |
381 |
| Web Interface: Configure a DHCP Server in Dynamic Mode |
382 |
| Configure a DHCP Reservation |
384 |
| CLI: Configure a DHCP Reservation |
385 |
| Web Interface: Configure a DHCP Reservation |
385 |
| 23. DHCPv6 Server |
387 |
| CLI: Configure DHCPv6 |
389 |
| Web Interface: Configure an Inter-area Router |
390 |
| Configure Stateless DHCPv6 Server |
394 |
| CLI: Configure Stateless DNS Server |
394 |
| Web Interface: Configure Stateless DHCPv6 Server |
395 |
| 24. Double VLANs and Private VLAN Groups |
398 |
| Double VLANs |
398 |
| CLI: Enable a Double VLAN |
399 |
| Web Interface: Enable a Double VLAN |
399 |
| Private VLAN Groups |
402 |
| CLI: Create a Private VLAN Group |
403 |
| Web Interface: Create a Private VLAN Group |
404 |
| 25. Spanning Tree Protocol |
408 |
| Configure Classic STP (802.1d) |
408 |
| CLI: Configure Classic STP (802.1d) |
408 |
| Web Interface: Configure Classic STP (802.1d) |
409 |
| Configure Rapid STP (802.1w) |
410 |
| CLI: Configure Rapid STP (802.1w) |
410 |
| Web Interface: Configure Rapid STP (802.1w) |
410 |
| Configure Multiple STP (802.1s) |
411 |
| CLI: Configure Multiple STP (802.1s) |
411 |
| Web Interface: Configure Multiple STP (802.1s) |
412 |
| 26. Tunnel |
414 |
| CLI: Create a Tunnel |
415 |
| Configure Switch GSM7328S_1 |
415 |
| Configure Switch GSM7328S_2 |
416 |
| Web Interface: Create a Tunnel |
417 |
| Configure Switch GSM7328S_1 |
417 |
| Configure Switch GSM7328S_2 |
419 |
| 27. IPv6 Interface Configuration |
422 |
| Create an IPv6 Routing Interface |
422 |
| CLI: Create an IPv6 Routing Interface |
422 |
| Web Interface: Create an IPv6 Routing Interface |
424 |
| Create an IPv6 Network Interface |
425 |
| CLI: Configure the IPv6 Network Interface |
426 |
| Web Interface: Configure the IPv6 Network Interface |
426 |
| Create an IPv6 Routing VLAN |
427 |
| CLI: Create an IPv6 Routing VLAN |
427 |
| Web Interface: Create an IPv6 VLAN Routing Interface |
429 |
| Configure DHCPv6 Mode on the Routing Interface |
432 |
| CLI: Configure DHCPv6 mode on routing interface |
432 |
| Web Interface: Configure DHCPv6 mode on routing interface |
433 |
| 28. PIM |
435 |
| PIM-DM |
435 |
| CLI: Configure PIM-DM |
437 |
| Web Interface: Configure PIM-DM |
441 |
| PIM-SM |
460 |
| CLI: Configure PIM-SM |
461 |
| Web Interface: Configure PIM-SM |
465 |
| 29. DHCP L2 Relay and L3 Relay |
488 |
| DHCP L2 Relay |
488 |
| CLI: Enable DHCP L2 Relay |
489 |
| Web Interface: Enable DHCP L2 Relay |
490 |
| DHCP L3 Relay |
494 |
| Configure the DHCP Server Switch |
494 |
| Configure a DHCP L3 Switch |
499 |
| 30. MLD |
505 |
| Configure MLD |
506 |
| CLI: Configure MLD |
506 |
| Web Interface: Configure MLD |
508 |
| MLD Snooping |
519 |
| CLI: Configure MLD Snooping |
520 |
| Web Interface: Configure MLD Snooping |
521 |
| 31. DVMRP |
524 |
| CLI: Configure DVMRP |
525 |
| Web Interface: Configure DVMRP |
531 |
| 32. Captive Portal |
542 |
| Captive Portal Configuration |
543 |
| Enable Captive Portal |
543 |
| CLI: Enable Captive Portal |
543 |
| Web Interface: Enable Captive Portal |
544 |
| Client Access, Authentication, and Control |
545 |
| Block a Captive Portal Instance |
546 |
| CLI: Block a Captive Portal Instance |
546 |
| Web Interface: Block a Captive Portal Instance |
546 |
| Local Authorization, Create Users and Groups |
546 |
| CLI: Create Users and Groups |
547 |
| Web Interface: Create Users and Groups |
547 |
| Remote Authorization (RADIUS) User Configuration |
548 |
| CLI: Configure RADIUS as the Verification Mode |
549 |
| Web Interface: Configure RADIUS as the Verification Mode |
549 |
| SSL Certificates |
550 |
| 33. iSCSI |
551 |
| Enable iSCSI Awareness with VLAN Priority Tag |
552 |
| CLI: Enable iSCSI Awareness with VLAN Priority Tag |
552 |
| Web Interface: Enable iSCSI Awareness with VLAN Priority Tag |
552 |
| Enable iSCSI Awareness with DSCP |
553 |
| CLI: Enable iSCSI Awareness with DSCP |
553 |
| Web Interface: Enable iSCSI Awareness with DSCP |
553 |
| Set the iSCSI Target Port |
554 |
| CLI: Set iSCSI Target Port |
554 |
| Web Interface: Set iSCSI Target Port |
554 |
| Show iSCSI Sessions |
555 |
| CLI: Show iSCSI Sessions |
555 |
| Web Interface: Show iSCSI Sessions |
555 |
 1
1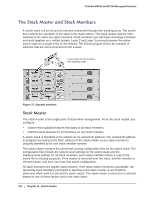 350
350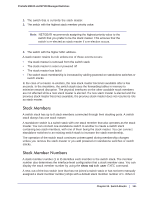 351
351 352
352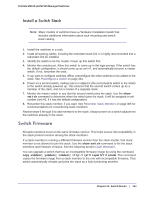 353
353 354
354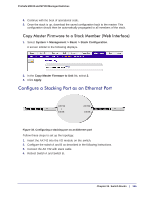 355
355 356
356 357
357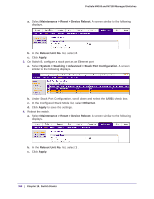 358
358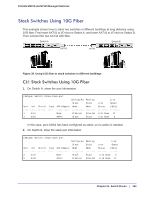 359
359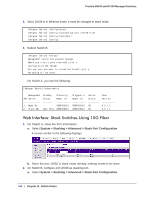 360
360

