Netgear RAX200 User Manual - Page 30
Set up the Multi-Gig port on your router
 |
View all Netgear RAX200 manuals
Add to My Manuals
Save this manual to your list of manuals |
Page 30 highlights
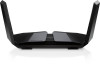
Nighthawk Tri-Band AX12 12-Stream AX WiFi Router • Use These DNS Servers. If you know that your ISP requires specific servers, select this option. Enter the IP address of your ISP's primary DNS server. If a secondary DNS server address is available, enter it also. 15. Select a Router MAC Address radio button: • Use Default Address. Use the default MAC address. • Use Computer MAC Address. The router captures and uses the MAC address of the computer that you are now using. You must use the one computer that the ISP allows. • Use This MAC Address. Enter the MAC address that you want to use. 16. Click the Apply button. Your settings are saved. 17. Click the Test button to test your Internet connection. If the NETGEAR website does not display within one minute, see You cannot access the Internet on page 166. Set up the Multi-Gig port on your router The Multi-Gig port on your router is an Ethernet port capable of speeds of up to 2.5 Gbps. Connect a Multi-Gig capable device to the Multi-Gig port on your router and enjoy Multi-Gig speeds. To set up the Multi-Gig port on your router: 1. Launch a web browser from a computer or mobile device that is connected to the router network. 2. Enter http://www.routerlogin.net. A login window opens. 3. Enter the router admin user name and password. The user name is admin. The password is the one that you specified the first time that you logged in. The user name and password are case-sensitive. The BASIC Home page displays. 4. Select Internet. The Internet Setup page displays. 5. In the WAN Preference section, select the Multi-Gig Port (2.5/1 Gbps) radio button. 6. Click the Apply button. Specify Your Internet Settings 30 User Manual
-
 1
1 -
2
-
3
-
4
-
5
-
6
-
7
-
8
-
9
-
10
-
11
-
12
-
13
-
14
-
15
-
16
-
17
-
18
-
19
-
20
-
21
-
22
-
23
-
24
-
 25
25 -
 26
26 -
 27
27 -
 28
28 -
 29
29 -
 30
30 -
 31
31 -
 32
32 -
 33
33 -
 34
34 -
 35
35 -
36
-
37
-
38
-
39
-
40
-
41
-
42
-
43
-
44
-
45
-
46
-
47
-
48
-
49
-
50
-
51
-
52
-
53
-
54
-
55
-
56
-
57
-
58
-
59
-
60
-
61
-
62
-
63
-
64
-
65
-
66
-
67
-
68
-
69
-
70
-
71
-
72
-
73
-
74
-
75
-
76
-
77
-
78
-
79
-
80
-
81
-
82
-
83
-
84
-
85
-
86
-
87
-
88
-
89
-
90
-
91
-
92
-
93
-
94
-
95
-
96
-
97
-
98
-
99
-
100
-
101
-
102
-
103
-
104
-
105
-
106
-
107
-
108
-
109
-
110
-
111
-
112
-
113
-
114
-
115
-
116
-
117
-
118
-
119
-
120
-
121
-
122
-
123
-
124
-
125
-
126
-
127
-
128
-
129
-
130
-
131
-
132
-
133
-
134
-
135
-
136
-
137
-
138
-
139
-
140
-
141
-
142
-
143
-
144
-
145
-
146
-
147
-
148
-
149
-
150
-
151
-
152
-
153
-
154
-
155
-
156
-
157
-
158
-
159
-
160
-
161
-
162
-
163
-
164
-
165
-
166
-
167
-
168
-
169
-
170
-
171
-
172
-
173
-
174
-
175
 |
 |
