Netgear RND4275 Hardware Manual - Page 29
Replacing a Disk, immediately and wait for the ReadyNAS system to format it
 |
UPC - 606449056099
View all Netgear RND4275 manuals
Add to My Manuals
Save this manual to your list of manuals |
Page 29 highlights
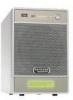
ReadyNAS Duo and NV+ Replacing a Disk In the case of a failed disk, the system provides email alerts and status messages about the need to replace a disk. Your system supports hot-swap bays, so you do not need to power down your system when replacing a disk. If you are replacing a disk with a previously formatted disk, see the precautions in Previously Formatted Disks on page 26. Note that the tray design on your system might vary from the design pictured. To replace a disk: 1. Press the disk tray pull release latch. The disk tray handle pops out. WARNING! If you accidentally remove the wrong disk when no other disk is syncing, do not remove the correct disk. Instead, re-insert the disk immediately and wait for the ReadyNAS system to format it and sync it. When it completes syncing, you can remove the correct disk. If you accidentally remove the wrong disk when another disk is syncing, call NETGEAR technical support. They might be able to help you recover your data if the disk you accidentally removed is not defective. Disks 29
-
 1
1 -
2
-
3
-
4
-
5
-
6
-
7
-
8
-
9
-
10
-
11
-
12
-
13
-
14
-
15
-
16
-
17
-
18
-
19
-
20
-
21
-
22
-
23
-
 24
24 -
 25
25 -
 26
26 -
 27
27 -
 28
28 -
 29
29 -
 30
30 -
 31
31 -
 32
32 -
 33
33 -
 34
34 -
35
-
36
-
37
-
38
-
39
-
40
-
41
 |
 |
