Netgear WNHDEB111 Installation Guide - Page 2
Configuring With the Smart Wizard, Troubleshooting, Technical Support - firmware
 |
UPC - 606449054217
View all Netgear WNHDEB111 manuals
Add to My Manuals
Save this manual to your list of manuals |
Page 2 highlights
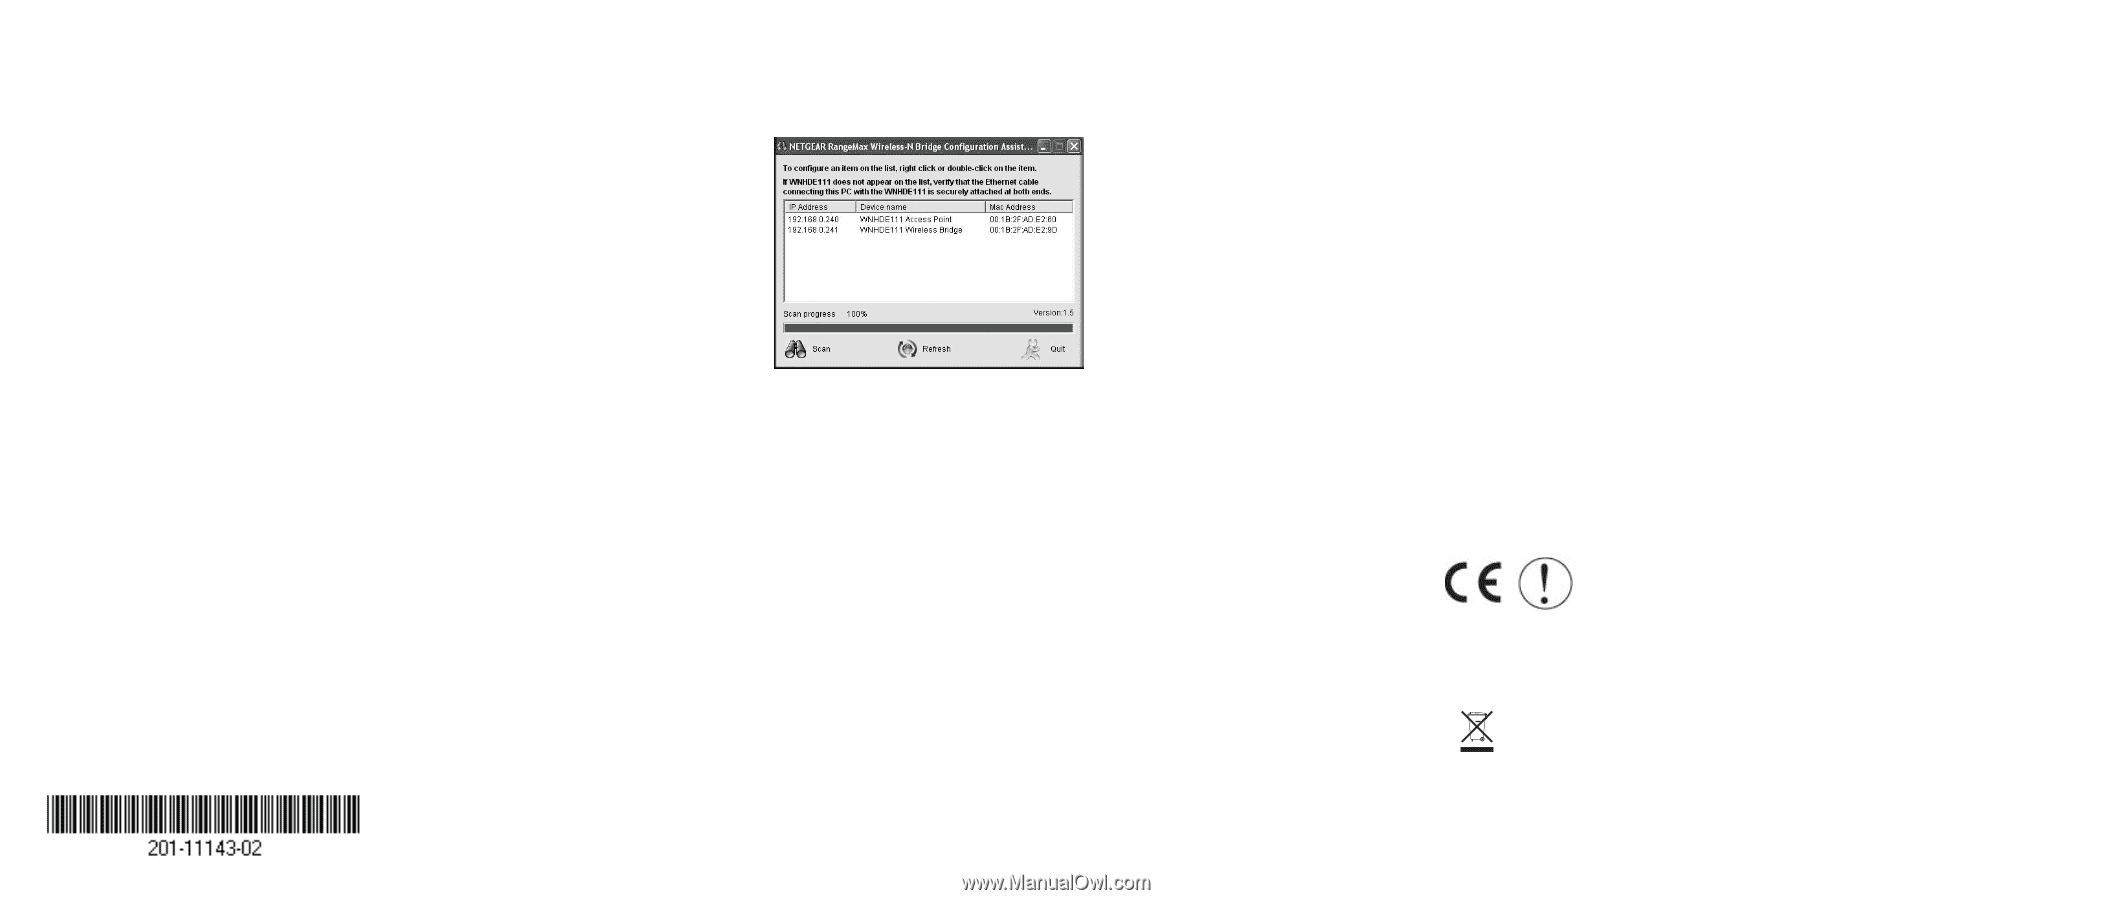
2. Connect a power adapter to the new Wireless-N Bridge. The power light should blink quickly in groups of 3 (if the power light is off, press the power light on/off switch on the back panel to turn it on). 3. On the new Wireless-N Bridge, press the WPS button for 10 seconds (located on the front panel). Its WPS light should start to blink. 4. Within 2 minutes, press the WPS button on the Wireless-N Bridge in AP mode. Its WPS light should start to blink. 5. After 1-2 minutes the new Wireless-N Bridge in Bridge mode should be associated with the Wireless-N Bridge in AP mode. The WPS light for the Bridge mode unit will turn off. On the AP mode unit, the WPS light will be on solid for about 6 minutes, then turn off. The power lights on both units will be steadily on. Configuring With the Smart Wizard Use the NETGEAR Smart Wizard Configuration Assistant to change the IP address type (static or dynamic), set the wireless network SSID, set up wireless security, or view device status. By default, the IP address is assigned dynamically by the router. Without a router, the IP address of the Wireless-N Bridge in AP mode will default to 192.168.0.240 and the IP address of the Wireless-N Bridge in bridge mode will default to 192.168.0.241. Configuring the Wireless-N Bridge to use a fixed or dynamic IP address lets you access the Wireless-N Bridge configuration from the Smart Wizard Configuration Assistant or a Web browser. 1. Do one of the following: a. Connect via a wireless connection to the Wireless-N Bridge as described in "Setting Up One WNHDE111 5 GHz Wireless-N HD Access Point/Bridge" on page 1. b. Connect an Ethernet cable from your PC to an Ethernet port on the Wireless-N Bridge that is in AP mode. 2. Insert the Resource CD in your CD-ROM drive. If the program does not start automatically, double-click autorun.exe. 3. Select Run the Configuration Assistant. January 2008 Note: If the IP address of the PC that is running the Configuration Assistant does not match the IP network, the Configuration Assistant prompts you to change the IP address first. NETGEAR recommends that you change the IP address for the PC to match the IP network of the Wireless-N Bridge. The Configuration Assistant scans your LAN, and then shows all the Wireless-N Bridges on it, and whether they are in AP (access point) or Bridge mode. 4. To configure a Wireless-N Bridge on the list, double-click it. This transfers you to the Web GUI of that Wireless-N Bridge. 5. Enter password at the prompt to log in. For more information on configuring, refer to the WNHDE111 5 GHz Wireless-N HD Access Point/Bridge User Manual. The CD provides a link to this manual or you can download it from http://netgear.com/support. Troubleshooting If you have trouble setting up your WNHDE111 5 GHz Wireless-N HD Access Point/ Bridges, check the tips below. The Power light blinks quickly in groups of three. The Wireless-N Bridge in Bridge mode is not connected to the Wireless-N Bridge in AP mode. See "To Add Another Wireless-N Bridge to a System with a Wireless-N Bridge in AP Mode" on page 1. The Power light blinks slowly (once every second). The firmware is corrupted. See the WNHDE111 5 GHz Wireless-N HD Access Point/Bridge User Manual for emergency recovery instructions. The Smart Wizard Configuration Assistant does not find either Wireless-N Bridge unit. Make sure the Ethernet cable is securely connected from the PC to an Ethernet port on the AP mode unit. If the Smart Wizard does not find the Bridge mode unit, make sure the power light on the Bridge mode unit is not blinking in groups of three. You cannot connect to the Internet. You did not specify the correct Wireless-N Bridge IP address, or there could be a system problem. • Make sure that the Wireless-N Bridge in AP mode is connected to a router or gateway through an Ethernet cable. • Make sure that both the Wireless-N Bridge in AP mode and the Wireless-N Bridge in Bridge mode show correct IP addresses within the router network. Technical Support Thank you for selecting NETGEAR products. Register your product at http://www.NETGEAR.com/register. Registration on the website or over the phone is required before you can use our telephone support service. The phone numbers for worldwide regional customer support centers are on the Warranty and Support Information card that came with your product. Go to http://netgear.com/support for product updates and Web support. Attention: When you configure the wireless settings of this device, please make sure to select the correct country settings. Due to EU law, the country settings must be identical to the country where the device is operating. This symbol was placed in accordance with the European Union Directive 2002/96 on the Waste Electrical and Electronic Equipment (the WEEE Directive). If disposed of within the European Union, this product should be treated and recycled in accordance with the laws of your jurisdiction implementing the WEEE Directive. © 2008 by NETGEAR, Inc. All rights reserved. NETGEAR and the NETGEAR logo are registered trademarks of NETGEAR, Inc. in the United States and/or other countries. Other brand and product names are trademarks or registered trademarks of their respective holders. Information is subject to change without notice.
-
 1
1 -
 2
2
 |
 |