Netgear XSM4324FS Installation Guide - Page 2
Log In to the Web Management Interface, Support
 |
View all Netgear XSM4324FS manuals
Add to My Manuals
Save this manual to your list of manuals |
Page 2 highlights
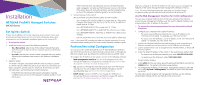
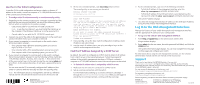
Use the CLI for Initial Configuration To use the CLI for initial configuration and assign a static or dynamic IP address to the switch, connect a computer or VT100/ANSI terminal to one of the console ports on the switch. ¾¾ To configure the IP address manually or use the ezconfig utility: 1. Depending on the connector type at your computer or terminal and the port that you are using on the switch, use one of the following cables, both of which are included in the product package: • USB console cable for use with the mini USB console port Note: To use the mini USB port, you must install the USB driver on the computer. (The Windows USB driver is on the resource CD.) • Console cable for use with the RJ-45 RS232 console port 2. Connect one end of the cable to the appropriate port on the switch and connect the other end to your computer or terminal. 3. If you connect a computer to a console port on the switch, start a terminal emulation program: • On a computer with a Windows operating system, you can use HyperTerminal or Tera Term. • On a computer with a MAC operating system, you can use ZTerm. • On a computer with a Linux operating system, you can use TIP. 4. If you connect a computer to a console port on the switch, configure the terminal emulation program to use the following settings: baud rate, 115,200 bps; data bits, 8; parity, none; stop bit, 1; flow control, none. 5. At the user prompt, log in to the switch using the user name admin and press Enter. At the password prompt, do not type a password but press Enter. You can now use the CLI to manually configure the IP address of the switch or continue with the next step and start the ezconfig utility. Note: For information about CLI management, see the CLI reference manual and the software administration manual on the resource CD. NETGEAR INTL LTD Building 3, University Technology Centre Curraheen Road, Cork, Ireland 6. At the next command prompt, type ezconfig and press Enter. The ezconfig utility is now running on the switch. Netgear Switch) #ezconfig EZ Configuration Utility Hello and Welcome! This utility will walk you thru assigning the IP address for the switch management CPU. It will allow you to save the changes at the end. After the session, simply use the newly assigned IP address to access the Web GUI using any public domain Web browser. Admin password is not defined. Do you want to assign the admin password (password length must be in range of 8 - 64 characters) (Y/N/Q)? y Enter new password:******** Confirm new password:******** 7. Using ezconfig, set up the basic switch configuration, including a static IP address and subnet mask. 8. Use the switch IP address that is set up by ezconfig to log in to the switch's web management interface. Find the IP Address Assigned by a DHCP Server By default, the switch is configured as a DHCP client to obtain its IP address from a DHCP server in the connected network. To find the assigned IP address of the switch's management interface or OOB port, connect a computer or VT100/ANSI terminal to one of the console ports on the switch. ¾¾ To find the IP address that is assigned by a DHCP server: 1. Make sure that the switch is connected to a DHCP server. 2. Set up a console connection with the switch. For information about setting up a console connection, see Steps 1 through 5 in Use the CLI for Initial Configuration. After you are logged in and at the CLI command prompt, continue with the next step. 3. At the command prompt, type one of the following commands: • To find the IP address of the management interface, enter the show ip management command, and press Enter. • To find the IP address of the OOB port (which is also referred to as the service port), enter the show serviceport command, and press Enter. The active IP address displays. 4. Use either the management interface IP address or the OOB port IP address to log in to the switch's web management interface. Log In to the Web Management Interface Manage the features of your switch through the web management interface with the appropriate IP address for your configuration. ¾¾ To log in to the switch's web management interface: 1. Enter http:// in the web browser address field. A login window displays. 2. Enter admin for the user name, leave the password field blank, and click the LOGIN button. The System Information page displays. You can now navigate from this page to other pages and configure your switch. For information about using the web management interface, see the software administration manual and the user manual on the resource CD. Support Thank you for purchasing this NETGEAR product. You can visit www.netgear.com/support to register your product, get help, access the latest downloads and user manuals, and join our community. We recommend that you use only official NETGEAR support resources. For the current EU Declaration of Conformity, visit http://support.netgear.com/app/answers/detail/a_id/11621/. For regulatory compliance information, visit http://www.netgear.com/about/regulatory/. See the regulatory compliance document before connecting the power supply. NETGEAR, Inc. 350 East Plumeria Drive San Jose, CA 95134, USA © NETGEAR, Inc., NETGEAR and the NETGEAR Logo are trademarks of NETGEAR, Inc. Any non‑NETGEAR trademarks are used for reference purposes only. June 2016
-
 1
1 -
 2
2
 |
 |