Netgear XSM7224S XSM7224S Installation Guide - Page 2
Technical Support
 |
UPC - 606449073706
View all Netgear XSM7224S manuals
Add to My Manuals
Save this manual to your list of manuals |
Page 2 highlights
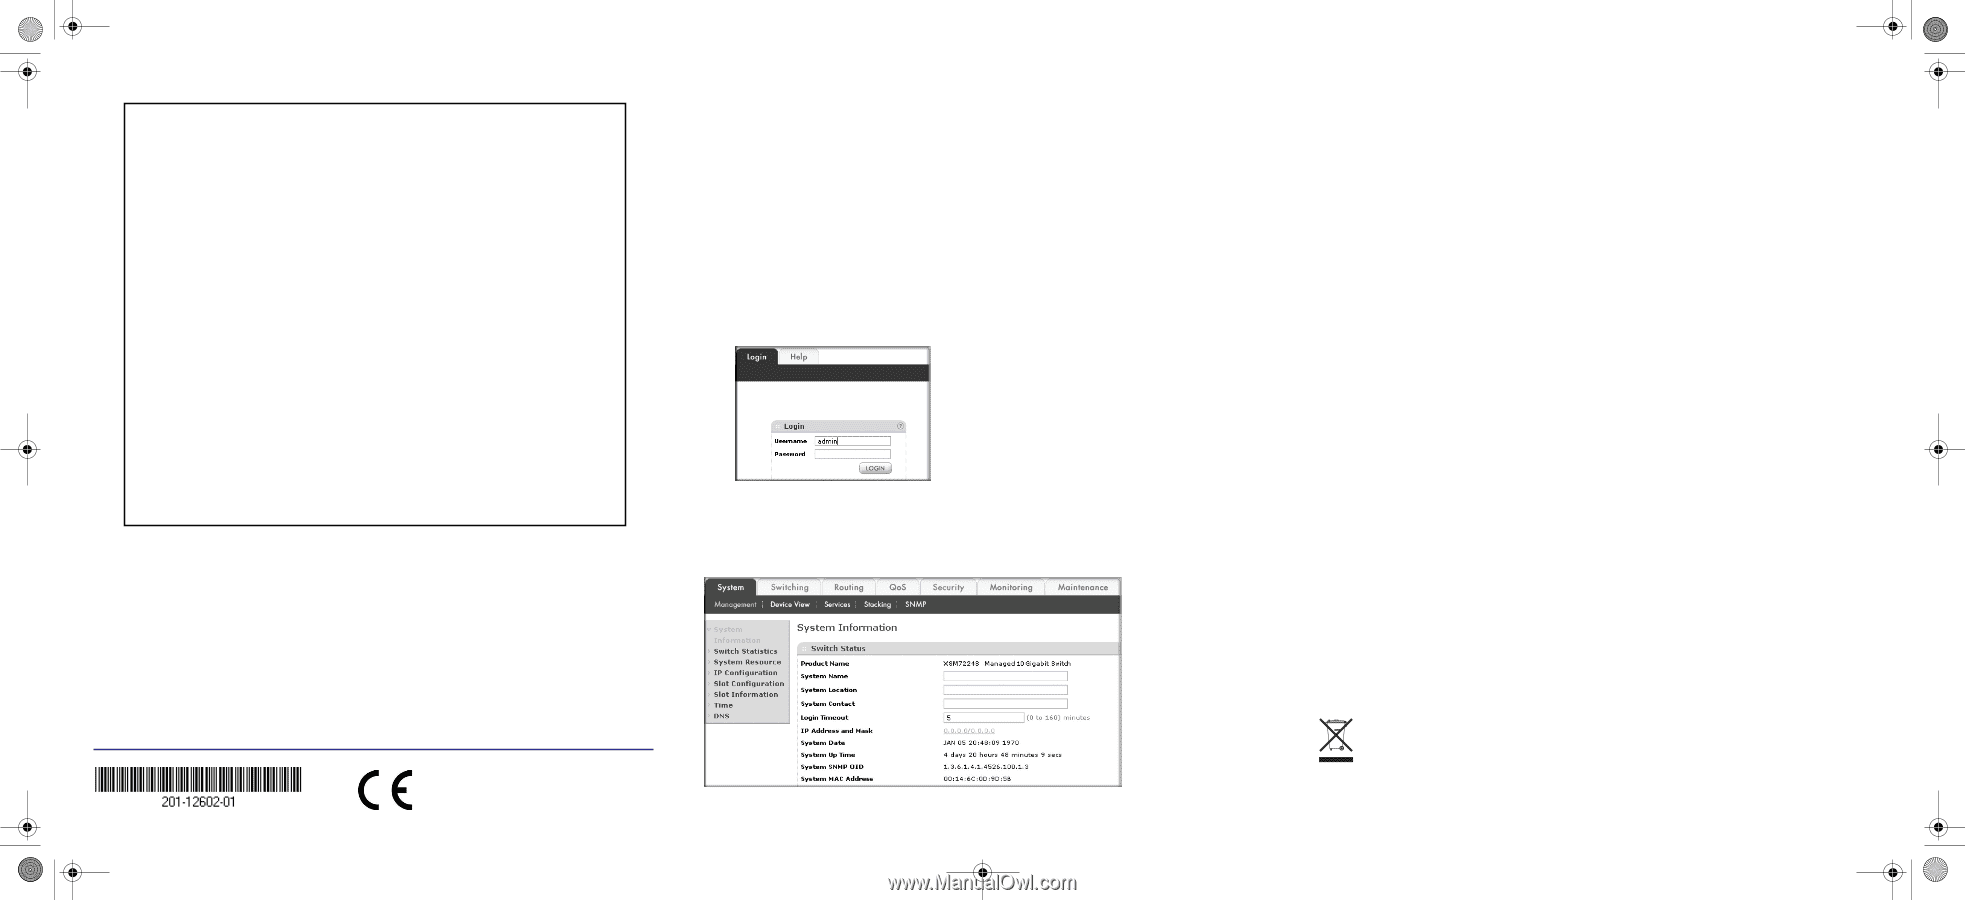
XSM7224S_IG 10Nov10.fm Page 2 Wednesday, November 10, 2010 9:52 AM User:admin Password: (XMS7224S) >ezconfig NETGEAR EZ Configuration Utility Hello and Welcome! This utility will walk you thru assigning the IP address for the switch management CPU. It will allow you to save the changes at the end. After the session, simply use the newly assigned IP address to access the Web GUI using any public domain Web browser. Admin password not defined. Do you want to change the password? (Y/N/Q) n The 'enable' password required for switch configuration via the command line interface is currently not configured. Do you wish to change it (Y/N/Q)? n Assigning an IP address to your switch management Current IP Address Configuration IP Address Assignment Mode: DHCP IP Address: 0.0.0.0 Subnet mask: 0.0.0.0 Would you like to assign an IP address now? (Y/D/N/Q/?)? y IP Address: 10.10.10.1 Network mask: 255.255.255.0 Do you want to assign switch name and location information (Y/N/Q)? n There are changes detected, do you wish to save the changes permanently (Y/N)? y The configuration changes have been saved successfully. Please enter 'show running-config' to see the final configuration. Thanks for using EzConfig! 3. Use this IP value to log in to the switch (see Web Login to the Switch). PC in DHCP Client Mode with DHCP Server By default, the switch is configured as a DHCP client to obtain its IP address from a DHCP server in the connected network. You must access the switch from the serial console port. 1. Make sure that the switch is connected to a DHCP server. 2. Find the switch IP address assigned by the DHCP server. After locating the switch IP address: a. Perform steps 1 through 3 of the procedure PC with Static IP Address. b. Type the show network command and press Enter. A screen will display that shows the active switch IP address. c. Use this IP address to login to the switch through its Web Management interface (see Web Login to the Switch). Web Login to the Switch Use the appropriate IP address for your configuration to manage your switch through its Web interface. 1. Type http:// into the URL window of your browser. A screen similar to the following, will display. 2. Type admin for the username and leave the password field blank. 3. Click Login. The Management screen will display. You can now navigate from this point to configure your switch. October 2010 Technical Support Thank you for selecting NETGEAR products. After installing your device, locate the serial number on the label of your product and use it to register your product at http://www.NETGEAR.com/register. Registration is required before you can use our telephone support service. Registration via our website is strongly recommended. Go to http://kbserver.netgear.com for product updates and Web support. For Warranty and Regional Customer Support information, see the Resource CD that came with your product. For complete DoC please visit the NETGEAR EU Declarations of Conformity website at: http://kb.netgear.com/app/answers/detail/a_id/11621/ This symbol was placed in accordance with the European Union Directive 2002/96 on the Waste Electrical and Electronic Equipment (the WEEE Directive). If disposed of within the European Union, this product should be treated and recycled in accordance with the laws of your jurisdiction implementing the WEEE Directive. ©2010 by NETGEAR, Inc. All rights reserved. NETGEAR and the NETGEAR logo are registered trademarks of NETGEAR, Inc. in the United States and/or other countries. Other brand and product names are trademarks or registered trademarks of their respective holders. Information is subject to change without notice.
-
 1
1 -
 2
2
 |
 |